The Expires Headers of a website tell the browser when to load its resource from the server or its cache.
When you build a WordPress website on a VPS or Cloud server, you need to configure expires headers on your server manually. So, your website runs smoothly as electricity.
If you haven’t configured expires headers on your site, you need to do it now. It affects them very badly on site performance.
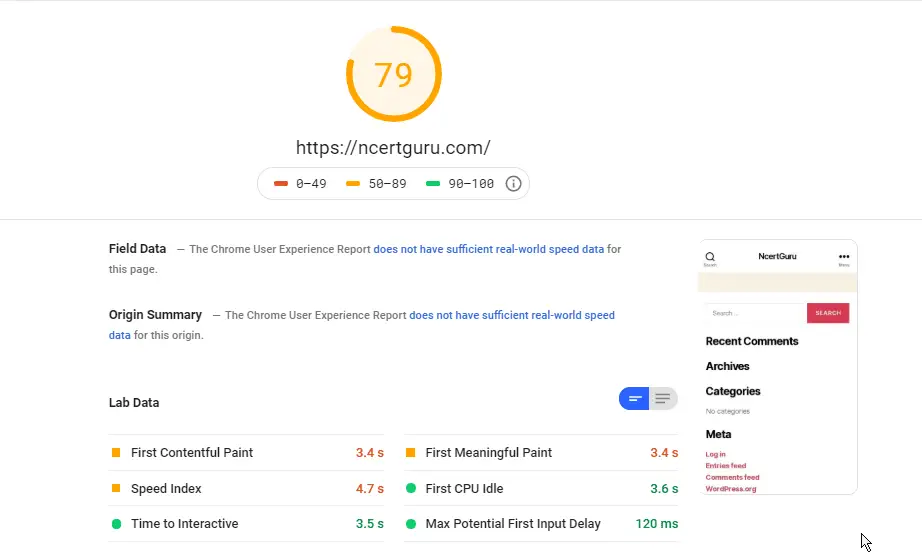
When we set up our website on the google cloud platform and check-up the GTMetrix or Google Page Speed Insight performance test, we got some ‘F’ grade results, as shown below images.
GTMetrix Performance Score:

Google Pagespeed Insight Score:

As you can see, both of the speed test results. Expires headers affect a terrible impact on website performance. At present, site performance is one of the most important SEO factors for the Google search engine.
So now, we are going to tweak our WordPress VM instances on Google Cloud step by step.
Connect Compute Engine with SSH
First, we will connect our VM instances or Compute engine through SSH, and then we will use some commands for adding expires headers. We will note all commands and certainly down with steps.

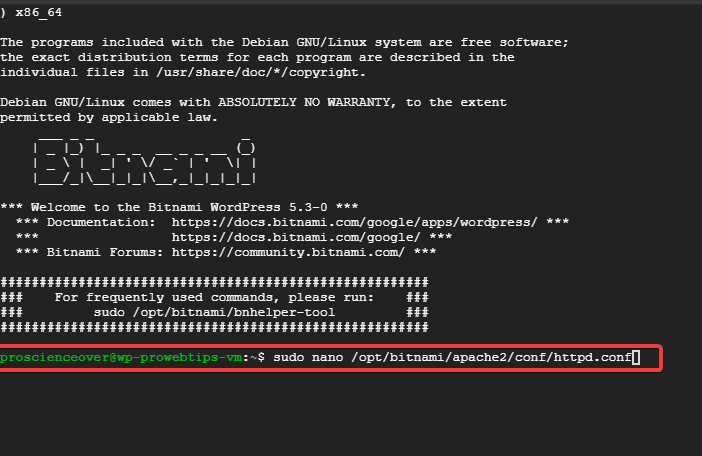
Now, (After connecting VM with SSH), we are going to execute a command for editing ‘httpd.conf‘, the command looks like this:
sudo nano /opt/bitnami/apache2/conf/httpd.confEnable mod_expires.so Module
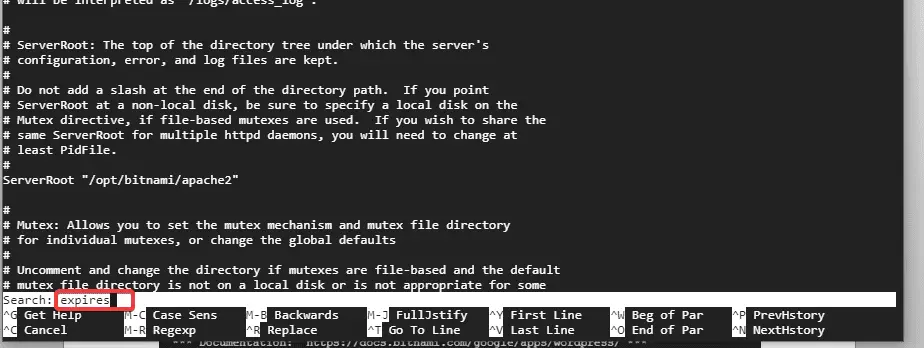
In this step, we will search the expire headers modules, now click CTRL+W, then type “expires” in the search box and hit ENTER. Now a list will open like the picture shown below.


You can see the red box, we going to remove the hash (#) sign like this:
{#LoadModule expires_module modules/mod_expires.so} to {LoadModule expires_module modules/mod_expires.so}Adding Expires Headers Values to Virtual Host File
After enabling the expires headers modules we need to add some lines of code in the Apache virtual host file.
sudo nano /opt/bitnami/apps/wordpress/conf/httpd-app.confNow, the nano editor will be open, and we need to find the </IfModule> <IfDefine USE_PHP_FPM> tag as shown in the image below.
</IfModule> and <IFDefine USE_PHP_FPM>
Now, the following lines of code you must copy and paste between the following tags, as shown in the image.
<filesMatch ".(ico|pdf|flv|jpg|jpeg|png|gif|js|css|swf)$">
Header set Cache-Control "max-age=2592000, public"
</filesMatch>

<IfModule mod_expires.c>
ExpiresActive On
ExpiresByType image/jpg "access 1 year"
ExpiresByType image/jpeg "access 1 year"
ExpiresByType image/gif "access 1 year"
ExpiresByType image/png "access 1 year"
ExpiresByType text/css "access 1 month"
ExpiresByType application/pdf "access 1 month"
ExpiresByType text/x-javascript "access 1 month"
ExpiresByType application/x-shockwave-flash "access 1 month"
ExpiresByType image/x-icon "access 1 year"
ExpiresDefault "access 2 days"
</IfModule>
Restart the Apache HTTP Server:
sudo /opt/bitnami/ctlscript.sh restart apache
Test Performance
Now the header modification is completed, so we will test the performance of the site.
The performance is not so great, but it is better than the first. Before adding the header’s value, we get 0 out of 100 and now about 45 out of 100.
Conclusion
Expires headers misconfiguration is very bad for your WordPress website. So you can follow these steps to configure correctly on your server.
If you do not want to configure through CLI, you should use a plugin named HTTP headers. This plugin is very easy to configure, and you can also configure other header policies.
If you have any problems or suggestions about expires headers, then throw your comment in the comment section.