In the WordPress website creating a custom header layout was not an easy task earlier than the Elementor Theme Builder plugin. At that time the theme developer provides a basic header layout and using WordPress customizer you were able to upload the logo, navigation menu, and some basic layout changes.
But nowadays you can create a custom header for your WordPress website and however, you want to customize you can do it. You can create specific headers for specific posts, pages, or archive pages using the new Elementor Theme Builder plugin.
Using Elementor you can customize the whole website, like a new theme, so the best thing is that Elementor support almost every theme and you can customize it accordingly to your requirement. You can buy Elementor Pro (paid version) at the lowest of $49 as a WordPress premium theme. So, no need for any premium theme for this tutorial or customizing the whole WordPress website.
So, let’s start from scratch to create a custom header for the WordPress website (Free Template Included).
Open Elementor Theme Builder
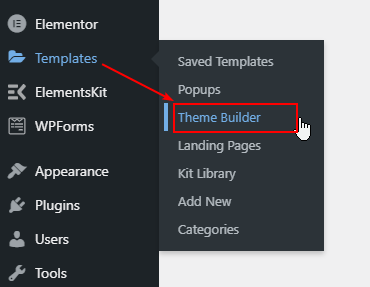
Open the WordPress dashboard and hover over the “Templates” menu under the Elementor and click on “Theme Builder”.
Add New Header
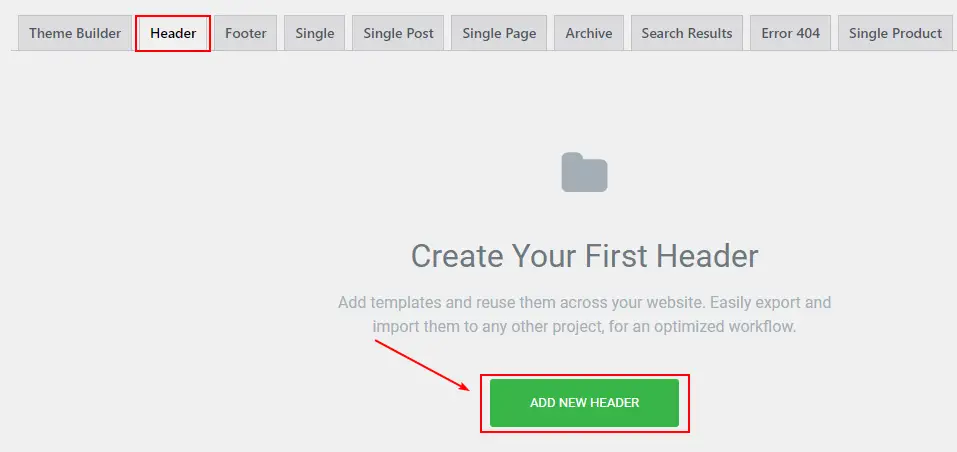
After opening Elementor Theme Builder, you must click on “Header” to create a new custom header. If you are first time creating a custom header using Elementor Theme Builder, you will see the green button as shown in the image, simply click upon it to open the Elementor builder to create a new header.
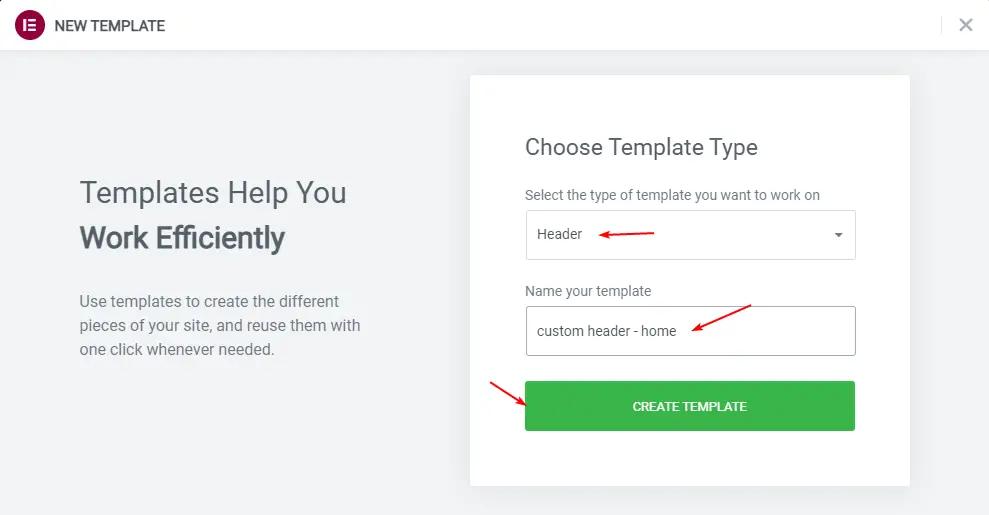
When you click on the button “ADD NEW HEADER”, Elementor will prompt you to add a name for the custom header section as shown in the image below.
Select Pre-Built Header or Create from Scratch
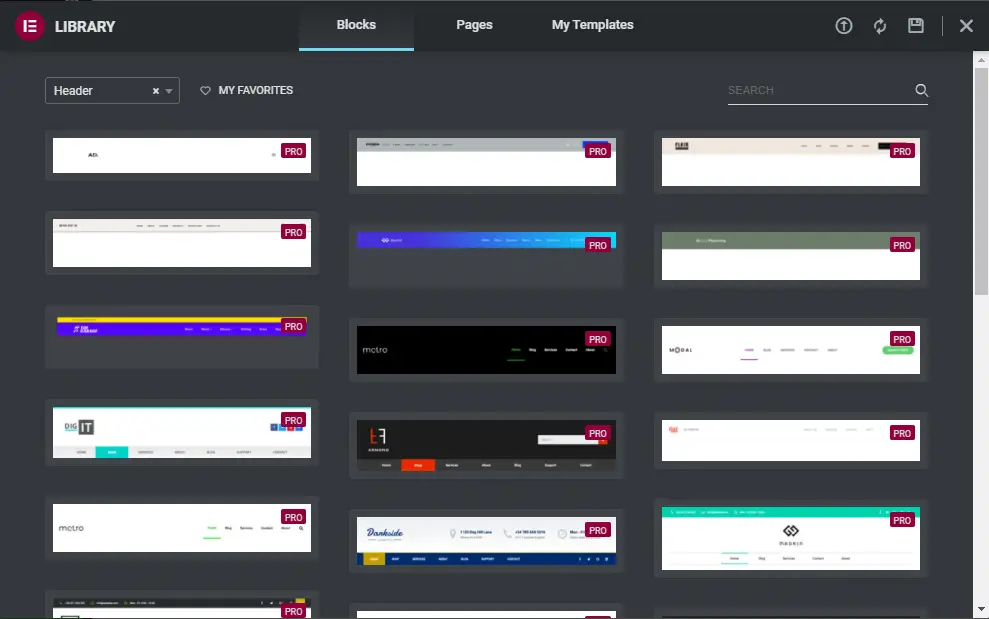
When we open Elementor builder for creating a section, in our case custom header section, Elementor will show a window of pre-built templates of the related section. If you choose the pre-built template, then afterward you can customize it.
But in this tutorial, we are going to show how you can create a custom header from scratch using the Elementor theme builder. If want to do the same, click on the “X” to close the window.
Add New Section for Custom Header
Now for creating a custom header from scratch you must click on the plus icon, as you can see in the image below. When you click on the plus icon, you will get different section formats. So, for creating a header section, choose a single one.
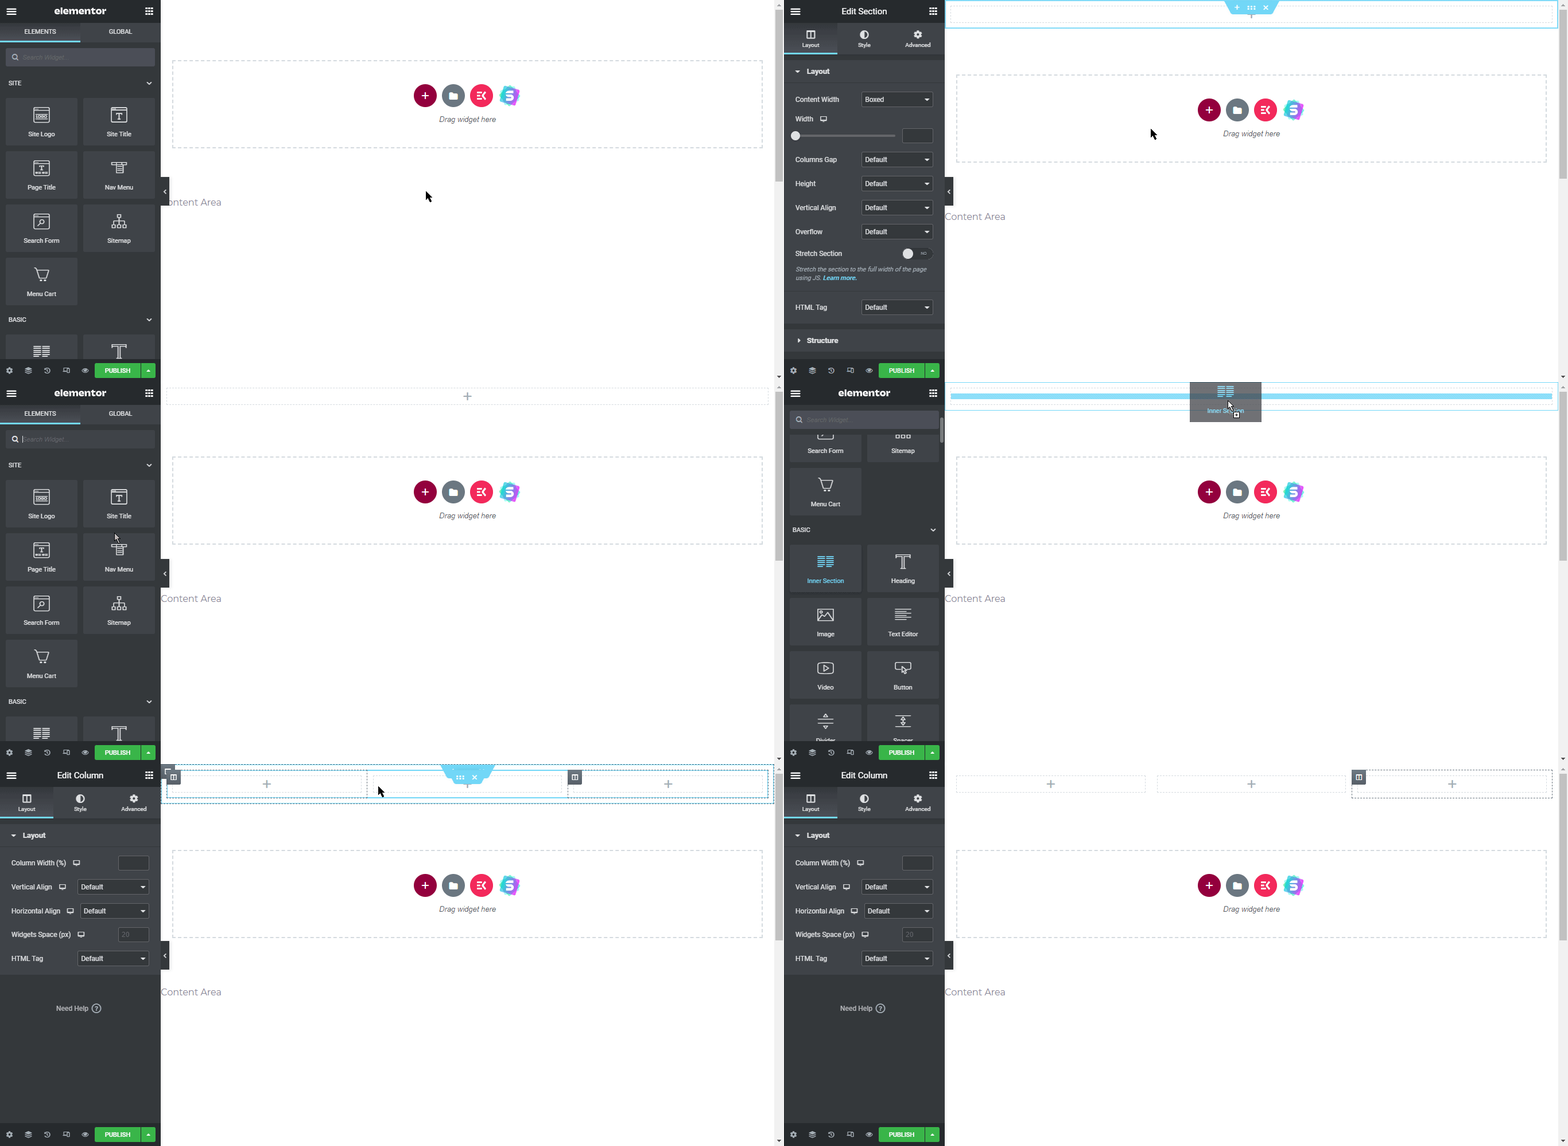
When you add a new section, there you can put multiple widgets and elements, but we are going to create a header so, put an “Inner Section” between a section (as already added). By default, Elementor put two inner sections, and we can add more by right-clicking (shown in the image above).
Styling Elementor Section
After adding a section, you can customize it to your preferences, in this tutorial we are going to change the background color, however, you will get various customization options.
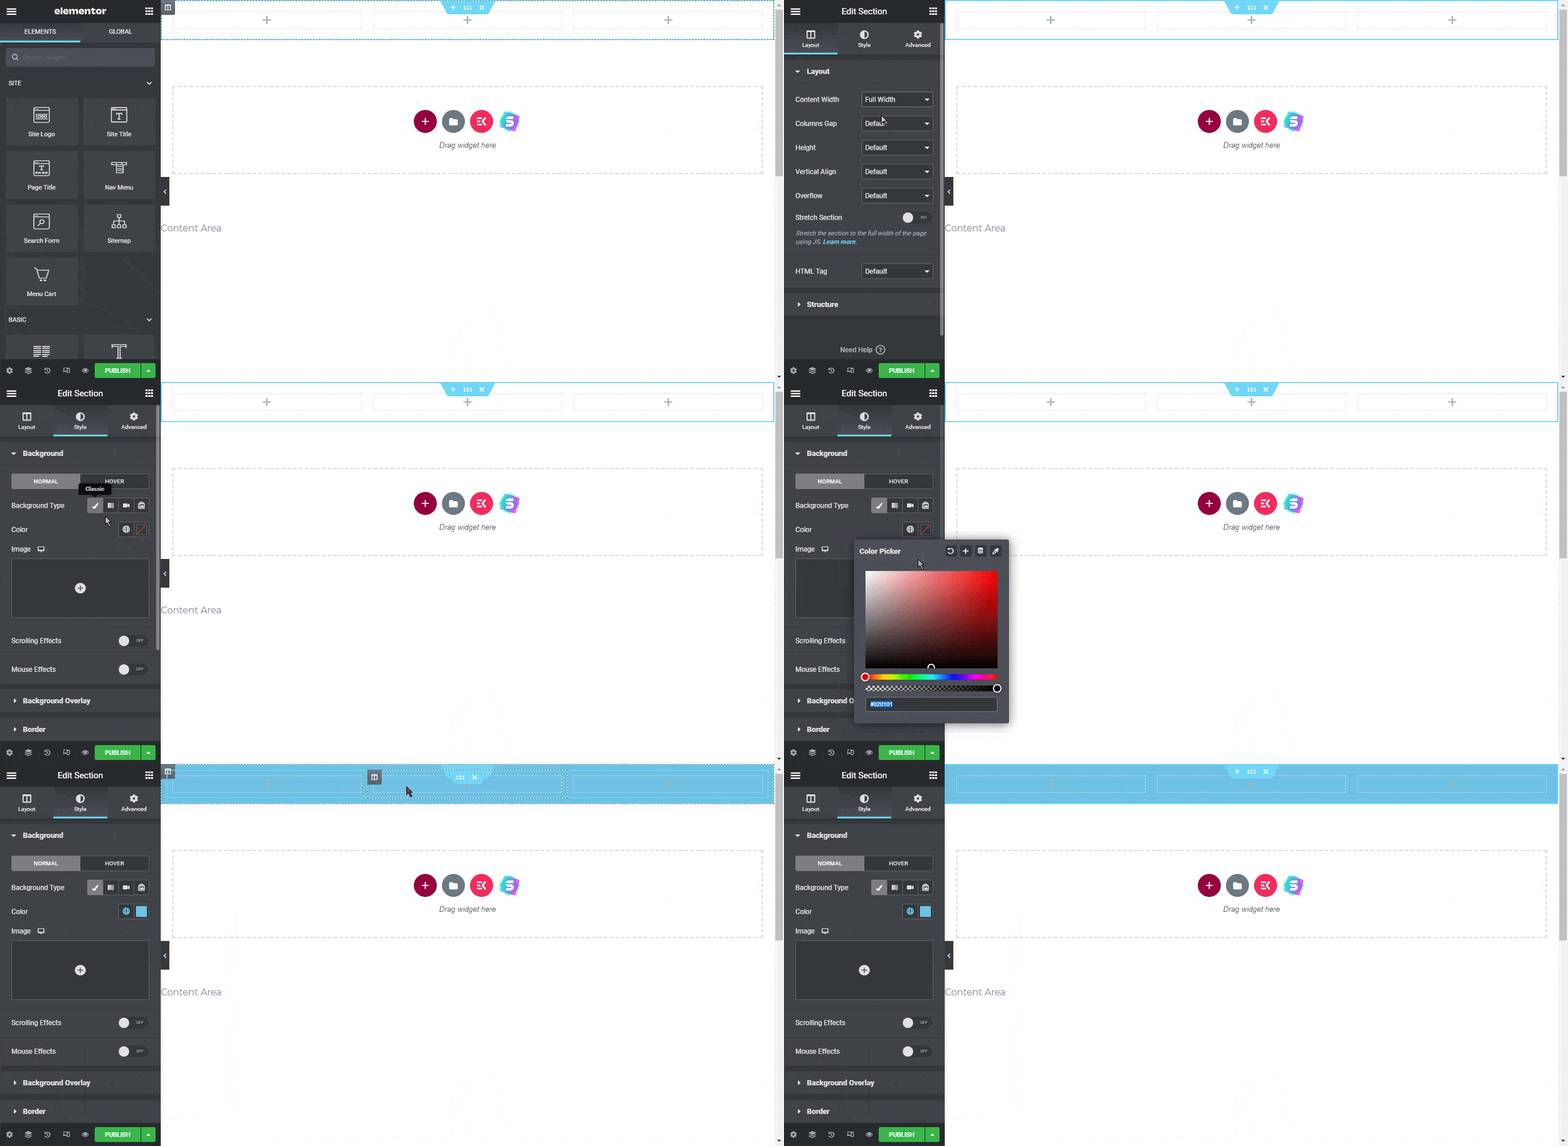
Adding Widgets (Navigation Menus) to the header
After the section and inner section, you must add widgets or navigation elements like a menu (inline, dropdown, or vertical menu), search bar, and site logo or name. However, you can add whatever elements you want there is no restriction.
Add Site Logo/Name Widget
For a better experience, you should only add three sections, perhaps there is no limitation you can add more. So, in one of the three sections, we are going to add “Site Logo”, as you can see in the image below, just you need to drag the widget upon an inner section.
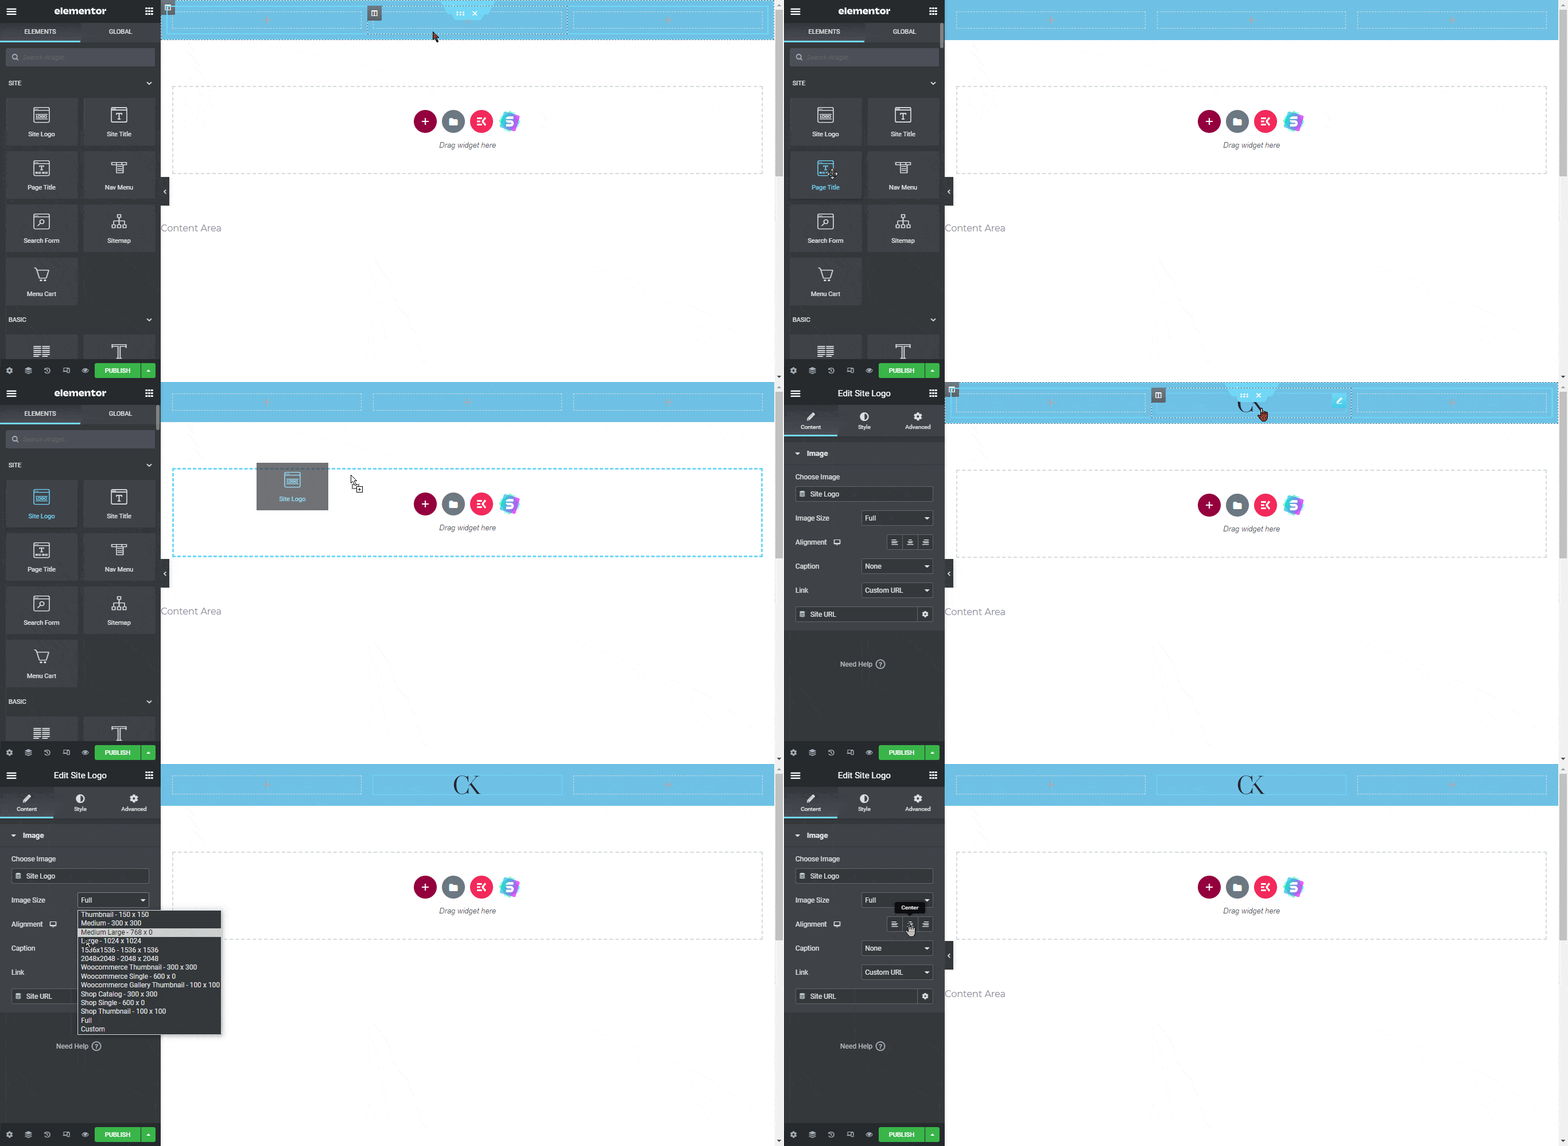
In case you haven’t uploaded the logo in your theme setting, then it would be not visible during header customization in Elementor.
Add Navigation (Nav Menu) Widget
Navigation is very important for any website to navigate easily to your website. So, you must add a navigation widget to your custom header. For adding a navigation menu, drag the navigation widget from the Elementor widget library.
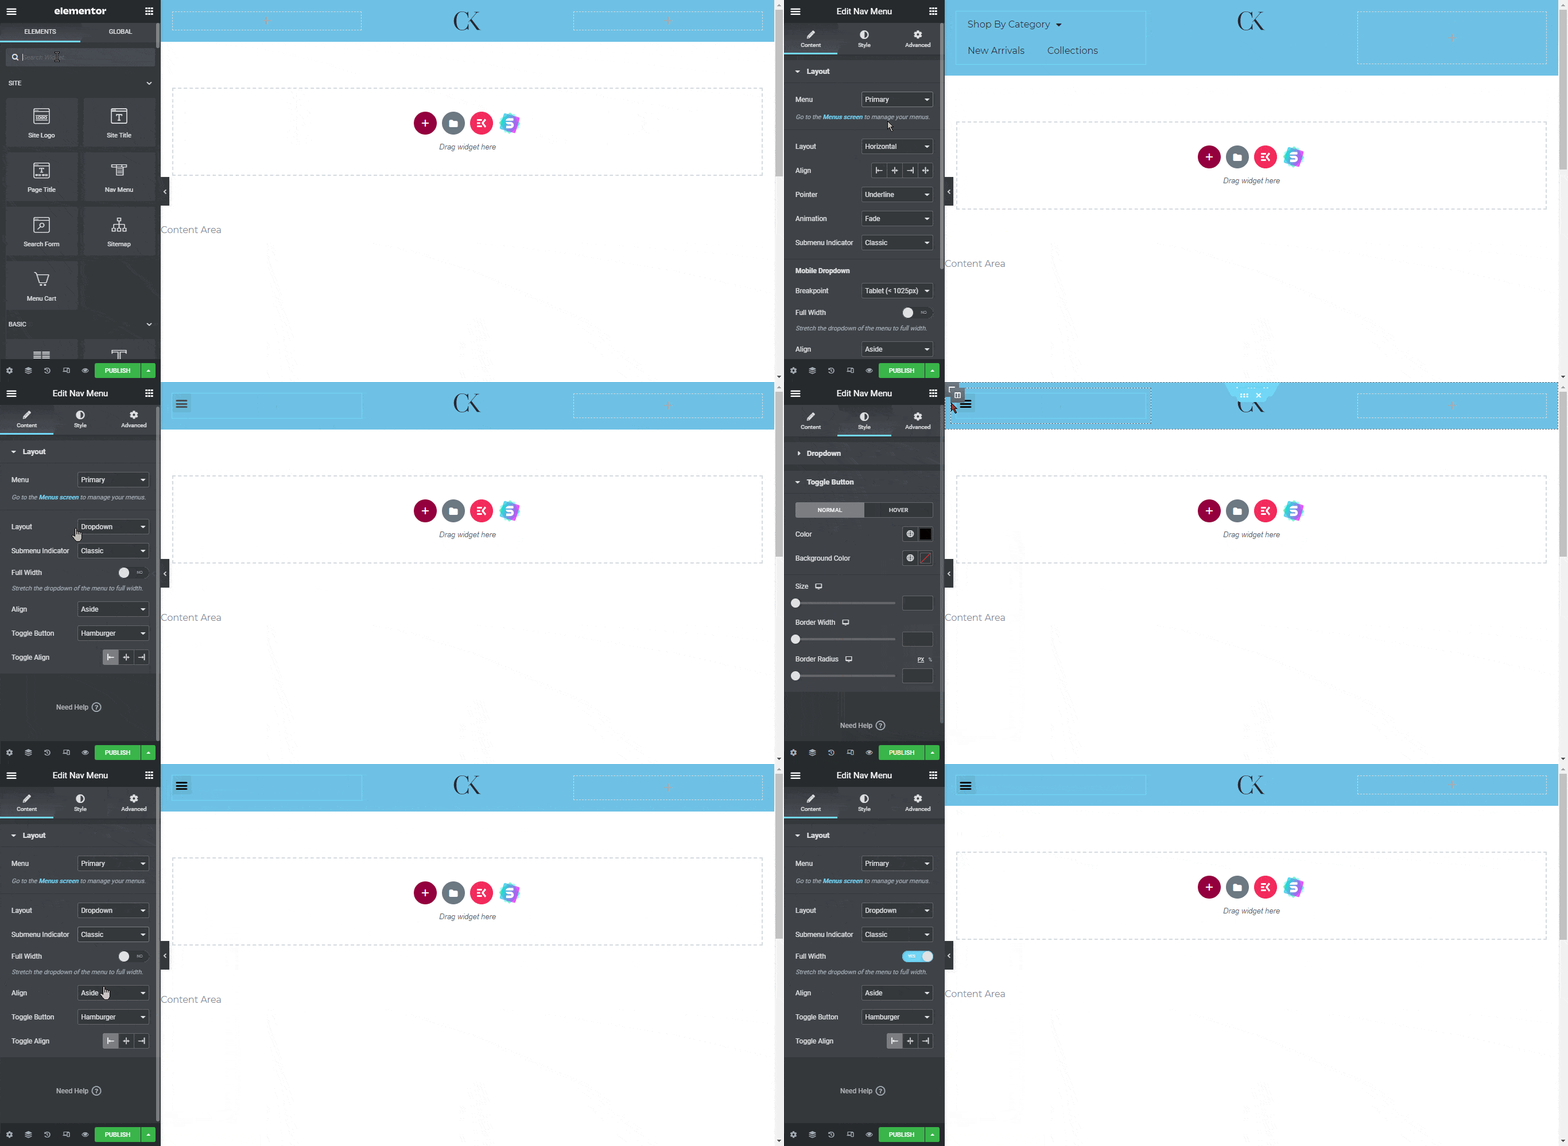
After adding the nav menu widget, you can choose which menu should show in the header menu. For that, you must create a menu first (WordPress Dashboard > Appearance > Menu). If you already have a menu, then select the menu as you can see in the image above. Afterward, you can choose the navigation menu layout, so it will show as a dropdown or vertical or horizontal. As our tutorial, we have selected dropdown, and you can also style the colors, font, and other customizations.
Add Cart Menu Widget
As our tutorial website was an e-commerce website, so We added a cart menu icon. So, it would be great for visitors or customers to navigate to cart items.
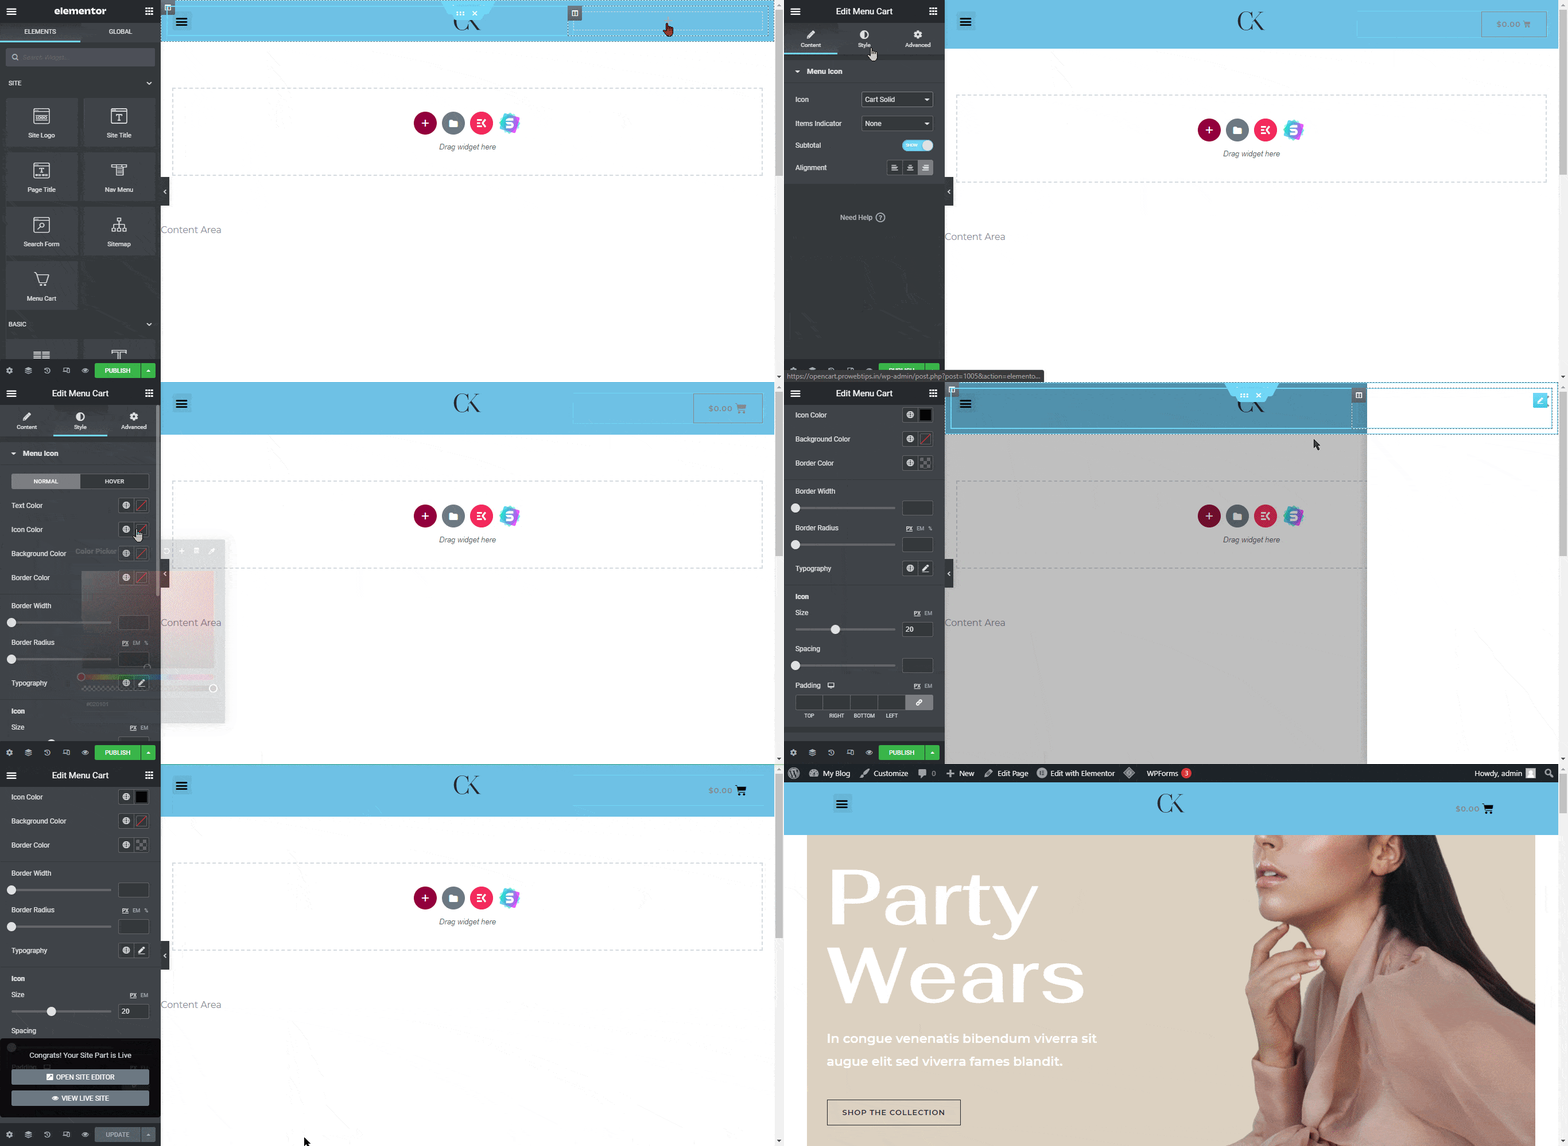
In this custom header tutorial, we have added three different widgets, and there is more possibility. Like you can create a popup as an off-canvas menu and integrate it into a custom header. You can add a search button with a cart menu button side by side.
When you completed the customization of your custom header menu, you must click on publish button and then set to condition for which pages or posts will show the header or add conditions to the entire site just by selecting the entire site condition as shown in the image above.
Summary
In this tutorial we have shown the basic implementations and customization, however, on YouTube, you will get a bunch of long-form tutorials, from basic to advance. So, our main motive was that if you are a blogger, or small business, or any small store owner, and want to create a beautiful website yourself, then you can do it.
For that, you don’t have to invest much in any specific feature plugin or theme. Elementor Pro is a paid plugin, and you can buy it for $49, and it works with almost every free WordPress theme, like GeneratePress, Astra, or Neve.
So, if you consider buying a premium theme, then think about it again and then decide. You can customize the whole website with Elementor, and it works perfectly with Woocommerce. So, what do you think about Elementor tell us in the comment box, and make sure before starting or creating a website read this article about how to create a WordPress website from scratch.
Grab the free template here: – Download