WordPress is a very popular CMS, and you can build beautiful multi-purpose websites and blogs. If you are using a VPS (Virtual Private Server) or a Cloud hosting instance, then you can host multiple WordPress sites on a single server.
It is very cost-effective and no need to deploy any separate server to host another WordPress website. In case you have a huge number of daily traffic on your sites, then I suggest you use an individual server for each site.
WordPress also has a multisite facility, but here we are not talking about that. Suppose you have a VPS hosting instance and have a tight budget or your site is new (with very low traffic), then you can simply host all your sites on the VPS like shared hosting.
Use a $5 Linode or Digital Ocean droplet to deploy a Linux Virtual Instance, or you can also use the LAMP stack from the marketplace. Now follow the simple procedure to install multiple WordPress sites on a single server.
Prerequisites
To host multiple WordPress sites on a single server, you must fulfill the pre-requisites, as follows:
- A Linux Server (1 GB Memory Recommended)
- SSH and Root Privileges
- LAMP Stack or LEMP Stack
- Setup Domain Name with Server
If you fulfilled all the prerequisites, then you can check the multiple WordPress installation procedure with immediate impact. If not, then you should proceed with the prerequisites.

HostGator Shared Hosting at $2.75/ per month
Cloud hosting could be a hurdle for you because you have to manage everything by yourself to maintain the cost. But choosing the best hosting like HostGator, you can forget this managing part, and the best thing is that it is affordable.
Creating Databases to Host Multiple WordPress
To host multiple WordPress sites on a single needs multiple databases to work properly. So first, we need to create databases for all specific websites.
| WordPress Sites Name | wordpress1.com | wordpress2.com |
| Database Name | wordpress1 | wordpress2 |
| Database Username | wordpress_user1 | wordpress_user2 |
| Database Password | wordpress_password1 | wordpress_password1 |
For this tutorial, we will host two separate WordPress sites on a single server. So, we have created an example table, where you can see the site’s name and database credentials.
Now to create the database for each site, you must execute the following commands as mentioned.
Step – 1. Login to MySQL
sudo mysql -u root -pStep – 2. Create First Database
CREATE DATABASE wordpress1;Step – 3. Create Second Database
CREATE DATABASE wordpress2;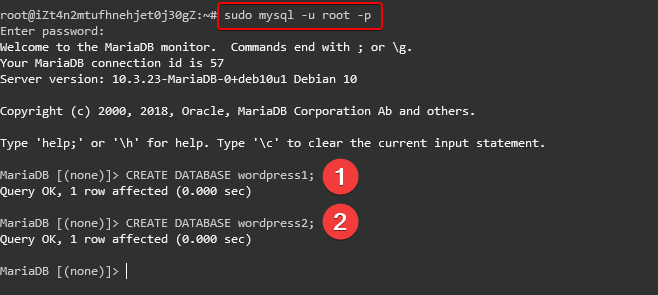
Step – 4. Create First Database User
CREATE USER wordpress_user1@localhost;Step – 5. Create Second Database User
CREATE USER wordpress_user2@localhost;Step – 6. Set First Database User’s Password
SET PASSWORD FOR wordpress_user1@localhost= PASSWORD("wordpress_password1");Step – 7. Set Second Database User’s Password
SET PASSWORD FOR wordpress_user2@localhost= PASSWORD("wordpress_password2");Step – 8. Grant All Privileges for First Database
GRANT ALL PRIVILEGES ON wordpress1.* TO wordpress_user1@localhost IDENTIFIED BY 'wordpress_password1';Step – 9. Grant All Privileges for Second Database
GRANT ALL PRIVILEGES ON wordpress2.* TO wordpress_user1@localhost IDENTIFIED BY 'wordpress_password2';Step – 10. Flush Privileges and exit
FLUSH PRIVILEGES;exit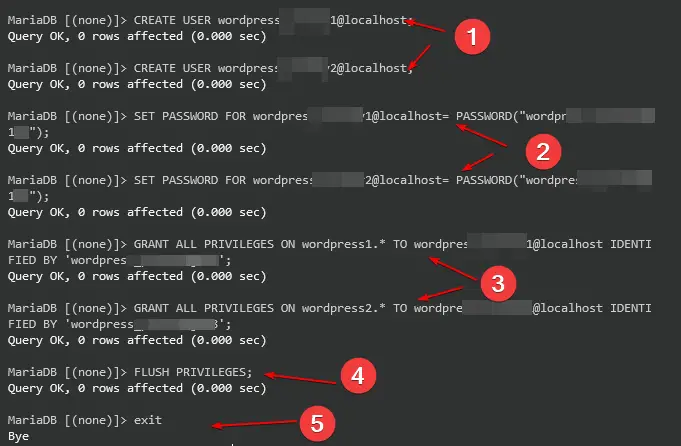
Now, our database creation has been completed.
Creating WordPress Sites Root Directories
In the WordPress root directory, where will be stored all assets and data of the sites. So, to host multiple WordPress sites on a single server, need to create multiple root directories for specific sites.
Step – 1. Change Directory to Webroot
cd /var/www/htmlWe need to create specific root directories in the /var/www/html directory, so we can host multiple WordPress sites on a single server. So, execute the following commands to create the directory for each website.
Step – 2. Create First Site’s Directory
sudo mkdir wordpress1Step – 3. Create Second Site’s Directory
sudo mkdir wordpress2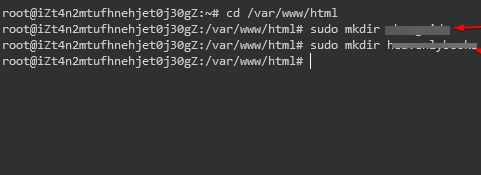
Download WordPress Core
WordPress is an open-source content management system. And its core files are freely available to download in compressed file format. So, using the following command you can download the WordPress source files.
Step – 1. Change Current Directory to System Root Directory
cdStep – 2. Download WordPress Core
wget -c https://wordpress.org/latest.tar.gz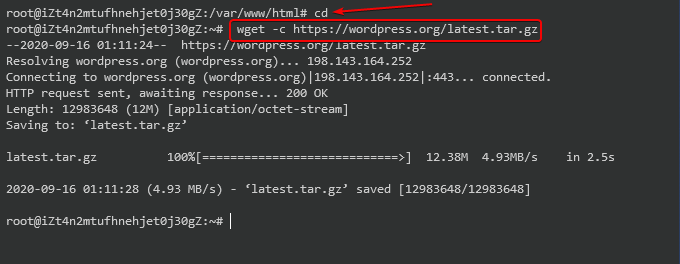
Step – 3. Extract the Compressed WordPress Core Files
tar -xvzf latest.tar.gzStep – 4. Rename the wp-config-sample.php to wp-config.php
cp ~/wordpress/wp-config-sample.php ~/wordpress/wp-config.php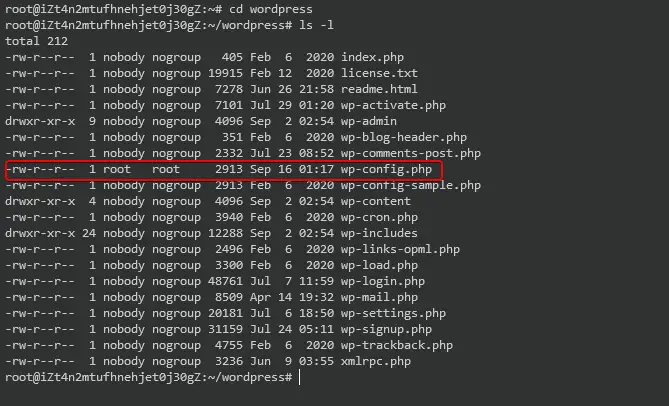
Step – 5. Copy the Extracted Files to Newly Created wordpress1 Root Directory
sudo rsync -avP ~/wordpress/ /var/www/html/wordpress1Step – 6. Copy the Extracted Files to Newly Created wordpress2 Root Directory
sudo rsync -avP ~/wordpress/ /var/www/html/wordpress2Step – 7. Give Proper Permission and Ownership to wordpress1 directory
sudo chown -R www-data:www-data /var/www/html/wordpress1/sudo chmod 755 -R /var/www/html/wordpress1/ Step – 8. Give Proper Permission and Ownership to wordpress2 directory
sudo chown -R www-data:www-data /var/www/html/wordpress2/sudo chmod 755 -R /var/www/html/wordpress2/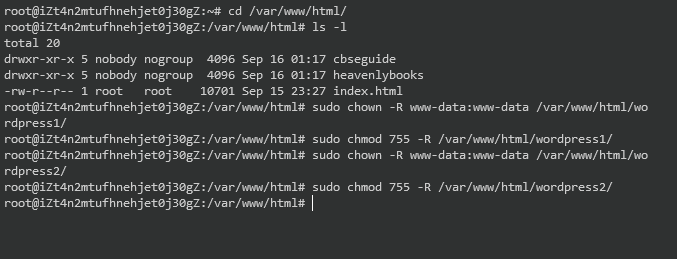
Without proper access permission, you won’t able to install, upload or modify files from the WordPress dashboard. So, as mentioned above, you must give the proper directory and file permissions.
Configure Databases with WordPress Sites
After downloading and copying the files to the site’s root directory, need to configure the database’s credentials.
You can skip this process for now but when you will open sites on the browser, the sites will prompt you to configure the database with WordPress, and then you must set up a WordPress admin user and password.
Step – 1. Edit First WordPress Site’s Config File
sudo nano /var/www/html/wordpress1/wp-config.phpStep – 2. Enter the First Database’s Credentials
// ** MySQL settings - You can get this info from your web host ** //
/** The name of the database for WordPress */
define( 'DB_NAME', 'wordpress1' );

/** MySQL database username */
define( 'DB_USER', 'wordpress_user1' );

/** MySQL database password */
define( 'DB_PASSWORD', 'wordpress_password1' );

/** MySQL hostname */
define( 'DB_HOST', 'localhost' );
Step – 3. Edit Second WordPress Site’s Config File
sudo nano /var/www/html/wordpress2/wp-config.phpStep – 4. Enter the First Database’s Credentials
// ** MySQL settings - You can get this info from your web host ** //
/** The name of the database for WordPress */
define( 'DB_NAME', 'wordpress2' );

/** MySQL database username */
define( 'DB_USER', 'wordpress_user2' );

/** MySQL database password */
define( 'DB_PASSWORD', 'wordpress_password2' );

/** MySQL hostname */
define( 'DB_HOST', 'localhost' );
Configure Apache Virtual Host
Apache virtual host handle http requests and the virtual host refers to the practice of running more than one website on a single server.
So, it is necessary to create Apache virtual host config files for our websites. You can create many as you want according to the number of websites you want to host.
We are going to create two host files, for this process you should use the following commands:
Step – 1. Create the First vHost Config file for the First WordPress Site
sudo nano /etc/apache2/sites-available/wordpress1.confStep – 2. Insert the Following Lines of Code to the First Config Files
<VirtualHost *:80>
     ServerAdmin [email protected]
      DocumentRoot /var/www/html/wordpress1
     ServerName wordpress1.com

     <Directory /var/www/html/wordpress1>
          Options FollowSymlinks
          AllowOverride All
          Require all granted
     </Directory>

     ErrorLog ${APACHE_LOG_DIR}/wordpress1.com_error.log
     CustomLog ${APACHE_LOG_DIR}/wordpress1.com_access.log combined

</VirtualHost>
Step – 3. Create the Second vHost Config file for the Second WordPress Site
sudo nano /etc/apache2/sites-available/wordpress2.confStep – 4. Insert the Following Lines of Code into the Second Config Files
<VirtualHost *:80>
     ServerAdmin [email protected]
      DocumentRoot /var/www/html/wordpress2
     ServerName wordpress2.com

     <Directory /var/www/html/wordpress2>
          Options FollowSymlinks
          AllowOverride All
          Require all granted
     </Directory>

     ErrorLog ${APACHE_LOG_DIR}/wordpress2.com_error.log
     CustomLog ${APACHE_LOG_DIR}/wordpress2.com_access.log combined

</VirtualHost>
Redirect non-www to www
To redirect the website from non-www to www, you need to write the following code lines in the virtual host of your WordPress website.
<VirtualHost *:80>
    # The primary domain for this host
    ServerName example.com
    # Optionally have other subdomains also managed by this Virtual Host
    ServerAlias www.example.com
    DocumentRoot /var/www/html/wordpress/
    <Directory /var/www/html/wordpress/>
        Require all granted
        # Allow local .htaccess to override Apache configuration settings
        AllowOverride all
    </Directory>
    # Enable RewriteEngine
    RewriteEngine on
    RewriteOptions inherit

    # Catchall redirect to www.example.com
    RewriteCond %{HTTP_HOST}   !^www.example.com [NC]
    RewriteCond %{HTTP_HOST}   !^$
    RewriteRule ^/(.*)         https://www.example.com [L,R]
</VirtualHost>
Step – 5. Symlink the First vHost Config file to sites-enabled directory
sudo ln -s /etc/apache2/sites-available/wordpress1.conf /etc/apache2/sites-enabled/wordpress1.confStep – 6. Symlink the Second vHost Config file to sites-enabled directory
sudo ln -s /etc/apache2/sites-available/wordpress1.conf /etc/apache2/sites-enabled/wordpress1.confNote: - You can also use Apache ensite command, instead of Symlink. Check out the complete tutorial about Apache ensite and dissite.
Step – 7. Enable Apache Rewrite Module
sudo a2enmod rewriteStep – 8. Restart Apache HTTP Server
sudo systemctl restart apache2Note: - The whole Virtual host situation will be diffrent for LEMP stack users or Nignx users. You can check out how to install WordPress on Nginx using the latest Ubuntu 22.04.
Finale Configuration for WordPress Site
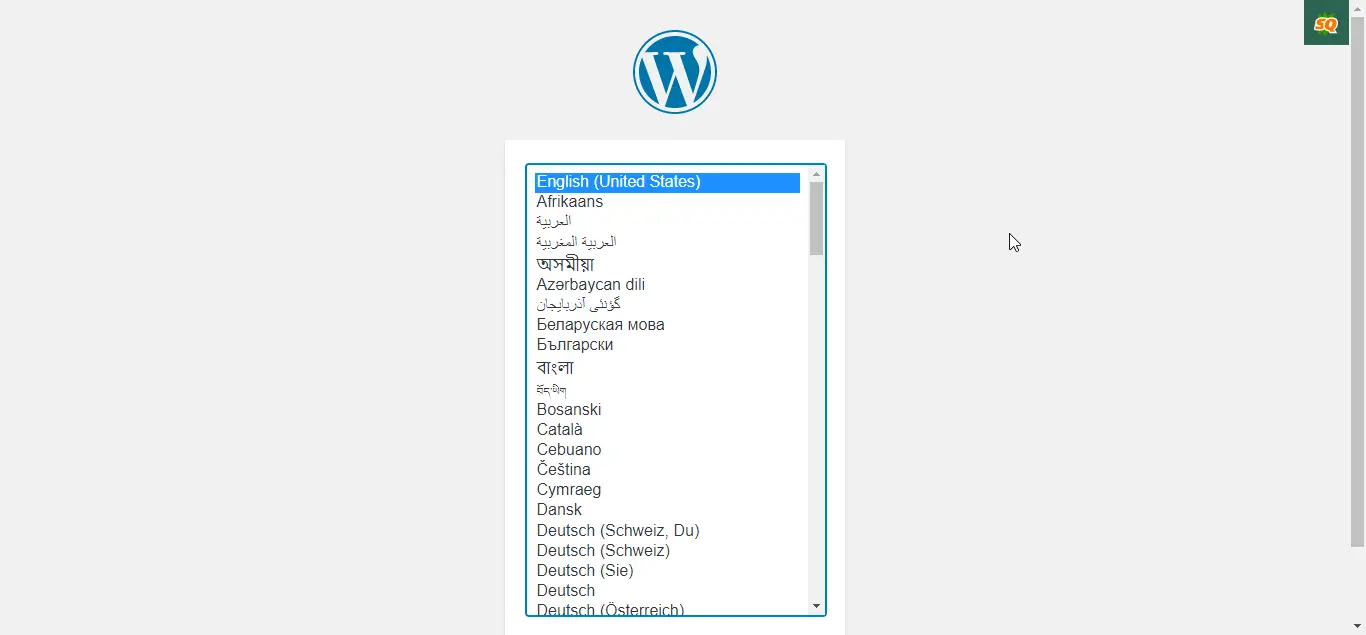
After all the processes, now need to configure the WordPress website’s admin credentials. So, first of all, open your domain name in the browser tab and if you got the same visuals as in the image below then your WordPress site installation is successful.
Summary
Hosting multiple WordPress sites on the Ubuntu server or the Debian server is very easy now and also affordable for you. Most of the cases, what happens with newbie bloggers, is they choose cloud hosting and just install a pre-contained WordPress site on a server. So, there is an issue you can’t install another WordPress on the same machine.
But we have explained how to install or host multiple WordPress sites on a single server, and do not need to pay for any other server for another site. You can host multiple sites on a single server at your pocket-friendly cost.
cPanel or Plesk also have capabilities to install multiple sites in a single server, but there is a big issue, you need to pay for the license of cPanel or Plesk if you take their software also there is another big issue, these software use unnecessary resources of your machine.
So, the best way to host multiple websites in a single VPS is to manually install everything and it is very pocket-friendly for you and resource-friendly for your machine.
Hi Pronay Sarkar,
Thanks for the detailed explanations, If I plan to run 5 WordPress installations in a single cloud server, what will be my hardware requirements? From the below standard servers, which one should I choose?
Thanks
Thanks, Mohan for the comment.
If you planned to run 5 WordPress installations on a single server. The hardware requirements will be different in different situations.
If you choose a VPS server and pay bills annually, then I don’t recommend choosing any base hardware VPS. Because, over time you will get traffic and if you choose any base server (mostly 1GB RAM + 1vCPU), then chances to get crashed two or three times depending on the traffic.
I will suggest you go with pay-as-you-go plan-based hosting providers, like Digital Ocean, Linode, Vultr, or Cloudways. And where you can host pretty much 5 or more WordPress sites at a time. When the traffic comes to start, increase the size or scale it. It will save your pocket and site performance.
Great! Thank you very much!
Had some issues with the mySQL commands (syntax errors, maybe I don’t have the same version of mySQL? Mine doesn’t write “MariaDB” in the command lines…) but could figure out a way to achieve the operations searching for the commands on my search engine.
Also, I used another config I had already with my former wordpress site for enabling ssl (with a wildcard certificate: “https://techguides.yt/guides/free-wildcard-ssl-certificate-for-nextcloud-and-wordpress/”).
Also, I didn’t get the use of redirecting non-www to www so I droped that part for now…
But it seems to work great!