If you are looking for the best affordable web hosting then Hostinger might be full fill your requirements. If you have purchased their plan and want to know how to install WordPress or other CMS on Hostinger cPanel? Then this article is for you.
Must Read:- Hostinger Review.
There is two way to install the WordPress Application in your Hostinger cPanel.
- Using Auto Installer
- Manually Installation
Both processes are easy for those who know MySQL Databases, and PHP kinds of stuff but if you are a beginner then I suggest you use Auto Installer.
Using Hostinger Auto Installer for WordPress
Hostinger Auto Installer is part of their custom hPanel’s (cPanel) function like Softaculous. In this Auto Installer, you will find more than 100+ applications for Web development. So, let’s start installing WordPress in 3 Steps.
Step – 1 Open Auto Installer
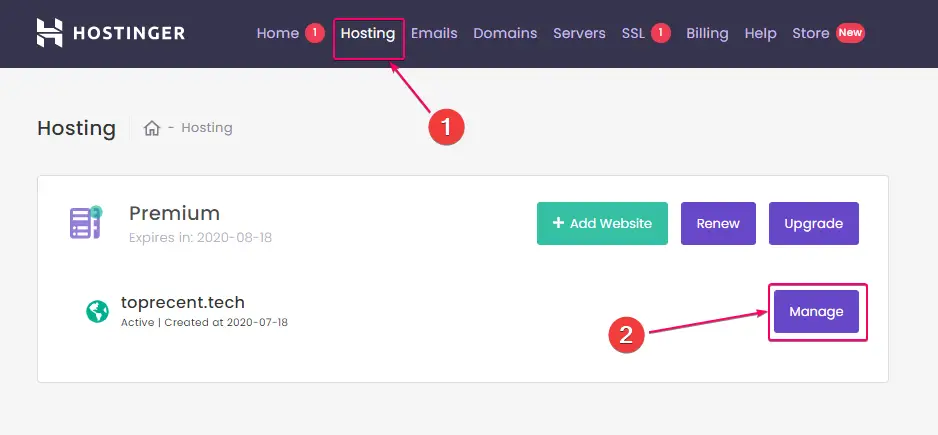
The first thing you need to log in to Hostinger Dashboard then needs to click on Hosting on the top bar of the website.
Second, you need to click on Manage on the box of the hosting list. (as below in the Image)
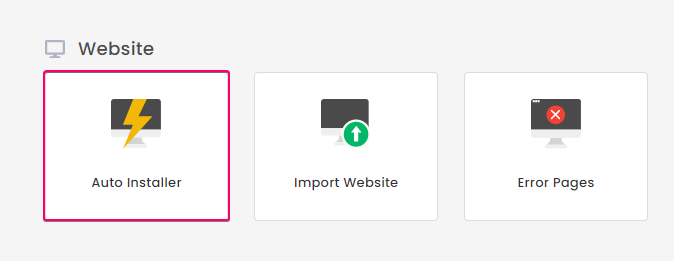
Now you need to scroll down and find the Website section there you will find the Auto Installer, there are other functions also available if you want to import your website, so you can.
Select Auto Installer for WordPress installations.
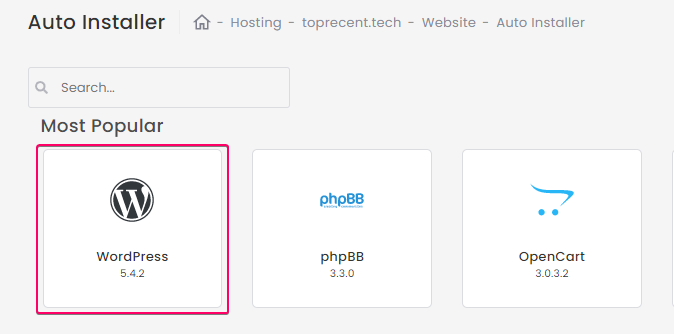
You will find the WordPress application at the top of the Most Popular section. Select WordPress from the menu.
Step – 2 Filling the Credentials and Installation Details
Fill up the required details like Admin Password and Username, Website Title, and Admin Email. After filling in all the required details, you need to click on the Install button.
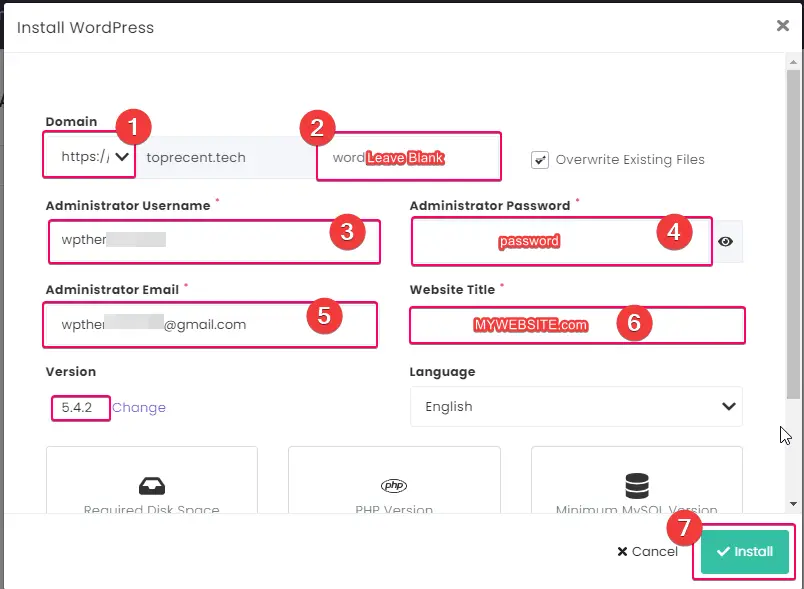
Note: - You can choose https:// or https://, I suggest you choose https:// because if you haven't any SSL certificate then you can use Cloudflare SSL. So, after contenting Cloudflare no need to force redirect.
Step – 3 Login to WordPress Dashboard
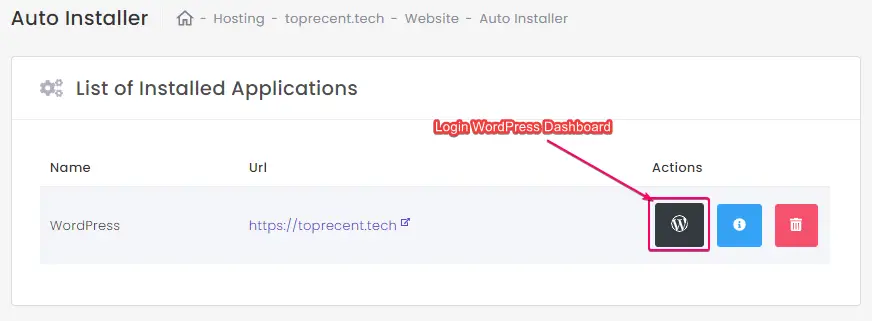
After the installation process, you can find the List of Installed Applications. Just you need to click on WordPress Icon so you can log in to the WordPress Dashboard.
If considering purchasing a hosting plan, please check out the Hostinger affordable plans by clicking the button.
Manually Install WordPress on Hostinger
Hostinger also has the option to install any website or CMS script manually using hPanel (Hostinger Control Panel). You need to follow some exact steps for the installation process.
I will install WordPress manually for this tutorial, and you can install any PHP or HTML script manually, followed by these four steps.
Step – 1 Create MySQL Database on Hostinger cPanel
First of all, you need to create a database for your project or website. So, scroll down the Hostinger hosting cPanel and select MySQL Databases in the Databases section for creating a new database.
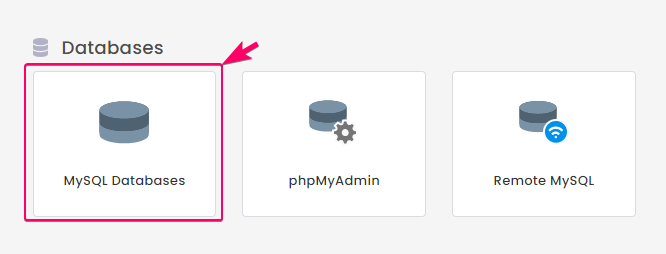
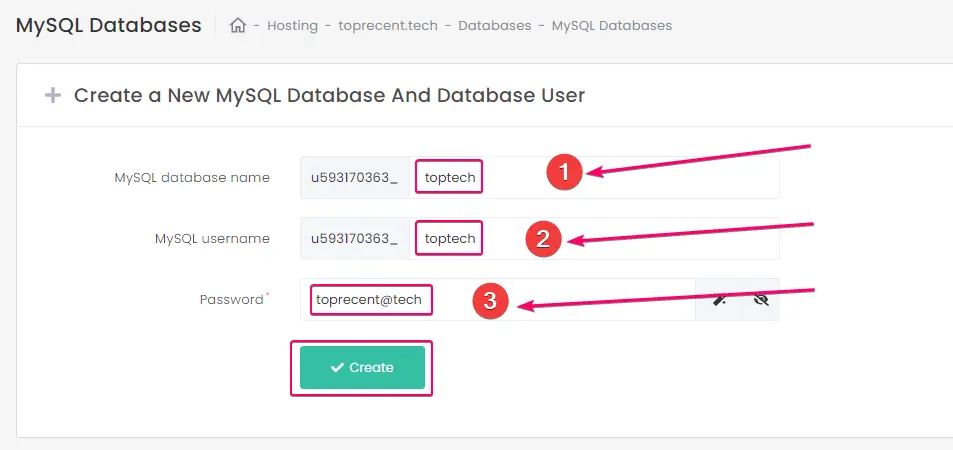
After selecting MySQL Databases, you will have to option create a new database as shown in the image below.
You need to fill in the MySQL database name, MySQL username, and Password, then click on the Create button.
Step – 2 Upload WordPress ZIP File on Hostinger File Manager
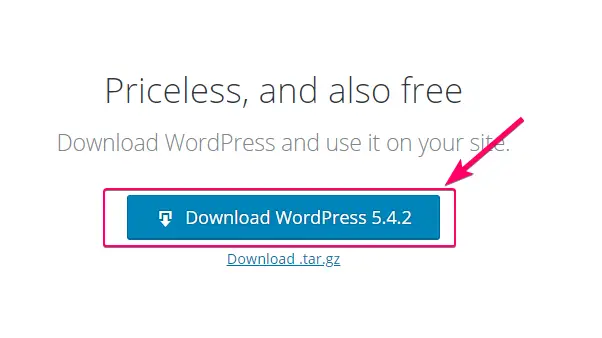
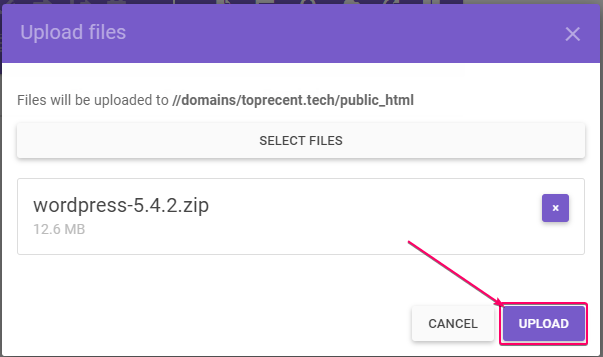
Download the ZIP file of WordPress from the official website wordpress.org, and after download, you need to upload the compressed zip into the Hostinger file manager.
Now select the File Manager in the section of Files, so you need to scroll down to find the files section.
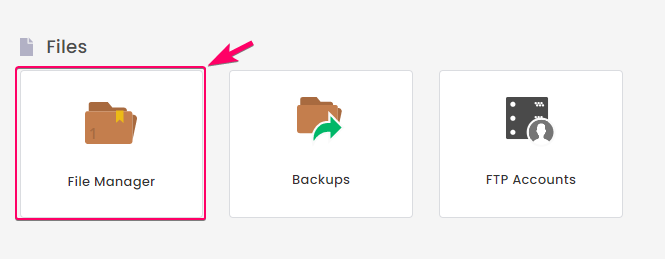
The file manager looks like below the image, now you need to upload WordPress’s latest downloaded ZIP file. Make sure you have uploaded the files in the correct path >>public_html (hostinger-username > domains > example.com > public_html).
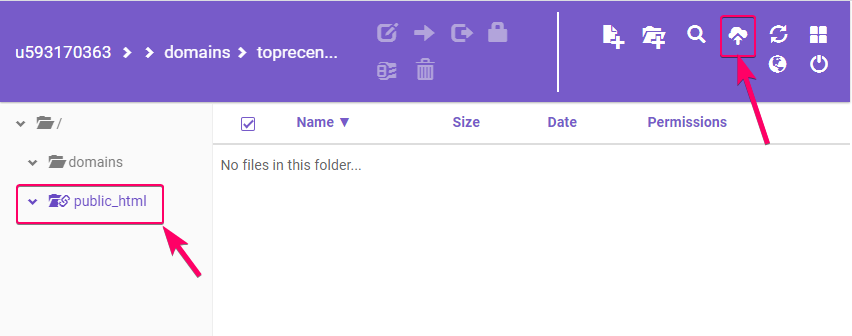
Select the zip file and upload in the /public_html
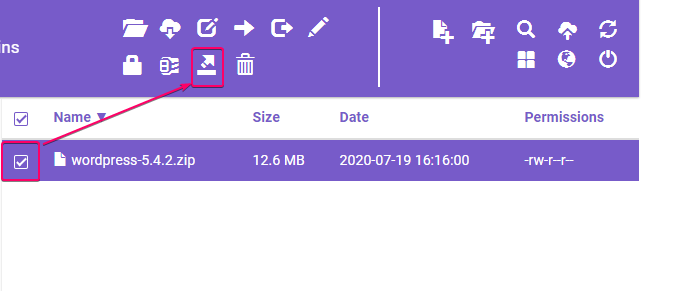
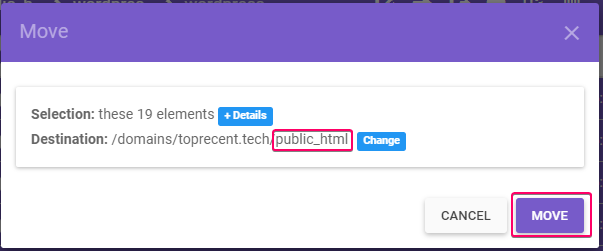
Extract the WordPress zip file using the following instructions, the extracted file should be in /public_html folder.
Note: - If you have any unnecessary files and folders in /public_html folder, you should remove them.
If you have extracted the zip file in some different folder, then you should move it out to the/public_html folder.
Step – 3 Configure Database Credentials on wp-config File
After uploading the zip file and extraction, you need to rename the wp-config-sample.php file to wp-config.php.
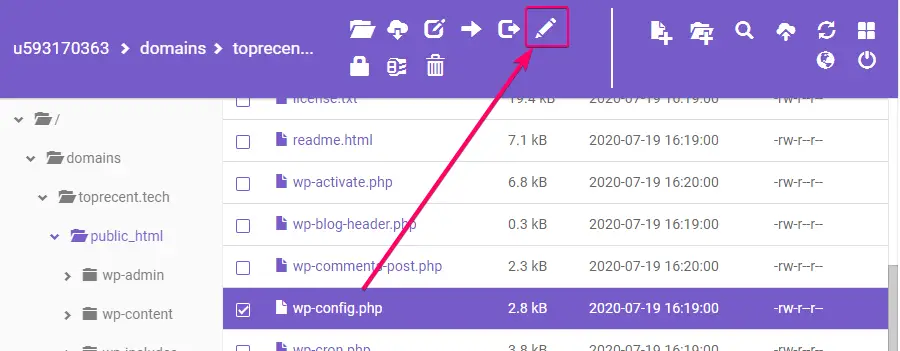
You could find this file in the public_html folder.

Renaming process.
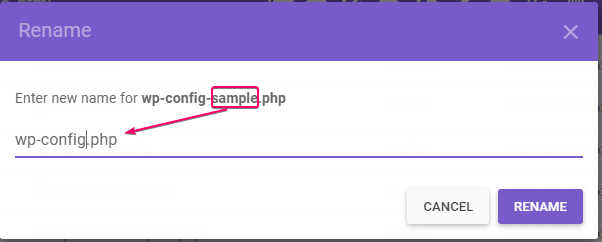
After renaming the wp-config-sample.php file to wp-config.php, you need to edit the file as shown below in the image.
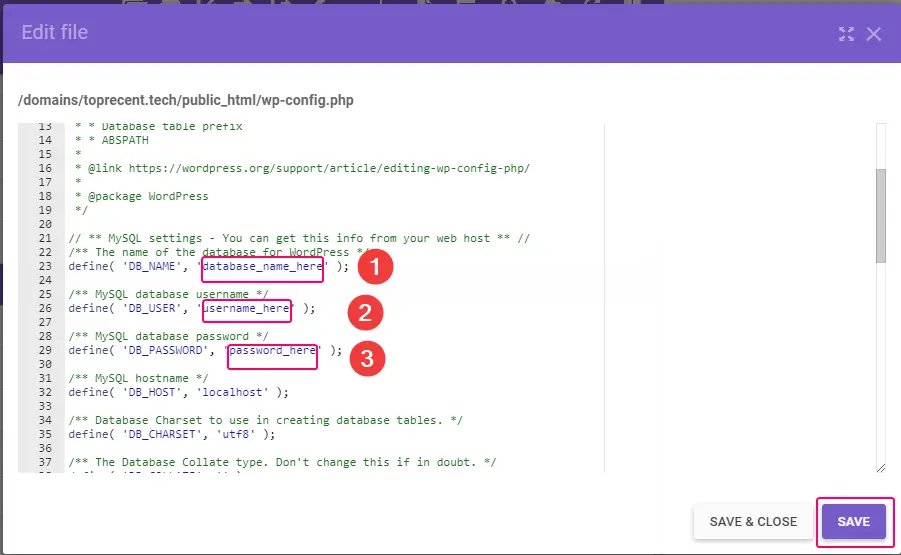
In this wp-config.php file, you need to insert the database’s credentials which we created earlier. So, you need to insert DB_NAME (Name of the Database), DB_USER (Username of the Database), and DB_PASSWORD (Password of the Database).
As you can see in the image below, the same is the need to fill in MySQL database credentials. After inserting the data, you need to click save.
Step – 4 Configure WordPress Application
After creating a database and uploading the WordPress zip file you need to configure the WordPress Application. So that is the final step.
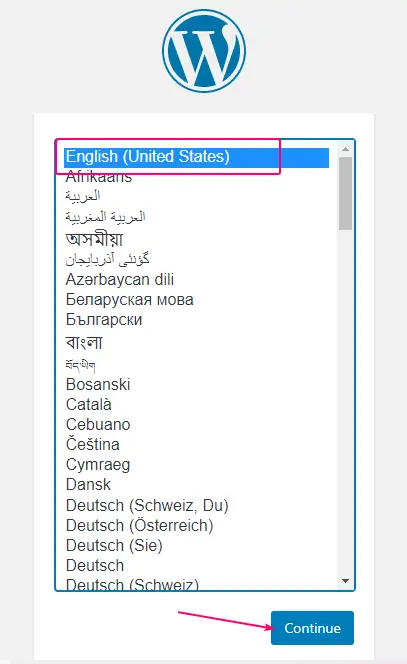
Open your website in a new tab and you will see WordPress’s language selection menu. Select your language then click the Continue button.
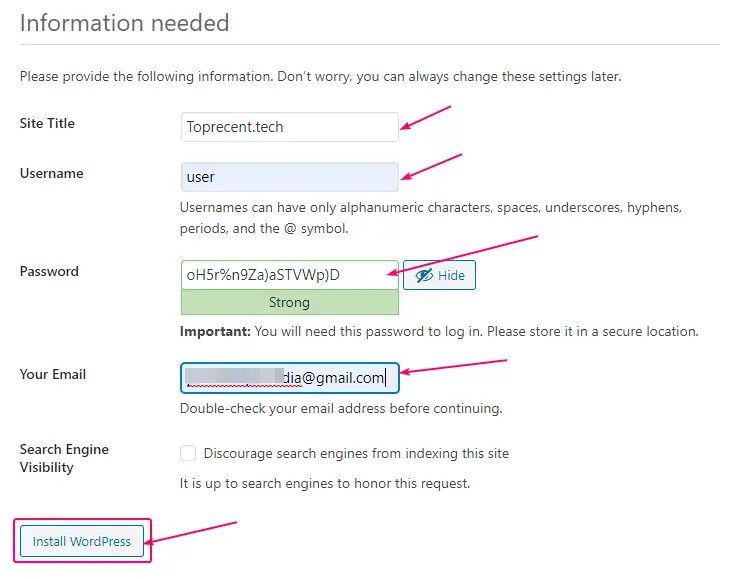
Now WordPress will prompt you to add your website credentials, which will be required for your future login to the WordPress dashboard.
So, you need to fill in the Site Title, Admin Username, Admin Password, and E-mail address then click the Install WordPress button.
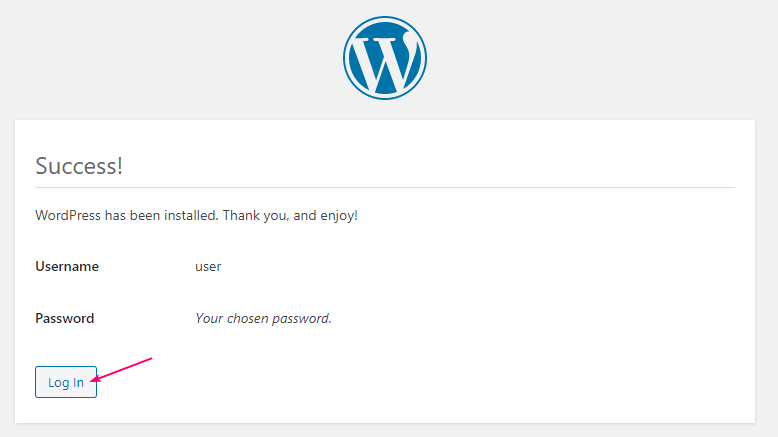
Now you will get a success message that will show you the login button, and your inserted Admin username and now you can log in to your WordPress website dashboard using your Username and Password.
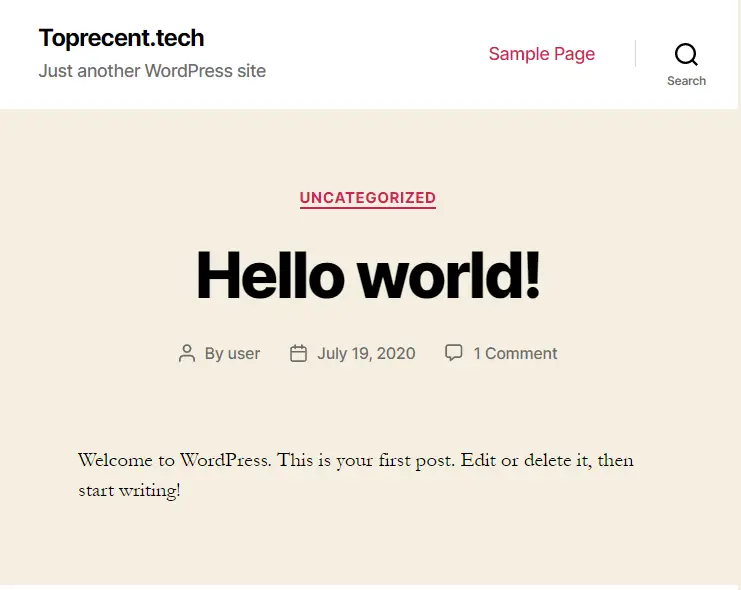
The view of the installed WordPress website’s home page.
Speed Test Results of Hostinger
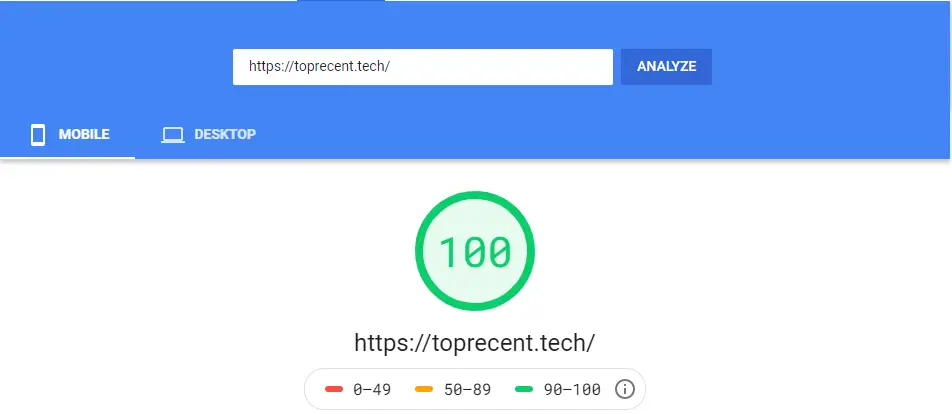
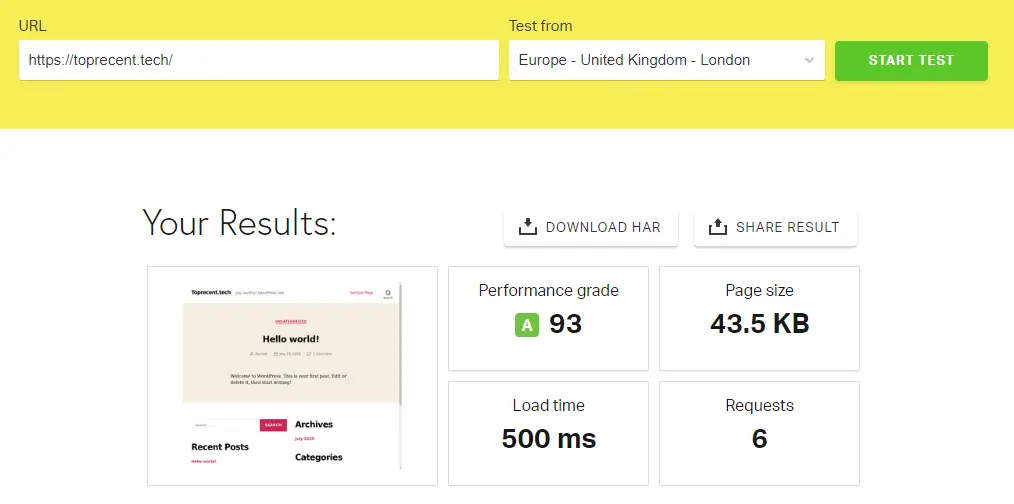
I have taken the speed test results on various platforms and you can see some speed test results below. I have tested the WordPress website after using auto Installer and after manually installing it.
Google PageSpeed Insight Results

GTMetrix Speed Test Results

Pingdom Speed Test Results
Conclusion
There is a conclusion, if you want to host a fast, affordable, and reliable WordPress website then you should consider taking Hostinger web hosting plans.
I have hosted a WordPress website in Hostinger, you can see the speed test results of the website. If you ask me which shared hosting will be better for blogging, So, I suggest you take Hostinger hosting if you want a long-term hosting solution.
If you have any questions or suggestions about Hostinger Hosting or WordPress related, leave your message in the comment box or contact forum.
Thanks!