Are you looking for a free custom email provider? Zoho mail is one of the best custom business email providers. You can get free custom business emails with Zoho.
Zoho is a well-known company known as Zoho Corporation. They mainly provide Customer relationship management (CRM) services like a web-based office suite, databases, notes, web conferencing, email services, and more.
This article will explain how you can create a free custom email with Zoho. For this process, certain things will be required, like your cell number to verify your account and personal email.
What Is Zoho Mail?
Zoho mail is a hosting email service from Zoho Corporation. Zoho provides personal and business email hosting, and it allows users to send and receive emails using a custom domain name. Zoho mail is secured and end-to-end encrypted.
Free Trial:- Get 60-Day Trial of Namecheap Premium Email Hosting
How to Sign Up for Free Zoho Mail?
Registration on Zoho’s platform is effortless and free. Zoho mail provides you with 5 GB of mail storage and up to 5 users for free. There are other premium plans, which we talk about later in the sign-up process.
So, we begin the Zoho mail sign-up process.
Step – 1. Open Zoho’s Official Website
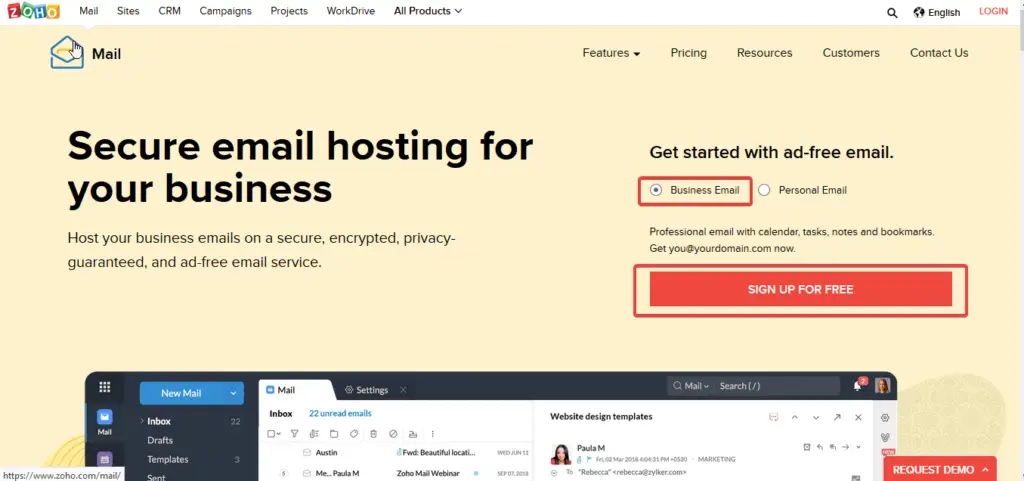
Zoho has its server worldwide, so whatever country you live Zoho’s website will automatically redirect to the regional site.
When you reach the Zoho email services page, then you will have the option to choose the type of email services Business and Personal email.
Select ‘Business Email’ and click ‘SIGN UP FOR FREE’ as shown in the image below.
Step – 2. Select Forever Free Plan
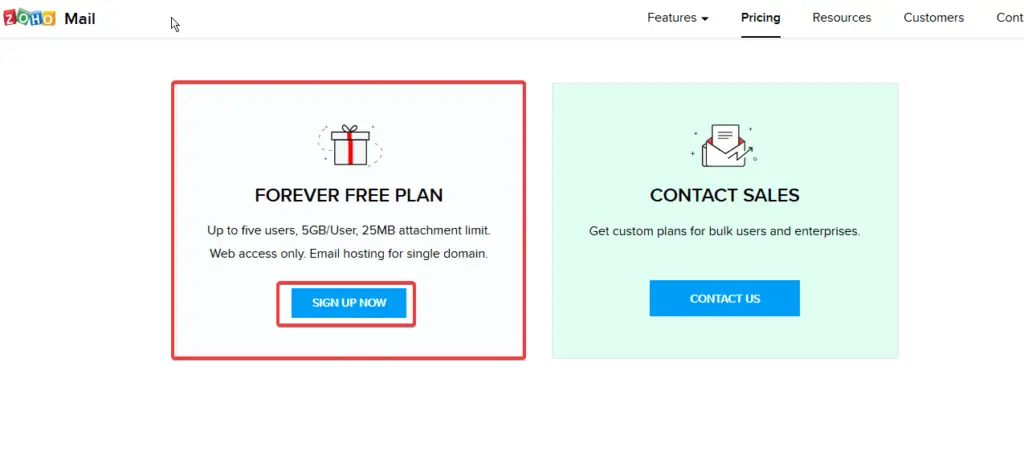
In one step, need to select the subscription plan, Zoho has various paid plans according to client requirements, but in our case, we have to select ‘Forever Free Plan.’
So, scroll down, and you will find the forever free plan block. Click for further procedures.
In free Zoho mail services, you will get up to 5GB of mail storage for up to five users, and the attachment size is 25 MB per email.
That is enough for a beginner like us.
Step – 3. Add Domain Name for Zoho Mail
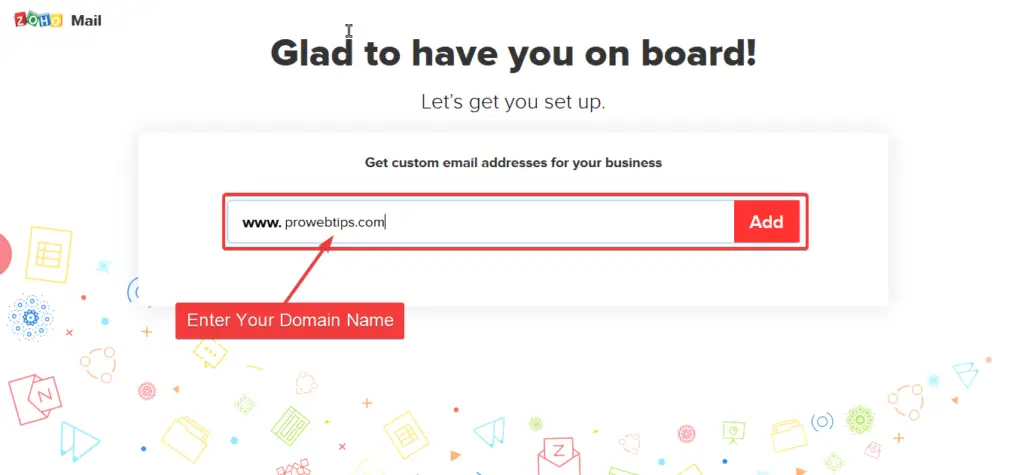
In this step, enter the domain name you have to use as your business mail. As you can see in the image below, I have entered my domain name, and after all configuration, I can create an email like ‘email[at]prowebtips.com.’
Step – 4. Add Your Personal Information

You have to fill in all required information like name, phone number, country name, and contact email in this step.
After filling up all the required information, you need to agree with the terms and conditions and then click on the ‘PROCEED’ button to verify your information.
Step – 5. Verify Phone Number for Free Zoho Mail Service

After completing every sign-up process at the end, you have to verify your phone number via an OTP. When OTP verification is done, your account also goes live.
Domain Name Configuration With Zoho Mail
After completing account creation on Zoho’s mail platform, now you have to configure a domain name, email users, groups, spam filter, etc.
So keep in mind, that you should own the domain name which you had filled in earlier in the sign-up process.
Step – 1. Verify Domain Name
Zoho mail gives you three different methods to verify your domain name. So you can choose your convenient way from the HTML method or Add TXT or CNAME record on the DNS manager.
Note:- In this article, I have used Cloudflare DNS management; Cloudflare is a fantastic and free CDN provider, that improves the website’s performance. Check out the article to configure a WordPress website to Cloudflare.
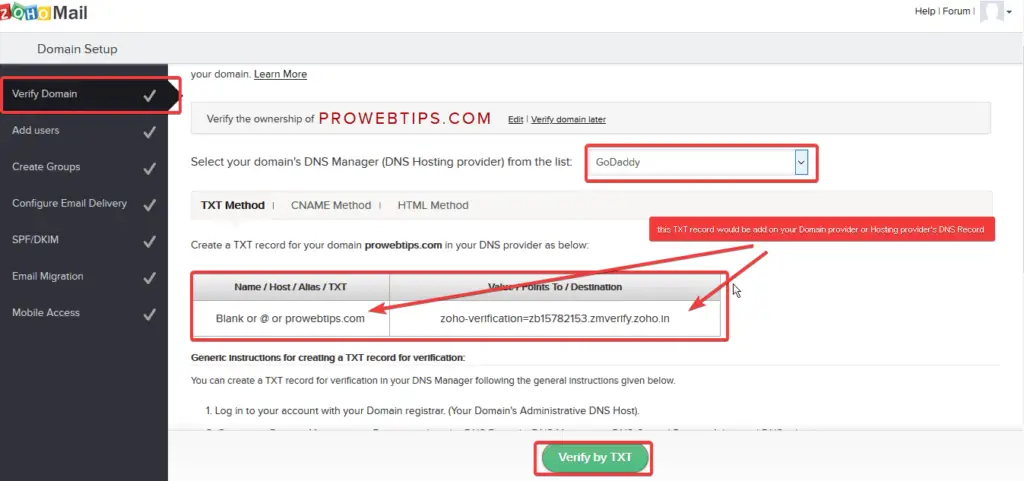
In our case, we will select TXT records, and as per the instruction, you need to copy all the records provided by Zoho, as you can see in the image below.
When you copy all records, then open your domain name DNS manager.
Step – 2. Adding TXT Records on DNS Manager
Adding TXT records is straightforward, open the DNS manager on the registrar website, as you can see in the image below, you need to add your DNS manager.
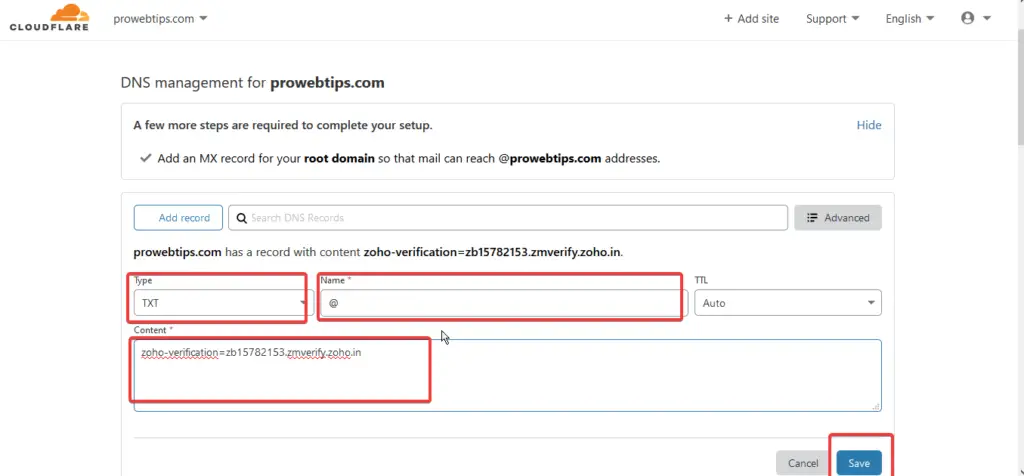
After adding Zoho mail TXT records to the DNS manager, return to the Zoho mail configuration page and click on ‘Verify TXT Record.’
Step – 3. Adding Super Admin on Zoho Mail

After TXT record verification, you need to add a ‘Super Admin’ email, as shown in the image below. Add your Zoho Mail super admin email and click on ‘Create Account.’
Step – 3. Add Users to Zoho Mail Account
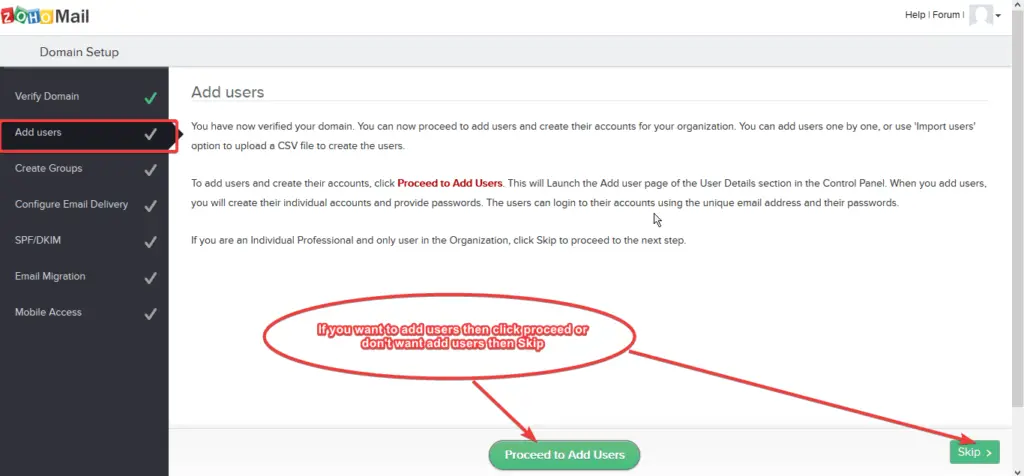
As you know, I have already told you about that, and you can add up to five users. So Zoho will prompt you to add users to your Zoho mail account.
In our case, we will skip it, but if you want to add it, you can add it now or after the configuration.
Step – 4. Groups on Zoho Mail
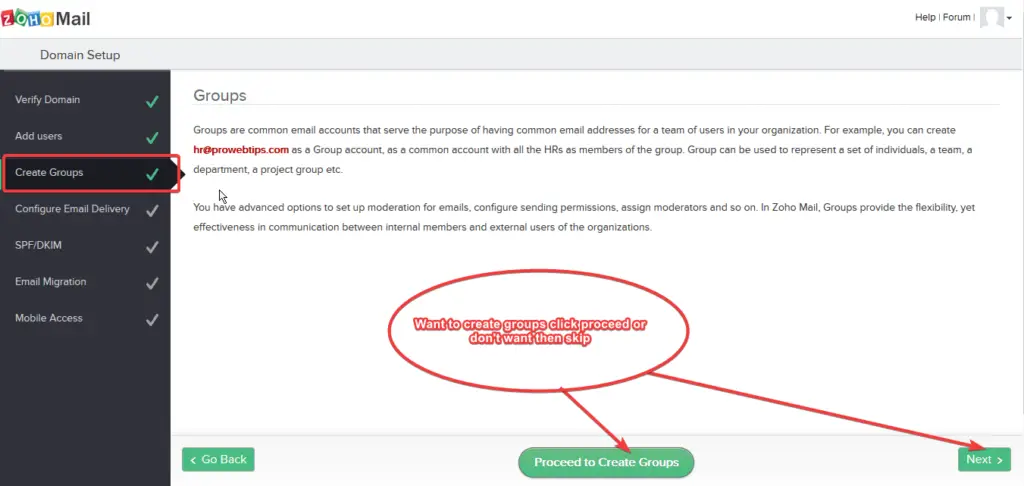
With Zoho Mail’s forever-free plan, you can create groups for your team meeting, group chatting, etc.
If you want to add groups, you can do it now or even from the dashboard, so now click on ‘Next’ for further steps.
Step – 5. Configuration Zoho Email Delivery
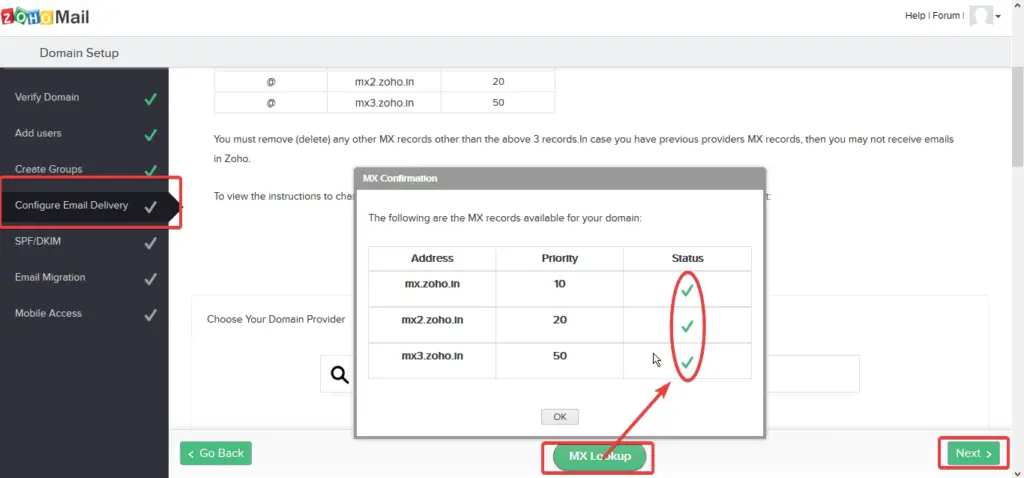
That is important to send and receive emails on your Zoho mail account. You have to add three MX Records on your DNS manager for configuration Zoho email delivery.
Step – 6. Add Mx Records on DNS Manager
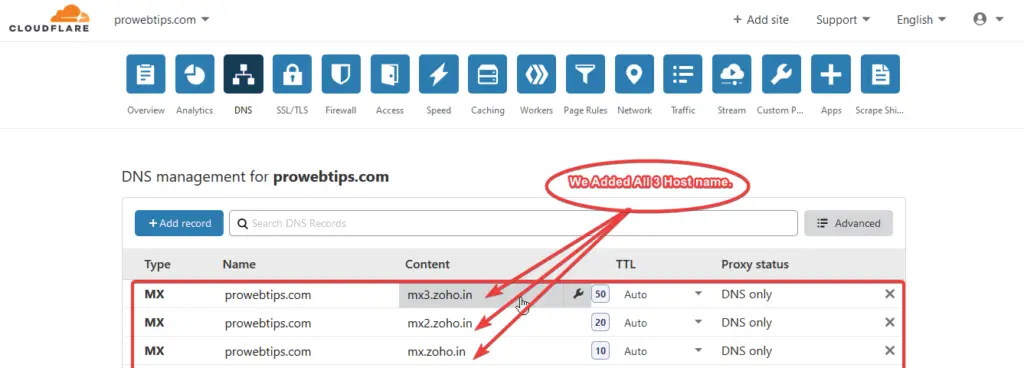
Again open the Domain DNS manager on the registrar’s website and add all those three MX records as per the instructions.
Now return to the Zoho mail configuration page and click on ‘MX Lookup,’ and if you have configured MX records successfully, you will see a popup with a green tick.
Step – 7. Add SPF/DKIM Spam Filter for Zoho Mail
In this step, we need to add TXT records to our Domain DNS manager for filtering spammy emails. So, copy the TXT record, open your DNS manager and add the TXT records.
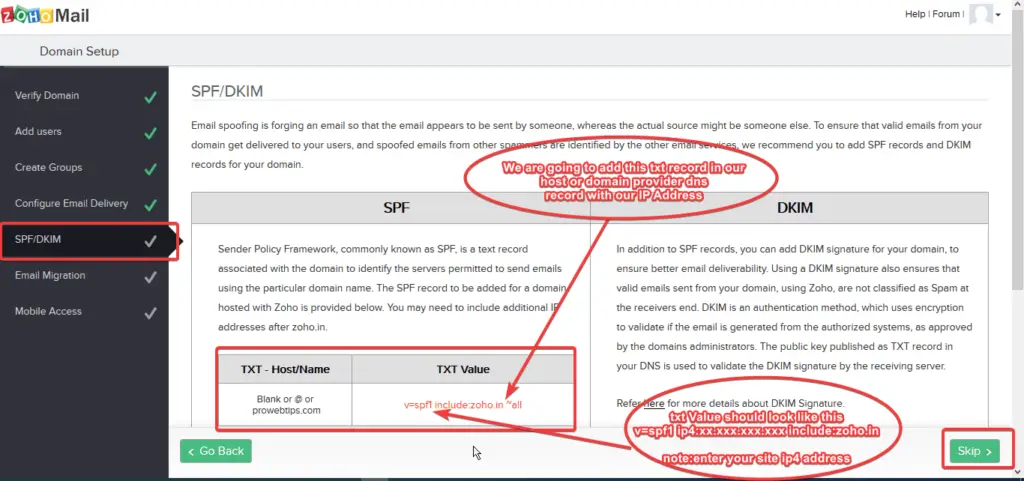
The TXT Value should include the IP4/IP6 address by you from your host. You can see the example in the image, also I will note down below:
V=spf1 ip4: your IP address include:zoho.in (if you have ip4 address)

V=spf1 ip6: your IP address include:zoho.in (if you have ip6 address)
You can also add these TXT records after completing all processes. So don’t worry.
Step – 8. Zoho Email Migration
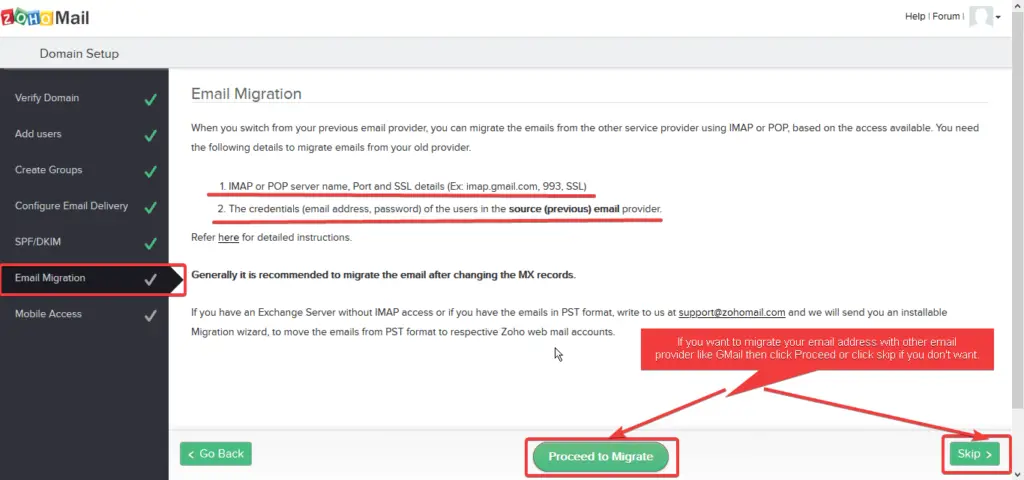
You can configure email migration when you have a paid plan in this step. If you take a paid plan, you can configure your Zoho email migration with popular email clients like Outlook, Gmail, Thunderbird, etc.
In our case, we are going to skip it.
Step – 9. Zoho Email Mobile Access
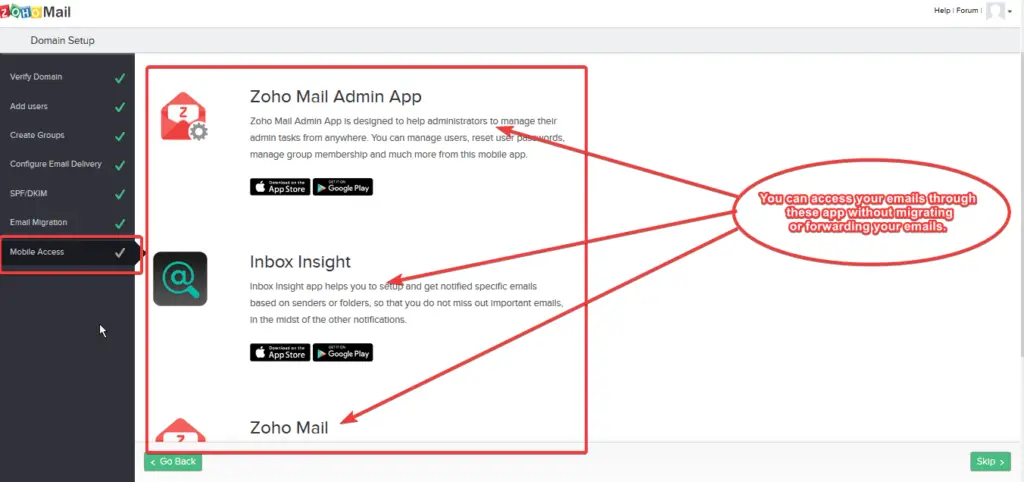
Zoho also has mobile apps to check your business emails and manage your account users. You can download those apps from the Google play store and App Store.
Step – 10. Sign in on Zoho Mail
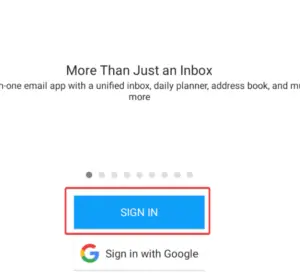
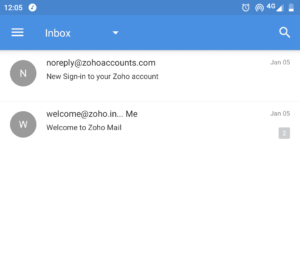
Zoho Mail Inbox Mobile:
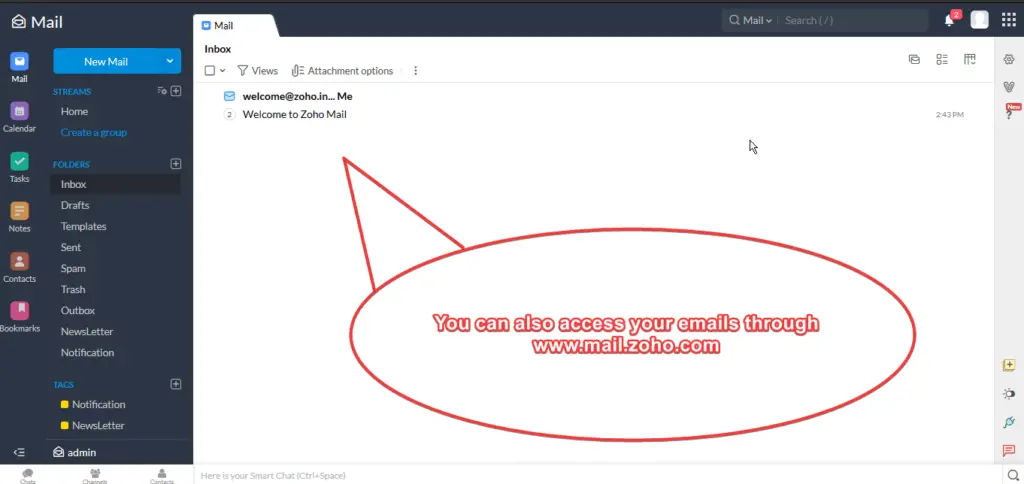
Zoho Webmail:
You can also use the Zoho Webmail through your web browser, so don’t worry, log on to zoho.com.
Summary
To get a free Zoho business email, you will have to take the above simple steps. Zoho mail is an excellent option for beginners to create their business email accounts.
If you use shared web hosting based on cPanel, you can create email accounts on the cPanel platform without paying extra money. But if you host your website on cloud hosting like Google Cloud, and on this platform, you may have to pay extra money to get email services.
So in its alternative, Zoho Mail is a great platform, and you can use the Sendinblue Email marketing platform if you want bulk email services for email marketing. Aweber allows you to send up to 500 subscribers and 3000 emails for free.
If you have any time to configure Zoho Mail, then in the comments, I will try to help you.
Thank you