If you are using Bitnami WordPress in any Cloud Platform like Google Cloud Platform, Amazon Web Services (AWS), and Microsoft Azure, you will find the upload limit; there is by default only 40 MB configured in your Bitnami WordPress.
Bitnami Applications are very popular, mostly the WordPress container. Bitnami provides the most popular open-source applications solutions and to use them you don’t have to pay any usages charges.
Bitnami continuously supports the applications and you can also join the Bitnami community to get resolve your issues or you can solve others.
In this article, I am going to address the issue of WordPress’s maximum upload file size limit on the Bitnami WordPress container.
So, I am going to show you step-by-step, how you can increase the current Bitnami WordPress upload file size limit.
Note: This method will apply for WordPress Certified by Bitnami container available on Google Cloud or AWS.
Connect to Compute Engine with SSH
If you deployed the Bitnami WordPress application on Google Cloud, AWS, or Azure Cloud, to login into the system you must use SSH.
Use the following command if you are using Windows PowerShell or Mac/Linux Terminal:
ssh -i <private key path> [email protected]If you have secured the system with an SSH key then you must use the private key to login into the system, otherwise, you can remove the highlighted part.
Find Bitnami WordPress php.in Location and Increase Upload Size
Bitnami Application is consist of different applications like an Apache server, MySQL Database, PHP, phpMyAdmin, Varnish, Redis, and more, and works as a single application in an isolated environment. That means these application directories will be different compared to the default installations (when we install separately every package).
First, you can locate the file using the ‘change directory (cd)‘ command or simply execute the command from the root directory using the full path in the command.
cd /opt/bitnami/php/etc/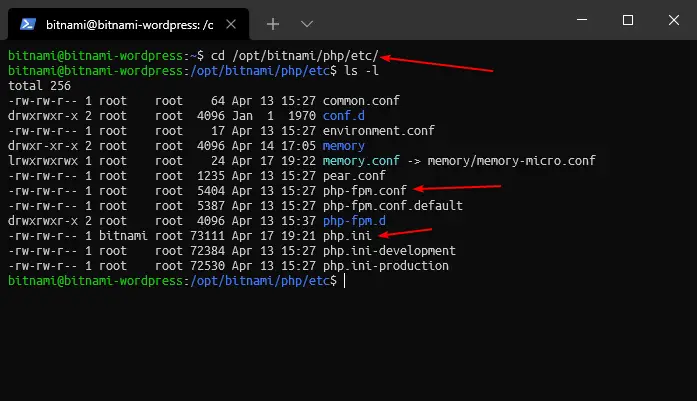
Edit php.ini File to Increase Bitnami WordPress Upload File Size Limit
Now, use the following command to edit php.ini file:
sudo nano php.inior use the full path command
sudo nano /opt/bitnami/php/etc/php.iniNow, the terminal will open the nano editor to edit the php.ini file. However, scrolling will be restricted by default in the system terminal and in Google Cloud Console, so we must use the following keyboard key combination to enter specific terms.
Type CTRL+W and enter the “Term” as you can see below in the image, then hit Enter key to find.
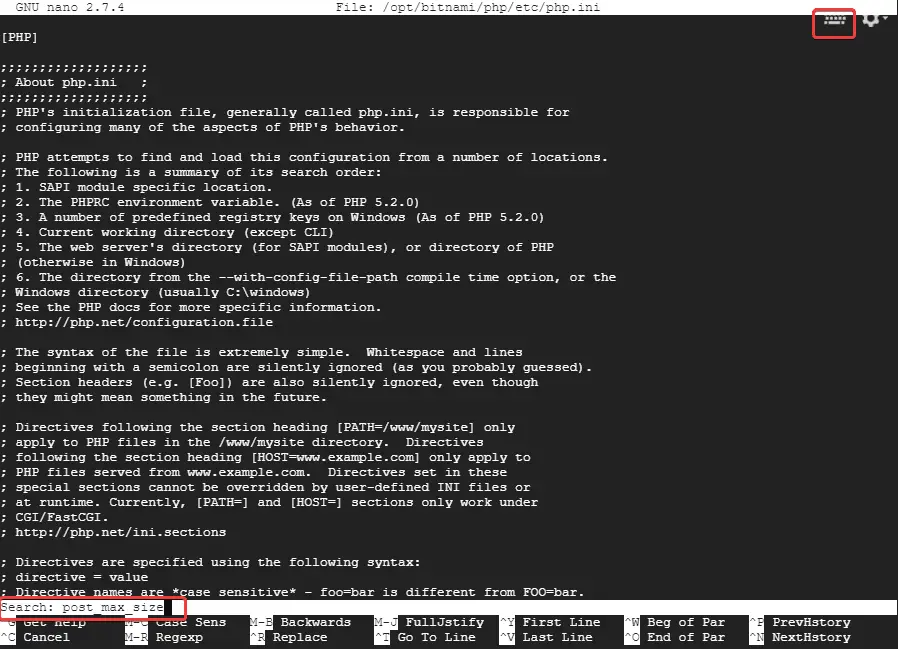
Note: GCP users can find a keyboard icon on their SSH terminal, clicking it will show the keyboard key combinations, where you have to select CTRL+W.
The search box will appear and search the specific term that is related to the Bitnami WordPress upload file size limit.
post_max_sizeupload_max_filesize
Change PHP Values to Increase Bitnami WordPress Upload File Size Limit
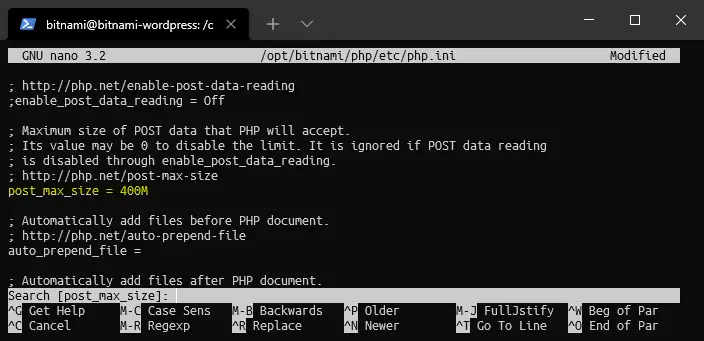
WordPress upload size value and post size value should be proportional to work efficiently. So, make sure of that, if you change the value of one of them then you should also consider changing another one.
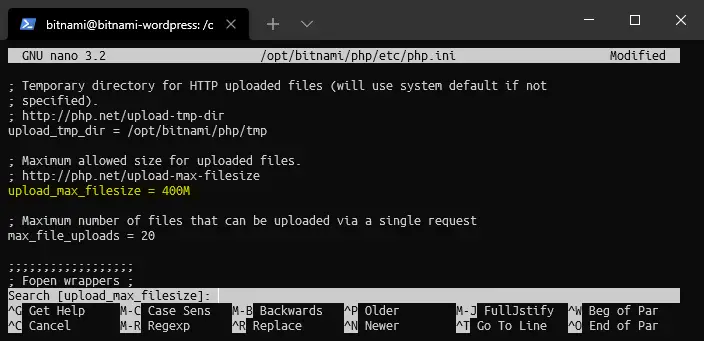
As we have done the modification, now we can save the changes by typing the following keyboard key combinations. Type CTRL+X then type Y and hit Enter to save changes.
Restart Bitnami Application
sudo /opt/bitnami/ctlscript.sh restart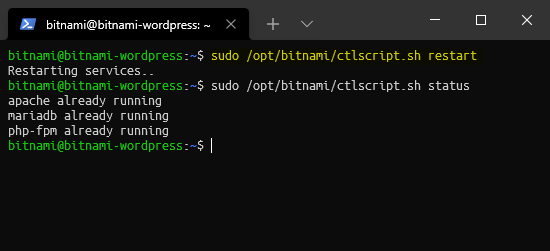
After restarting the Bitnami WordPress Application, check the WordPress Site Health dashboard to verify, that it is changed now.
Check Bitnami WordPress Upload and Post Size on Dashboard
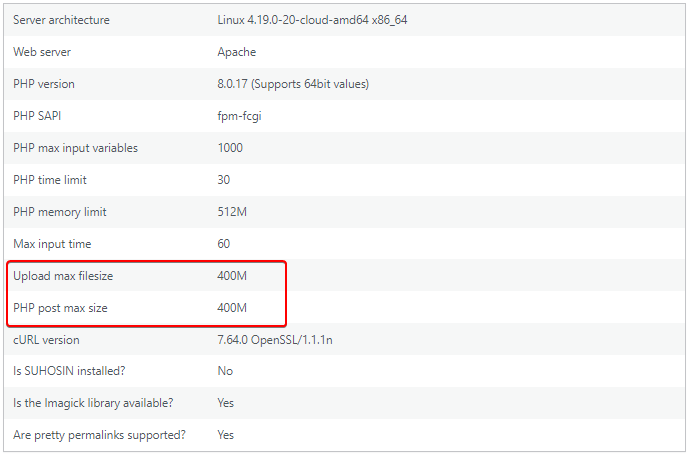
If you follow this procedure step-by-step and do changes in the php.ini file then the upload size will be increased without any problems. However, if you are using cPanel or CyberPanel to manage the WordPress application then you can follow this method to increase the WordPress upload file size limit.
How to Increase the WordPress Upload Limit by Plugin?

Go to WordPress dashboard and click Plugin then click Add New.
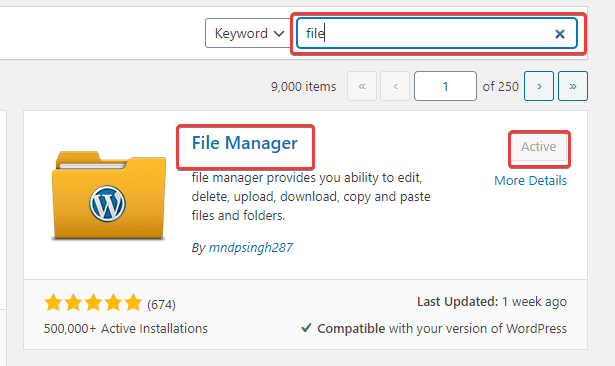
Search new plugin by typing “file”, and above show the image, as it as plugin install and activate. The plugin name is “File Manager“.
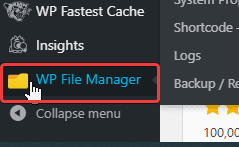
After activating the plugin, open the WP File Manager dashboard, and find the .htaccess file.
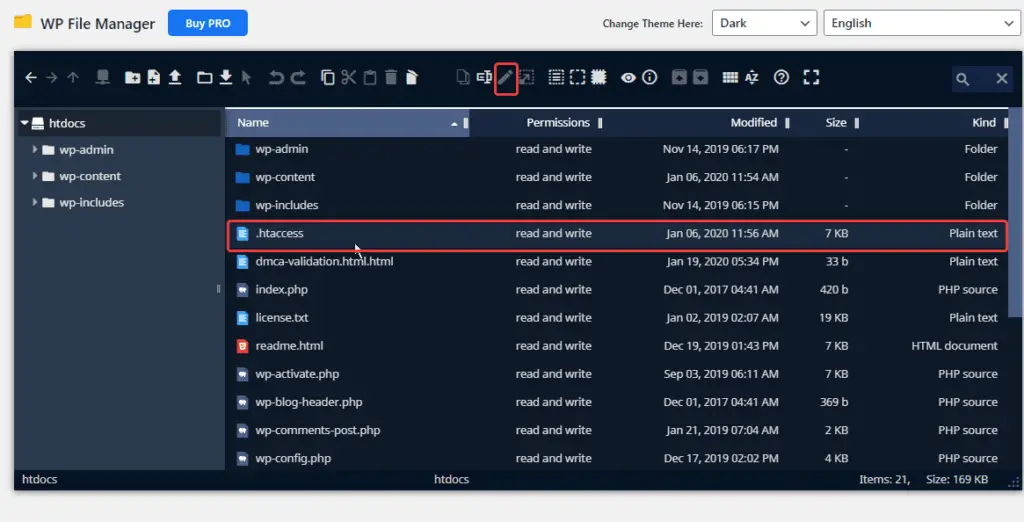
Click the Pen tool and edit the .htaccess and add the following value.
php_value upload_max_filesize 500M
php_value post_max_size 500M
php_value max_execution_time 300
php_value max_input_time 300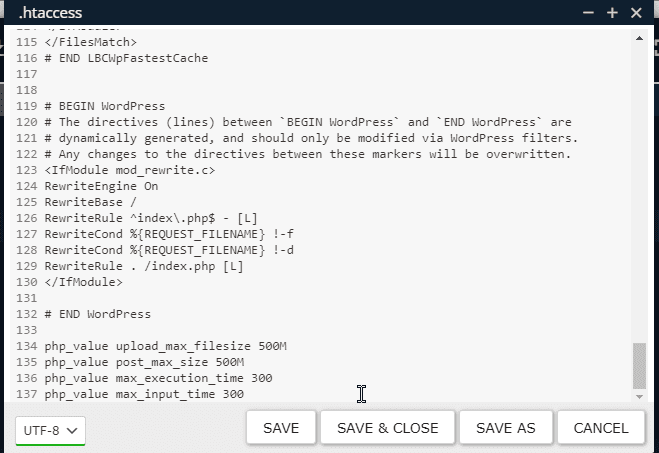
Summary
In most WordPress websites, you will get a limited file upload size, so in this article, we have explained how to increase the upload limit.
If you are using shared hosting like Namecheap or Hostinger, then there is no need to worry or configure yourself. You need to contact support and the rest of the work they will do for you.