SSL (Secure Sockets Layer) is the successor of TLS (Transport Layer Security). These are cryptographic protocols that provide secure communications between the browser (client) and the origin host (server).
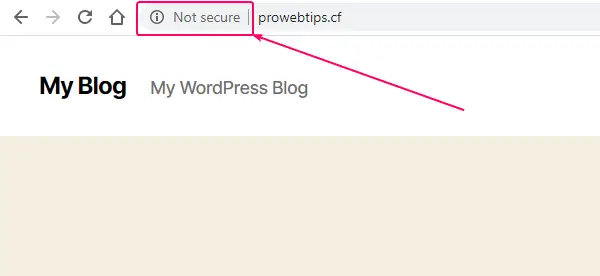
SSL Certificate defines whether your website is secured or not and it’s very important in terms of search engine optimization. If you notice that some older and outdated websites show the “Not secure” badge on the Google Chrome browser.
You can see the image below, I have installed a WordPress website in my cPanel and I haven’t added an SSL certificate. So, I am going to elaborate on how to install a free SSL certificate for free on any website.
If you are frustrated with installing manually SSL certificates on your website, then please check out Hostinger’s affordable web hosting with Lifetime SSL certificates and TLD domain otherwise follow the steps.
In this process, you don’t need any kind of debit or credit card for getting free SSL Certificates for your websites. You will get three SSL certificates every 90-day. After one-time verification, you will be free for the next nine-month.
So let’s dive deeper with us…
Step – 1 Enter Your Domain Name for a Free SSL Certificate
First of all, you need to visit sslforfree.com then enter your website’s URL, and click on to Create Free SSL Certificate Button. 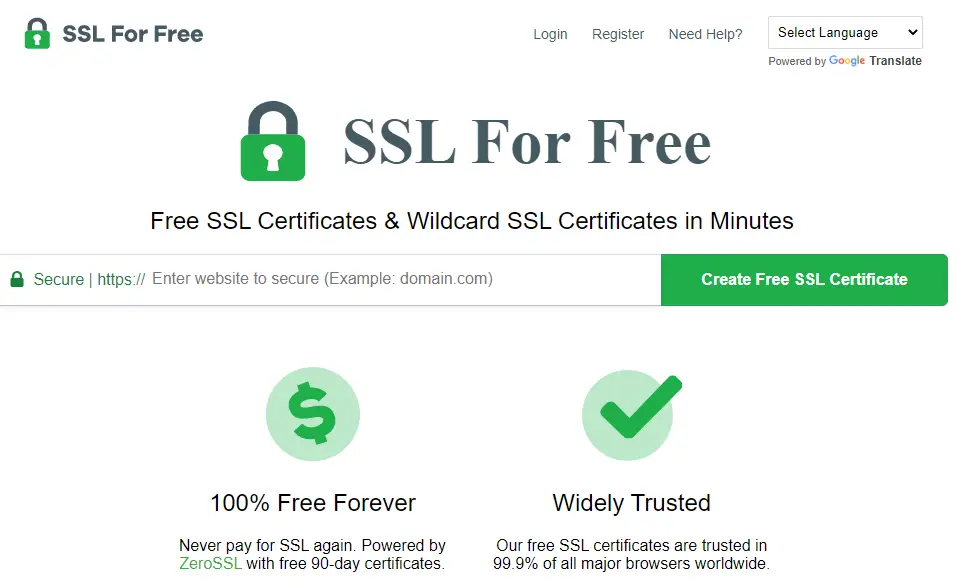
Step – 2 Sign up on sslforfree.com
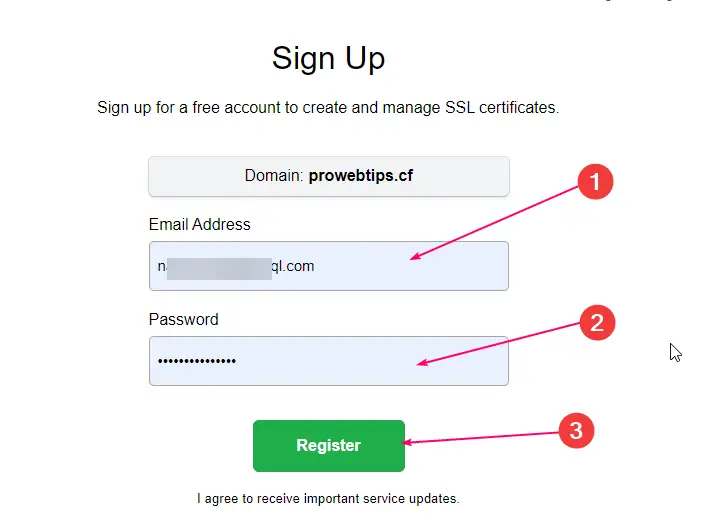
To sign up process you need to enter your valid email address and a password for future login. If you have an account already on this site then you need to just log in.
Step – 3 Setups of SSL Certificate
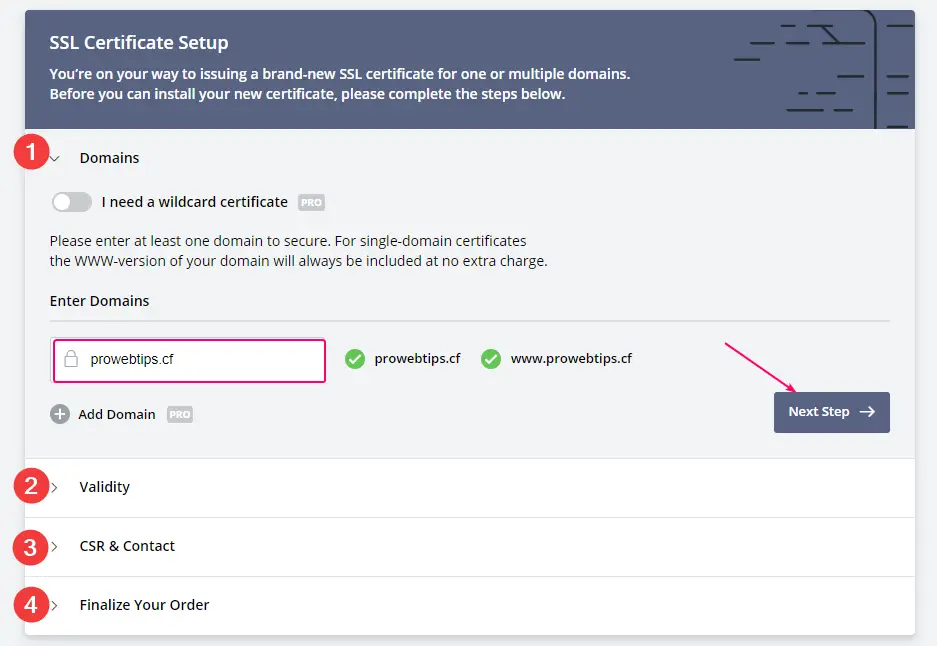
In this step, I will show you how to set up your SSL Certificate like the required domain name, Certificate validity, CSR & contacts record and how to finalize the free SSL Certificate order.
1. Domain Names
You need to enter your domain name (as shown in the image above), you can add multiple domains but that would be for paid users. Enter the domain name, then click Next Step ➡.
2. Validity
You can choose only 90 days option for a free SSL Certificate, if you need it for the long term then you can purchase it. But I suggest you buy a good shared hosting plan, most web hosting provider gives free SSL certificates. Hostinger provides affordable shared hosting with lifetime free SSL certificates, don’t believe check yourself.

3. CSR & Contact
CSR & Contact is an information box that shows the contact information of the owner of the website. When you click the green lock bar on the browser then the browser shows the information. So, in this step, you can put your contact information or generate it automatically. So, enable the Auto-Generate CSR toggle and click Next Step ➡. 
4. Finalize Order
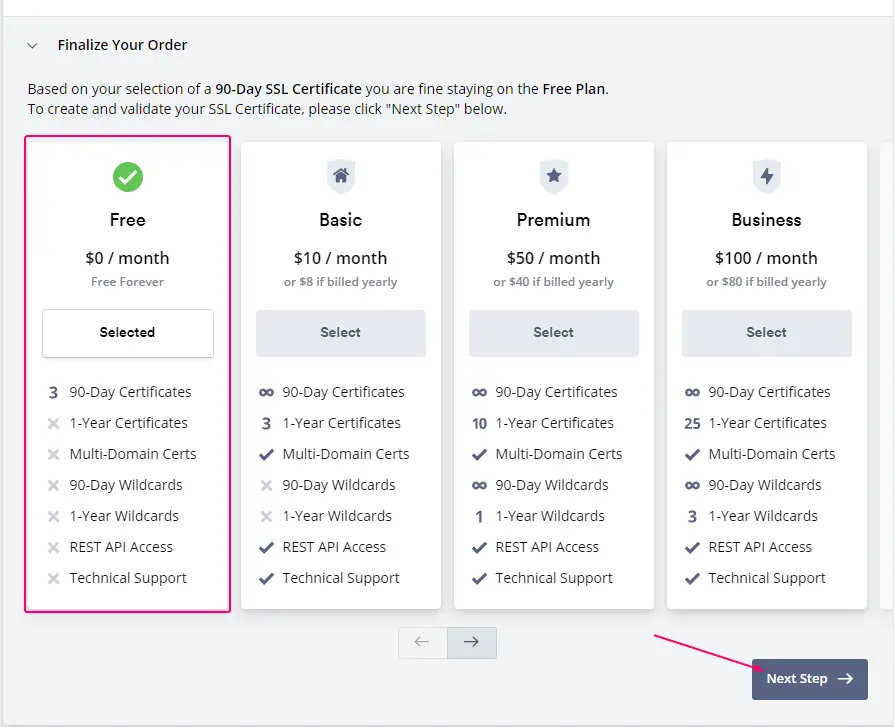
Now, finalize the free SSL certificate by choosing the plan, and selecting Free Plan $0/month. You will get 3 certificates for 9 months, which means every certificate validity will be 90-days only.
If you want renewable tension-free SSL certificates then check out the deals to get up to 86% off.
After choosing a free plan, click Next Step ➡.
Step – 4 Domain Verifications via HTTP file method
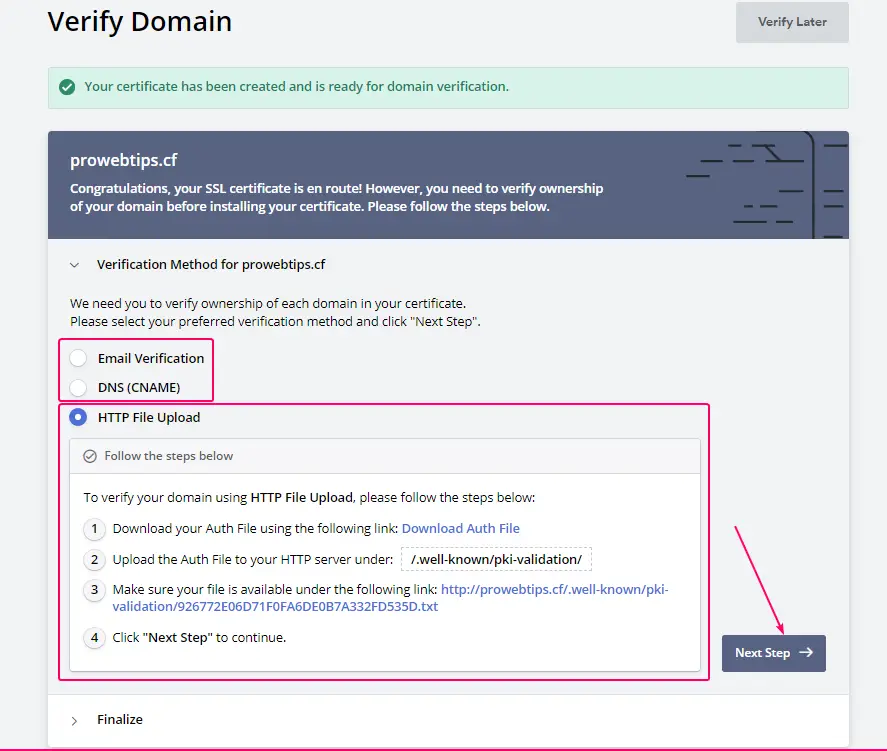
There are three methods to verify your domain ownership, first via email method: in this method, you should have an exact domain-specific email. Suppose your domain name is example.com and then your email account should be [email protected]. Afterward, this website will send you an email for verification.
Must Read:- How to create a free custom email address on Zoho?
The next method is DNS (CNAME) records: you need to add some information to your DNS management. Most domain name registrar has the features to add CNAME or TXT records, but in case your domain name provider doesn’t have these features then your contact customer service or point your domain name to Cloudflare for getting full control of your domain.
Check out the article on how to point the domain to Cloudflare.
The third method which I have used in this tutorial, this method is fast and reliable. This method is called the HTTP file upload method. As you can see in the image below, you need to download a file and need to be uploaded in your Web hosting storage.
So, how to upload the downloaded HTTP file? Check out the next step.
Step – 5 Uploading HTTP File in cPanel for Verification
1. Open File Manager in cPanel
First of all, you should be logged in to your web hosting dashboard (cPanel, Web Panel, or Plesk), now find the file manager option, and open it.
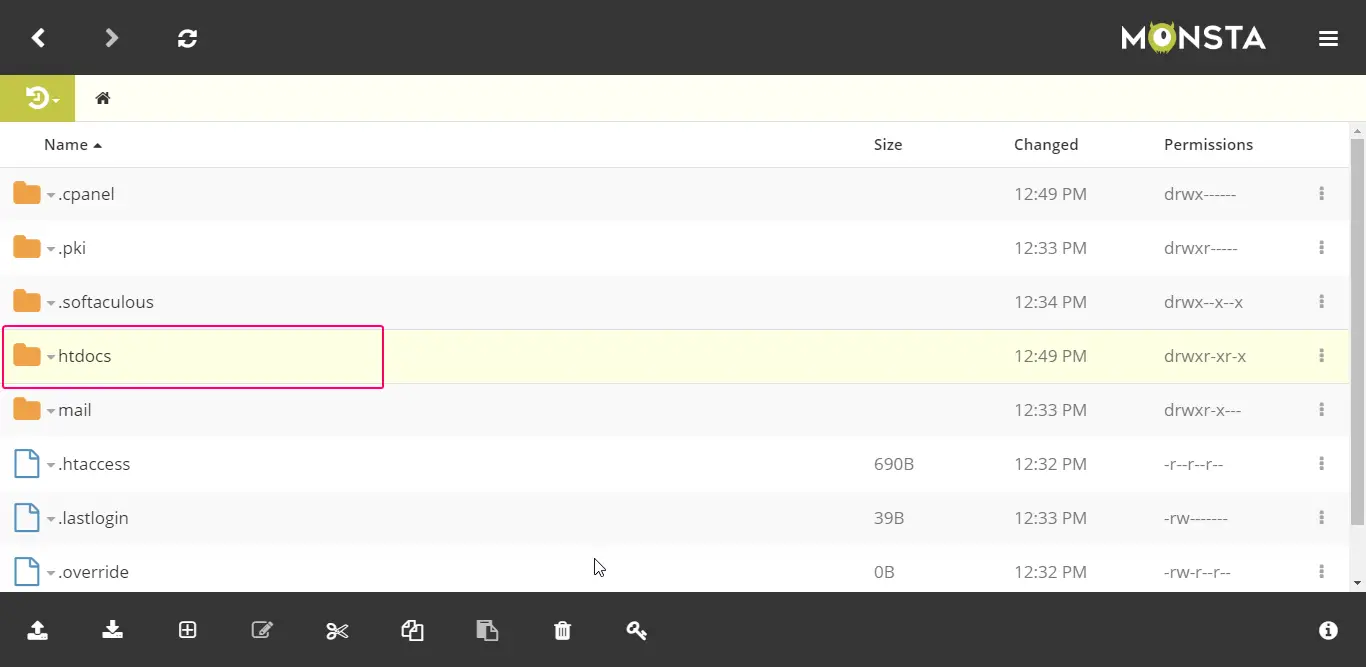
Now find htdocs (public_html in some other cPanel account) and open the directory. In this directory, we need to create a folder and subfolder.
2. Creating two new folders for uploading HTTP file
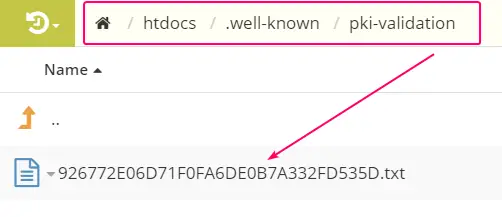
When you open the directory you need to create a folder and a sub-folder as you can see in the image below. The folder name should be .well-known and the sub-folder would be PKI-validation.
When you have done, then you should upload the downloaded file, the downloaded file would be in .txt format, and sometime it would be without any extension.
3. Verify the HTTP file by opening a path in the browser
After successfully uploading the HTTP file you need to verify by opening the directory in your browser tab, as you can see in the image below.

4. Finalize the Domain Verification
Now the final step of verification, if you have done the installation everything successfully you need to return to the website freeforssl.com to verify the domain.
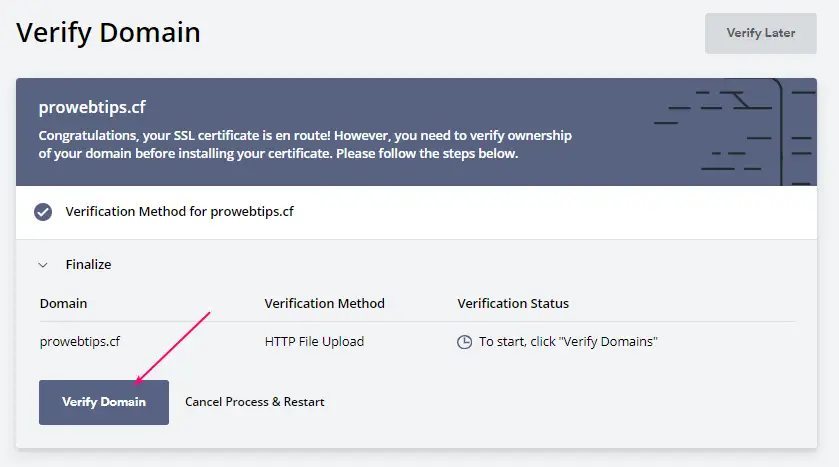
As you can see in the image below you need to click on the Verify Domain button for verification. If everything is okay then you will see Success! Message.
Step – 6 Install SSL Certificate
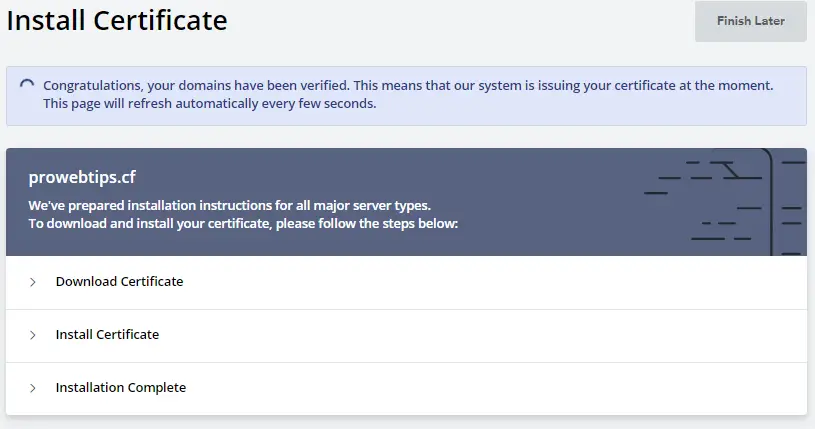
In the final step of installation of the SSL certificate to the server, after successful domain verification, you need to download the certificate bundle that’s included with Private Key, CSR, and the Certificate.
1. Download the SSL Certificate Bundle
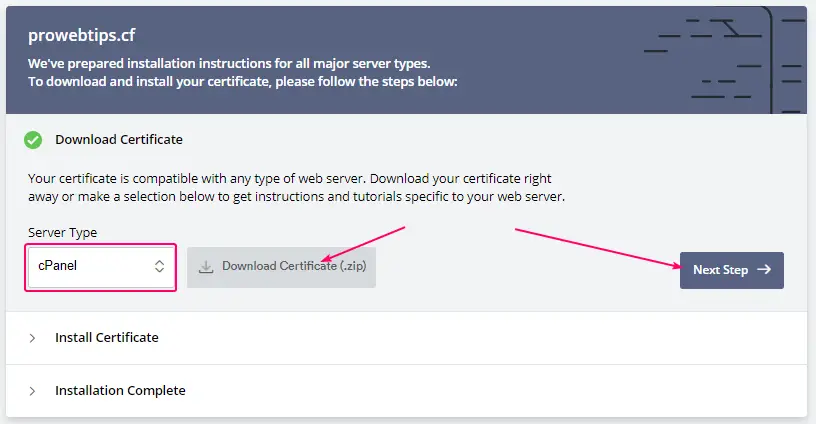
Select your server type, if you don’t know then select cPanel as default, then click the Download Certificate button for Private key, CSR, and Certificate file.
2. Re-Open the cPanel Dashboard and find SSL/TLS
Now, after downloading the certificate bundle you need to open your Web hosting dashboard and find SSL/TLS for installation of the SSL certificate.

3. Upload the extracted Certificate file
After opening the SSL/TLS section you would see the three empty boxes, you need to insert the downloaded file’s data here as you can see in the image below.
So, how to get the data? When you download the Certificate bundle in ZIP format, first of all, you need to extract the file, then you will get three .crt files. Now you should open these files one-by-one in any text editor software (ex. Notepad++) and copy the data and paste it into the empty boxes.
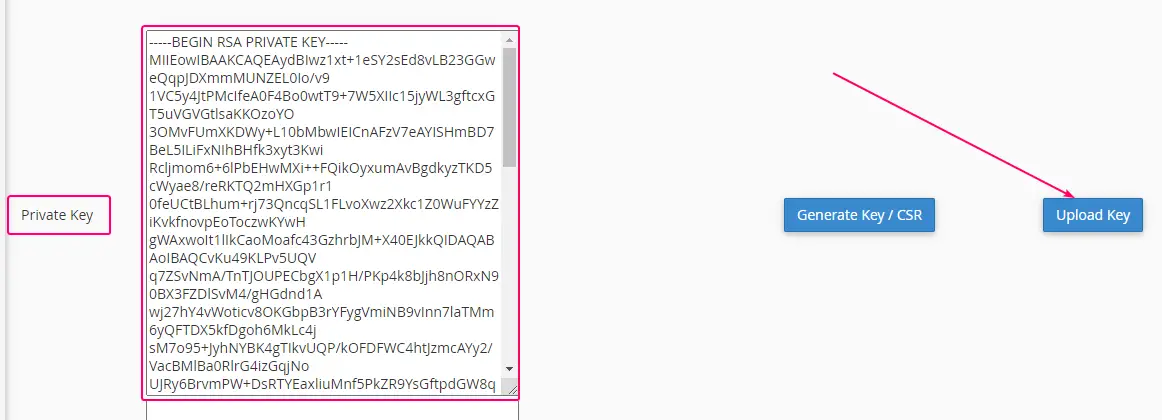
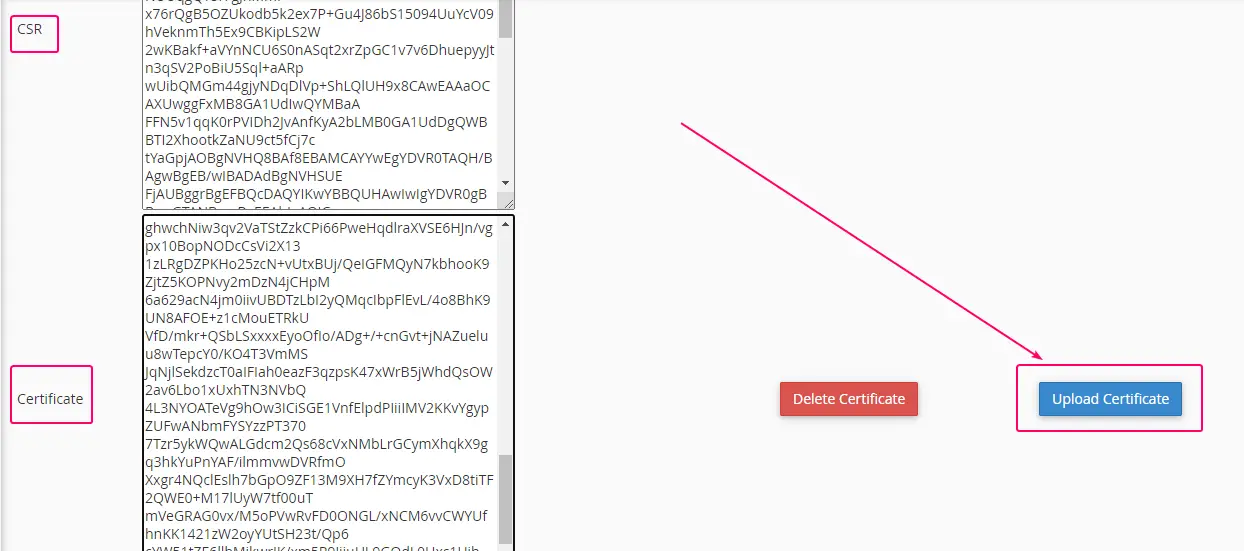
Note: - Please insert Key file data in Private Key box, and CSR data in CSR box, and the Certificate or CA data in Certificate box.
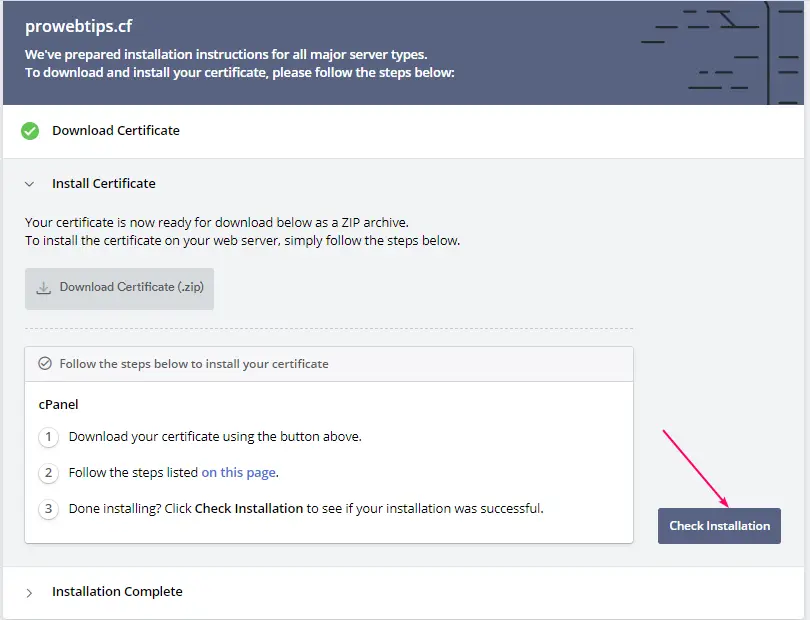
4. Check SSL Certificate Installations
Finalizing the installation by checking the installation by clicking the button as you can see in the image below.
Step – 7 Checking the actual Website for SSL
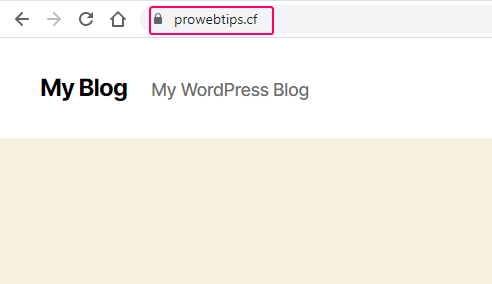
Check the installation of the SSL certificate on your website, I checked the website using https:// before the domain name. If it’s configured correctly then it will show a lock sign if not then your browser will give a warning.
Step – 8 Force Redirect to HTTPS
The final step of the configuration SSL certificate on the website is to force a redirect to HTTPS. Your visitor will never add the https manually so your website will open in HTTP protocol. So, if you redirect your website HTTP to HTTPS, then visitors automatically redirect to the secure page without adding HTTPS before the URL.
So, how to do that?
Open your website dashboard and install a plugin, named Really Simple SSL. Install the plugin and activate it, then your website will automatically be redirected to the secure server.

Conclusion
There it’s the conclusion and my thought about installing a free SSL certificate, if you need top-notch security or encryption then you should purchase premium Wild card SSL certificates. These wild card certificates are recommended for e-commerce or big business websites.
If you have a simple blogging website then you should use free SSL certificates, but these certificates are not for the long term you need to renew after every 90 days. For this reason, I suggest you buy a shared web hosting plan Hostinger provides a lifetime validity SSL certificate that is included with their web hosting plan.