If you want to install Redis in your system, you are in the right place. In this article, I have explained all the easiest methods to install Redis in your system.
Before we start the tutorial, you should know what Redis is and why we use it.
What is Redis?
Redis (aka. Remote Dictionary Server) is an in-memory data structure store, used for object caching and as a message broker. Redis supports different kinds of data structures, and we don’t talk about that. But if you are working on any web app projects, Redis could be helpful.
As I am a WordPress web developer and all of my websites and clients’ websites, I have installed the Redis server for persistent object caching, which helps to improve the website’s performance.
Install Redis on Ubuntu 18.04 & 20.04 LTS
This method will also work in other versions of Ubuntu (Ubuntu 18.04 LTS, 16.04 LTS, and 14.04), so there are some prerequisites for this, such as root permission in the system and should be installed latest PHP in the system. Then you can follow the steps given below.
Step 1. Update System
Before installing the Redis server on Ubuntu, you have to update the system and all the dependencies and then upgrade with the newer updates. So, use the following commands.
sudo apt update && apt upgradeStep 2. Installing Redis Server
Redis Server package data is available in Linux’s apt (Advanced Package Tool) repository, and Redis can be installed in Ubuntu using the following command.
sudo apt install redis-serverAfter installation of Redis, check the status of the service, is running or not. So run the following command.
sudo service redis status
Step 3. Configure Redis
Redis server can be used without modification with the default configuration file. But using Redis as a cache, you have to modify some parameters in the default configuration file, which is located in /etc/redis/redis.conf. Edit the configuration file using any text editor or run the following command to edit on the terminal.
sudo nano /etc/redis/redis.confNow, you have to find #maxmemory and replace it with the following value.
maxmemory 128mb

maxmemory-policy allkeys-lru
You can change the memory value as you want (56 MB, 128MB, or 256MB). If you are installing Redis for your web apps or website, then choose the memory values as per your web traffic.
Now save the configuration file (CTRL+X and Y ↵) and restart the Redis services using the following command.
sudo systemctl restart redis-server.serviceStep 4. Installing PHP Redis Extension
If you want to use PHP-based applications with the Redis server, you should install the PHP Redis extension using the following command. Before installing the module, you should already install PHP in the system.
sudo apt-get install php-redisYour system has a specific version of PHP. You should also need to install a distinct version of the PHP Redis extension. Like your system already installed PHP 7.4, then you have to install specifically for that version. So you have to run a specific command.
sudo apt-get install php7.4-redisMust Read:- Check out how to upgrade php7.4 to php8.0.
Step 5. Test Redis Connection, Is that Working or Not
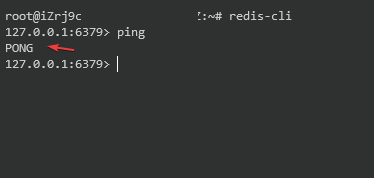
Using Redis CLI, you can test that the Redis server is working correctly, so run the following command.
redis-cli ping
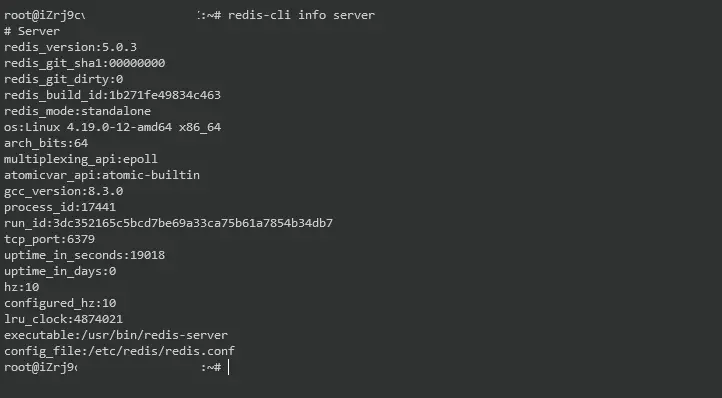
Here are other commands to get information about the Redis server, or you can check the official website.
redis-cli inforedis-cli info statsredis-cli info server
Wrapping Up!
Redis Server is open-source software, mainly used for data storage and object caching. Redis Server can be easily installed in Ubuntu machines as mentioned above. How to install Redis Server in Debian 10 and other operating systems can be read in our blog.