As you know for running a website on the internet you must have a webserver. There is two most popular and widely used open-source application that works as an HTTP web server, and the software is Apache and Nginx. So, in this article, I will show you how you can install a WordPress website on an Nginx web server running on Ubuntu 20.04 LTS VPS.
For this tutorial, I was using Oracle Cloud, and I have written an article about Oracle Cloud, and there, how you can deploy two Compute instances for free. Perhaps, if you have any paid cloud hosting like Cloudways, Linode, or Liquid Web, then you can create a VPS server and host a WordPress website as in this tutorial.
Pre-requisites For Installing WordPress with Nginx
There are no special requirements for the WordPress installation with Nginx, however, I have specified some details, that are helpful if you follow.
- PHP 7.2+ (Recommended)
- MySQL/MariaDB Database
- Nginx
- Linux System with 10+ GB of Storage
Use Ubuntu or Debian Linux distribution, because these two open-source operating systems are far most used for web hosting purposes, they have better community support and fantastic documentation. And especially like their simple command line.
So, let’s begin the installation procedure of WordPress based on the Nginx web server.
Perform Basic Server Configuration
When you deploy a VPS server, you must manage the basic configuration of the server like system updates, firewall rules, etc.
Update the system:
sudo apt update && sudo apt upgrade -yRemove unnecessary programs:
sudo apt autoremoveInstall UncomplicatedFirewall (UFW) & Add rules:
sudo apt install ufwsudo ufw allow ssh
sudo ufw allow http
sudo ufw allow httpsEnable UncomplicatedFirewall (UFW):
sudo ufw enableBefore installing any crucial programs to host a WordPress website, you must perform these basic configuration commands. In case you are using any shared hosting based on cPanel or others, you don’t have to manage everything.
And we all know VPS hosting is far better than shared hosting, and for that, you have to be a little technical. So let’s start the process of installing WordPress.
Install Required Programs for WordPress with Nginx
For installing WordPress on a VPS server, you will need three major components, a web server, a database, and a scripting language. In the case of WordPress, you can use Apache or Nginx as a web server, for the database MySQL, although WordPress is based on PHP so your system must have the latest version of PHP.
So, here I am going to show you how to install these three components in a VPS server step by step.
Install Nginx
Nginx is the first component for WordPress installation on the Ubuntu server. Nginx is a free open-source HTTP web server, that also works as a load balancer, and a reverse proxy tool.
Update system:
sudo apt update && sudo apt upgrade -yInstall Nginx Web server:
sudo apt install nginx -yCheck Nginx status:
service nginx status..Output
...
root@ubuntu-nginx-test:~# service nginx status
● nginx.service - A high performance web server and a reverse proxy server
Loaded: loaded (/lib/systemd/system/nginx.service; disabled; vendor preset: enabled)
Active: active (running) since Wed 2021-07-21 02:34:01 IST; 41s ago
Docs: man:nginx(8)
Main PID: 16743 (nginx)
Tasks: 2 (limit: 2010)
Memory: 4.0M
CGroup: /system.slice/nginx.service
├─16743 nginx: master process /usr/sbin/nginx -g daemon on; master_process on;
└─16744 nginx: worker process
Jul 21 02:34:01 ubuntu-nginx-test systemd[1]: Starting A high performance web server and a reverse proxy server...
Jul 21 02:34:01 ubuntu-nginx-test systemd[1]: nginx.service: Failed to parse PID from file /run/nginx.pid: Invalid argu>
Jul 21 02:34:01 ubuntu-nginx-test systemd[1]: Started A high performance web server and a reverse proxy server.
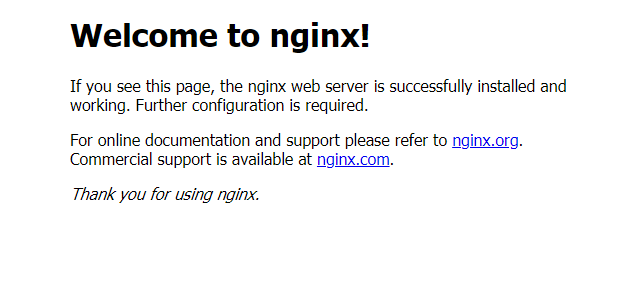
lines 1-14/14 (END)Now type CTRL+C to end the Nginx service status output. And then open your browser and visit your server’s public IP address (http://public_ip_address/).

Note: –
In Oracle Cloud, I encountered some issues regarding the firewall rules. Deploying an instance and setting the firewall rules on the VCN subnet section for HTTP and HTTPS requests is not enough, because after adding the rules the accessibility will same without adding any VCN rules.
But in my research, I found an article on Oracle developer documentation, and according to them, you have to execute some commands to add iptables firewall rule on each OCI.
But good thing is that if you are using any other cloud partner except Oracle then, this step is not required.
Execute the following two commands (OCI users):
sudo iptables -I INPUT 6 -m state --state NEW -p tcp --dport 80 -j ACCEPT
sudo iptables -I INPUT 6 -m state --state NEW -p tcp --dport 443 -j ACCEPT
sudo netfilter-persistent save
Install PHP
PHP is a popular scripting language and for WordPress, it is a required component. With a few commands, you can install the latest stable version of PHP with the required modules.
Add ppa:ondrej/php repository:
sudo add-apt-repository ppa:ondrej/php -yUpdate system:
sudo apt updateInstall PHP with required mods:
sudo apt install php7.4-fpm php7.4-common php7.4-mysql \
php7.4-xml php7.4-xmlrpc php7.4-curl php7.4-gd \
php7.4-imagick php7.4-cli php7.4-dev php7.4-imap \
php7.4-mbstring php7.4-opcache php7.4-redis \
php7.4-soap php7.4-zip -y
Check PHP version:
sudo php -v..Output
...
root@ubuntu-nginx-test:~# php -v
PHP 7.4.21 (cli) (built: Jul 1 2021 16:09:41) ( NTS )
Copyright (c) The PHP Group
Zend Engine v3.4.0, Copyright (c) Zend Technologies
with Zend OPcache v7.4.21, Copyright (c), by Zend Technologies
Install MariaDB database
The database is the required component for a WordPress website. All crucial information will be stored in a table format in the database software. The most widely used database software is MySQL and it is an open-source program. However, in this tutorial, I am going to use MariaDB which is a forked version of MySQL database software and is easy to use.
So, let’s begin the installation procedure of the MariaDB database, although I have a dedicated article to install MySQL and MariaDB on the Ubuntu server, you can read the in-depth articles and know the cheats of the MySQL.
Add MariaDB repository:
sudo apt-get install software-properties-commonsudo apt-key adv --fetch-keys 'https://mariadb.org/mariadb_release_signing_key.asc'sudo add-apt-repository 'deb [arch=amd64,arm64,ppc64el] http://mirrors.up.pt/pub/mariadb/repo/10.4/ubuntu focal main'Install MariaDB:
sudo apt install mariadb-server -y
Secure MariaDB Installation:
sudo mysql_secure_installation..output
...
root@ubuntu-nginx-test:~# sudo mysql_secure_installation
NOTE: RUNNING ALL PARTS OF THIS SCRIPT IS RECOMMENDED FOR ALL MariaDB
SERVERS IN PRODUCTION USE! PLEASE READ EACH STEP CAREFULLY!
In order to log into MariaDB to secure it, we'll need the current
password for the root user. If you've just installed MariaDB, and
haven't set the root password yet, you should just press enter here.
Enter current password for root (enter for none):
OK, successfully used password, moving on...
Setting the root password or using the unix_socket ensures that nobody
can log into the MariaDB root user without the proper authorisation.
You already have your root account protected, so you can safely answer 'n'.
Switch to unix_socket authentication [Y/n] Y
Enabled successfully!
Reloading privilege tables..
... Success!
You already have your root account protected, so you can safely answer 'n'.
Change the root password? [Y/n] Y
New password:
Re-enter new password:
Password updated successfully!
Reloading privilege tables..
... Success!
By default, a MariaDB installation has an anonymous user, allowing anyone
to log into MariaDB without having to have a user account created for
them. This is intended only for testing, and to make the installation
go a bit smoother. You should remove them before moving into a
production environment.
Remove anonymous users? [Y/n] Y
... Success!
Normally, root should only be allowed to connect from 'localhost'. This
ensures that someone cannot guess at the root password from the network.
Disallow root login remotely? [Y/n] Y
... Success!
By default, MariaDB comes with a database named 'test' that anyone can
access. This is also intended only for testing, and should be removed
before moving into a production environment.
Remove test database and access to it? [Y/n] Y
- Dropping test database...
... Success!
- Removing privileges on test database...
... Success!
Reloading the privilege tables will ensure that all changes made so far
will take effect immediately.
Reload privilege tables now? [Y/n] Y
... Success!
Cleaning up...
All done! If you've completed all of the above steps, your MariaDB
installation should now be secure.
Thanks for using MariaDB!Create Database & Configure
Now the MariaDB database server is installed, you have to create a database for storing WordPress’s information. So, using the following commands you can create a or more databases.
Login MariaDB/MySQL CLI:
sudo mysql -u root -pWhen you execute the command, the system will prompt you to enter the MySQL root password. Enter the password and proceed with the database creation.
Create database:
CREATE DATABASE wp_example CHARACTER SET utf8mb4 COLLATE utf8mb4_unicode_ci;Create a user and set a password:
CREATE USER 'user'@'localhost' IDENTIFIED BY 'password';Grant privileges:
GRANT ALL PRIVILEGES ON wp_example.* TO user@localhost IDENTIFIED BY 'password';Flush privileges and exit:
FLUSH PRIVILEGES;exit;Download WordPress & Configure
Before configuring the Nginx web server, need to download WordPress files and need to set them up. So, use the following commands.
sudo cdDownload WordPress file:
wget -c https://wordpress.org/latest.tar.gzExtract WordPress compressed file:
tar -xvzf latest.tar.gzCreate Site directory:
sudo mkdir /var/www/html/sitenameCopy extracted files to the site directory:
sudo rsync -avP ~/wordpress/ /var/www/html/sitenameGive writable permission to site directory:
sudo chown -R www-data:www-data /var/www/html/sitenamesudo chmod 755 -R /var/www/html/sitenameNow, don’t have to edit the wp-config.php file manually, because in the next step we are going to configure the Nginx conf file, and after that when we open the site URL, it will automatically configure most of the WordPress settings.
Configure Nginx
Configuring Nginx would be hard but using tools like Digital Ocean Nginx Config, you can configure Nginx easily and even can install free let’s encrypt SSL certificates. But here I am going to show you the basic configuration of Nginx.
Keep in mind, that Nginx configuration depends on your website requirements, so I strongly suggest you use the Digital Ocean Nginx Config Tool.
Edit Nginx file to configure WordPress:
sudo nano /etc/nginx/sites-available/defaultserver{
listen 80 default_server;
listen [::]:80 default_server;
root /var/www/html;
index index.php index.html index.htm index.nginx-debin.html;
server_name server_domain_or_IP;
location / {
try_files $url $url/ -404;
}
location ~ \.php$ {
include $nippets/fastcgi.php.conf;
fastcgi_pass unix:/run/php/php7.2-fpm.sock;
}
location ~ /\.ht {
deny all;
}
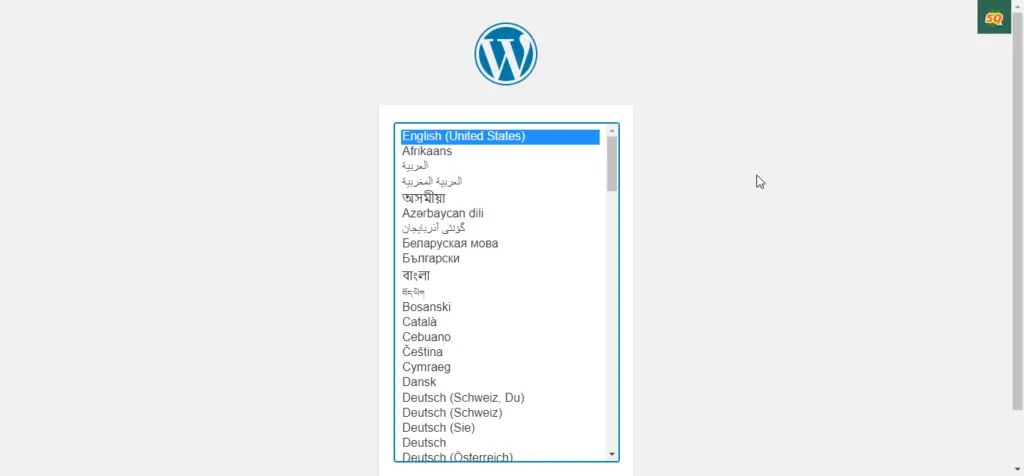
}sudo nginx -tsudo systemctl reload nginxNow, open your WordPress website URL and set up the basic information like database credentials and the site information.

So, that is the basic configuration file for WordPress on Nginx. However, for better security and robust configuration, check out the article about Digital Ocean NginxConfig.