Building an email list is a sign of being a successful marketer. You can increase your business and traffic to the website with the email list, and there are many benefits to it. Creating an email list comes under email marketing.
When users subscribe to your mailing list and send them commercial emails, newsletters, and emails to promote your business, it is called email marketing.
To do email marketing and capture email, you will need an email marketing tool. This article will use Mailchimp, a popular tool, and there are other popular alternatives available in the market. You can learn about them in our Email Marketing Tools blog post.
So to capture the emails, we need a lead magnet or newsletter subscription form. For the Newsletter subscription form, you can use embedded forms or use the plugin to create a form on a WordPress website.
You can get embedded forms directly from the email marketing tool provider’s website, and you can use plugins like Elementor Pro site builder to create your beautiful form. Elementor Pro is a paid plugin, but using some free plugins also you can do that.
But if you know, embedding code from an external source and installing the plugin on a WordPress website reduces its performance.

Is Your Website Slow?
Migrate to Hostinger and get up to 80% off on all shared hosting plans. Hostinger is one best hosting in terms of performance and affordability. Starts at $1.99/mo.
So I will give you a complete working HTML code in this article so that you can use it on any of your websites. All you have to do in this code is change the action URL.
Where can I get the action URL for the newsletter form? As I said earlier, we will use Mailchimp Email Marketing Tool, and you can get the form action URL from Mailchimp. To learn how to start email marketing on Mailchimp, see Mailchimp’s tutorial.
Complete Code (HTML, CSS, & JS)
As you can see in the live preview above, I have embedded HTML, CSS, and JavaScript code. You can fork this code on Codepen by clicking on the code. In this article, we will explain the implementation of this code which you can read below.
See the Pen Custom Newsletter Form by Pronay Sarkar (@itsmepronay) on CodePen.
How To Add The Newsletter Form To the Website
Adding this newsletter form to your website is so simple. If you have a custom CMS or WordPress, you can add the code by yourself. So, I will tell you to step by step process of combining the code and inserting it into a website. Before we proceed with the steps, you should have an active account with Mailchimp; if not, sign up first.
Step – 1. Combine the code

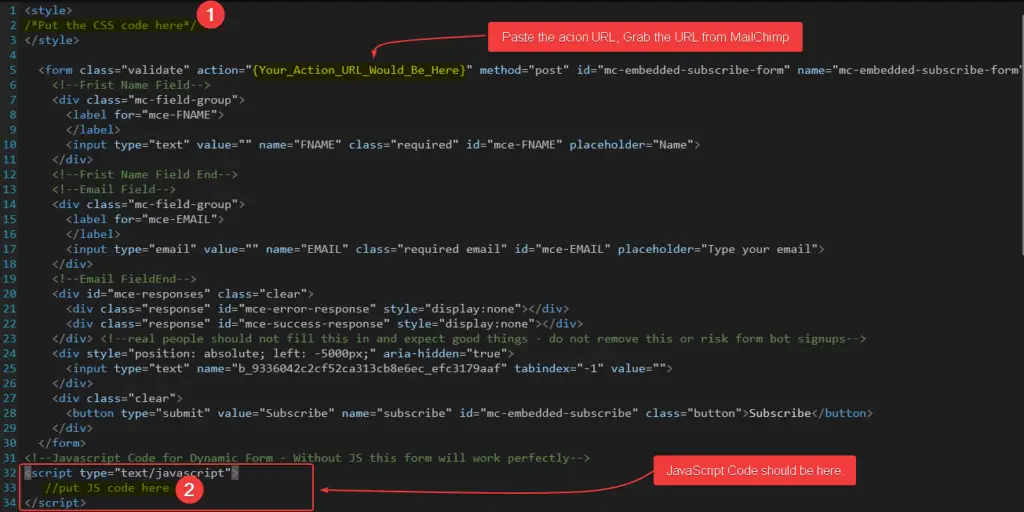
As you can see in the image above, you have to combine HTML, CSS & JS code in one place. If you don’t want to add JavaScript code to your newsletter form, it will still work without any problems.
The CSS code and JS code you can get from this article, and I have already embedded the complete code above. So, first of all, copy the CSS code and paste it between the <style></style> tag, and at the bottom, in between <script type="text/javascript"></script> tag, you have to paste the JS code.
Finally, as you can see in the image above, you have to insert your Mailchimp action URL in the {Your_Action_URL_Would_Be_Here} place. After you have copied your complete code, then paste it to the website.
Step – 2. Insert the code into the website
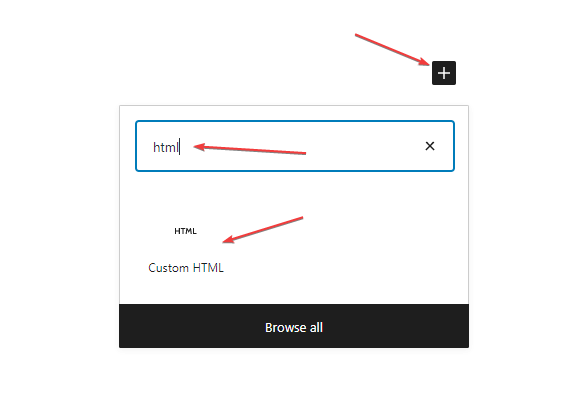
After combing the complete code, you have to insert it into the website. In this tutorial, I have used the WordPress website and its block editor. First of all, you have to open the page or post where you want to place the custom newsletter form’s code. If you are using a premium theme like GeneratePress, Astra, or Neve Pro, you can create a custom layout or “Element” and insert it globally.

As you can see in the image, open the page or post section where you want a newsletter form. As the WordPress block editor, you have to click on the plus sign to add a block, so click on the plus and find “Custom HTML.”

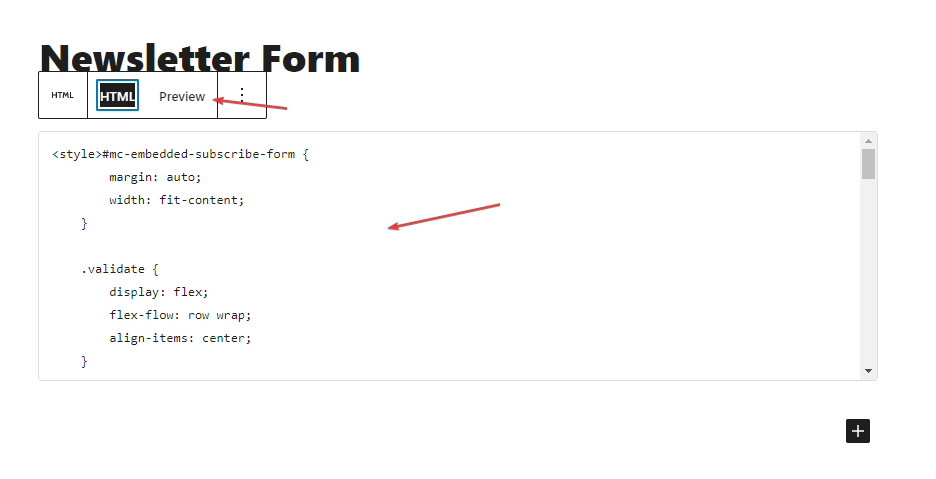
After adding the block, you have to paste the complete combined code in the custom HTML section. You can check the preview before publishing the page or updating the page, so you can be sure that the newsletter form is working fine.

As you can see in the preview above in the image, if your code also shows like this, hit the “Publish” or “Update” button.
In case you have a custom-made website instead of WordPress, you can also use the same code on the website. Have a fear that, something will happen with the website when you place the code. Then you should contact an expert to place the code without any issues.
FAQs About Adding Custom Newsletter Form
How to create a working custom HTML Newsletter form for WordPress?
To create a working HTML newsletter sign-up form, you have to sign up with Mailchimp to grab the action URL. Then create an HTML file, making sure that it contains the Name field to enter the user name and the Email field to enter the email. And there should be a subscribe button for submission. If you want to get more information from him besides his name and email, mention those fields. After the HTML file, use CSS code for the design. And then put this entire code on your website.
How to add a newsletter form in WordPress using a plugin?
There are many plugins to add a newsletter sign-up form to the WordPress website. But if you are looking for a free plugin, you should go with Contact Form 7 or Ninja Form.
How to create an email signup form using Mailchimp?
Mailchimp is a fantastic email marketing tool. Mailchimp provides up to 1000 email subscribers in their free plan, and you can increase the limit by upgrading to the paid plan. By the way, you can create a custom email signup form using Mailchimp form builder, and then you have to embed the code in your website. You can create various types of email sign-up forms like popups, dynamic embedded forms, etc.
Wrapping up!
As I have told you before, installing a plugin means increasing the server load and unnecessary static files on your website. Visitors never liked the slow website, so I have created a custom newsletter form or email magnet for this case.
I have provided the HTML, CSS, and JavaScript code, and If you don’t want to use JavaScript, it is great; the form still works flawlessly. By the way, this custom form size is less than 5 Kb, which means this form can’t affect your website speed.
If you liked the post, don’t forget to share, and have any issues with the code, then don’t forget to comment. I will reply asap!