Do you know? You can create a WordPress website offline on your computer.
Many new bloggers want to start their website on WordPress, and due to the lack of basic knowledge of WordPress, they face problems related to customization and SEO.
But if you learn such basic WordPress optimization first, then you can run the live website efficiently.
You can even migrate your offline WordPress website to a live server. Installing WordPress on a local machine is very easy, and beginners can quickly learn how to build a WordPress website without buying a domain and web hosting.
There is some software to create offline WordPress websites on the computer, through which you can easily create a website based on other popular languages, not just the WordPress website. For example, there is software such as XAMPP, WAMP, MAMP, Local, and Docker.
Why should you create a WordPress website locally?
Installing WordPress on Localhost gives you an isolated testing environment, which is excellent for beginners and professional developers. You can experiment on the established WordPress website on your computer, then apply the results of your experiments on your online live website at your convenience. That means you don’t have to worry about your live website.
For beginners who have not yet created their website on a live server, the WordPress website installed on localhost is a learning source. You can learn a lot, from general customization to code manipulation, etc. You can learn on your computer without buying domains and web hosting (you won’t even need the internet to some extent).
There is a better advantage of creating a WordPress website on Localhost, and that is you can push your local website to a live server at any time. Some people install WordPress on the localhost to stag their live website and do various tests on the website, and if the test results are not good, they do not affect the live website.
No.1
XAMPP
XAMPP is software, using it you can easily create WordPress websites or any other web projects on your local computer environment. If you want to install other popular software like Joomla or Drupal on your computer, you can install XAMPP’s add-ons with one click.
This article will tell you to Step by step how you can install XAMPP on your computer and how localhost can create a WordPress website.
What is XAMPP?
XAMPP is a free open-source server solution software and supports Windows Mac and Linux. XAMPP is developed by Apache Friends (Bitnami). This software is mainly supported by programming tools and languages such as Apache HTTP Server, MariaDB database, phpMyAdmin, PHP, and Perl.
Installing XAMPP on Your Computer
Step – 1. Download XAMPP
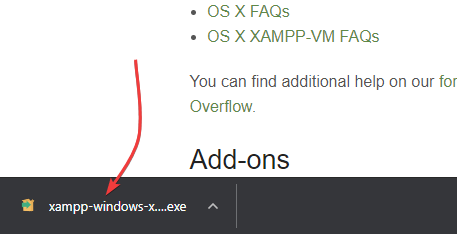
First of all, you download xampp from your official website on your computer, then download the WordPress add-on from the same website.
Step – 2. Install XAMPP
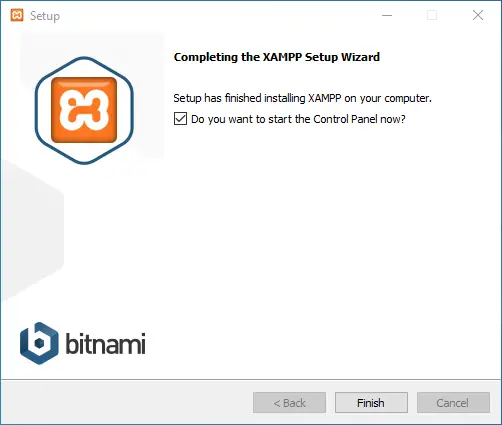
Once the Xampp software is downloaded, install it. While installing, you must have given instructions in the setup, and according to the same instructions and according to your requirement, you have to keep clicking on the Next button. You can install add-on modules when the installation is complete. Watch the complete video tutorial.
Creating a local WordPress Site with XAMPP
Step – 1. Download WordPress Add-on
You can download the add-on to install WordPress on the Xampp server, allowing you to install WordPress into your Xampp server with one click.
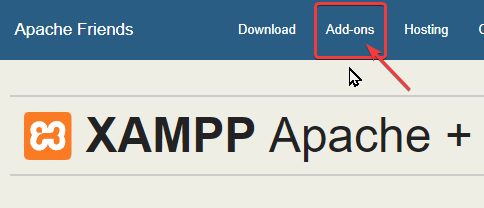
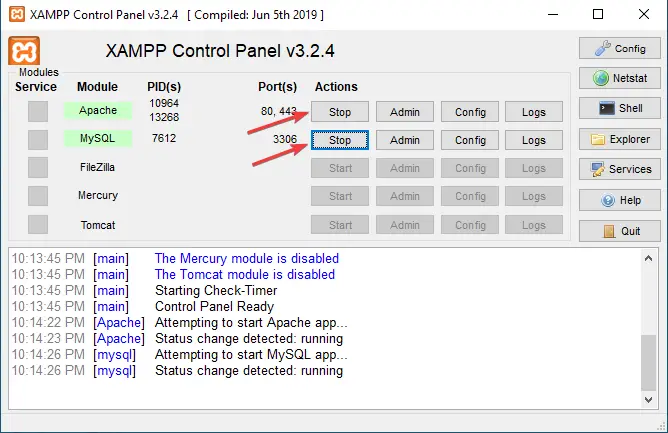
Step – 2. Start Apache & MySQL from Control Panel
Before installing WordPress, you must start the database and Apache server from the control panel of the Xampp server.
Step – 3. Install WordPress Add-on
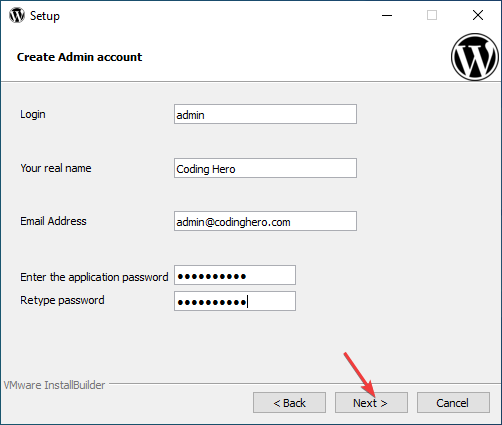
Once the WordPress add-on is downloaded, you will need to install it. During setup, you have to enter your WordPress admin’s credentials to log in using the same credentials when you want to log in to the dashboard.
Step – 4. Open & log in to the Local Website
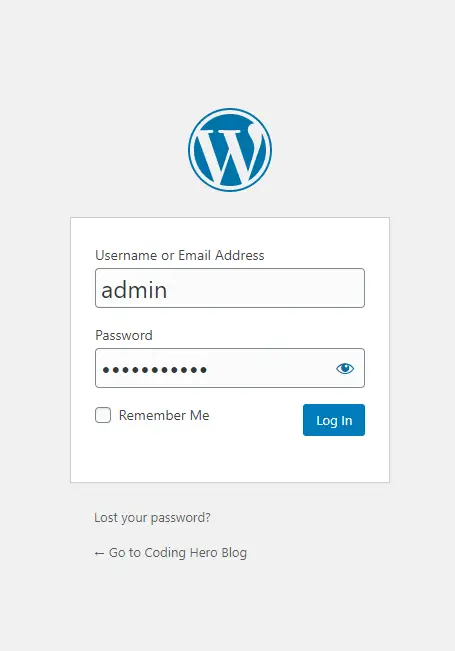
If you install the WordPress add-on on the xampp server, there is no need to configure the database. All you have to do is type localhost/wordpress/wp-login.php on your browser, which will take you directly to the login page of WordPress.
Other Modules (Add-ons) of XAMPP
- Joomla
- Drupal
- Bigcommerce
- MediaWiki
- Magento, etc
The Benefit of using XAMPP
One of the main advantages of using the Xampp solution stack is supporting all platforms (Windows, Mac, and Linux). Apart from this, you get lots of premade add-ons, and you can also use your application.
No.2
WAMP
With the WAMP server, you can create PHP-based websites like WordPress on your Windows operating system computer and laptop. This article will tell you how to install the WAMP server on your Windows-based pc and how to configure WordPress in it.
What is WAMP Server?
WAMP servers are a solution stack created by Romain Bourdon, the Microsoft Windows platform software only. The software consists of Apache Server, MariaDB and MySQL databases, phpMyAdmin, and PHP.
Installing WAMP Server on Your Computer
Step – 1. Download the WAMP Server from the Official Site
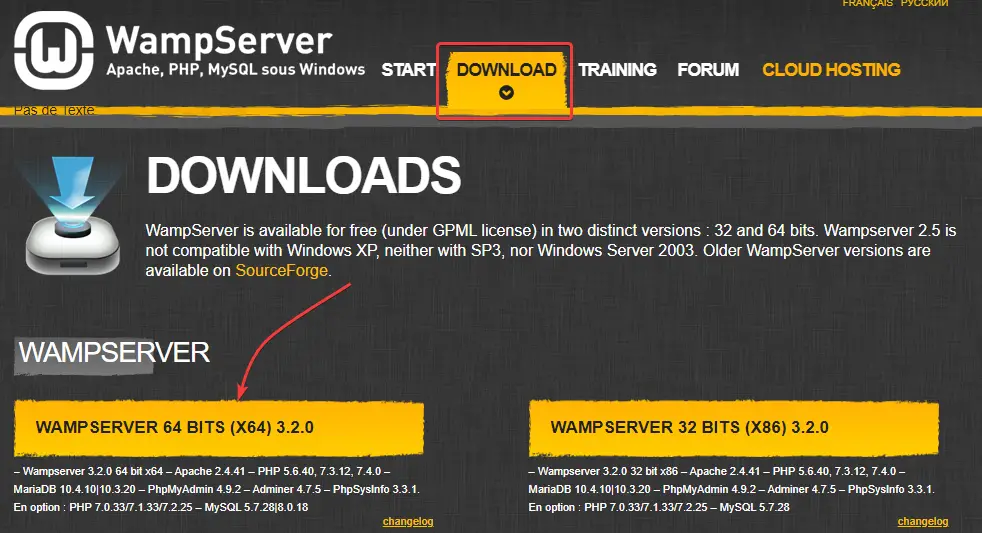
Download the WAMP server from the official website. This software is only for the Windows platform.
Step – 2. Run Setup
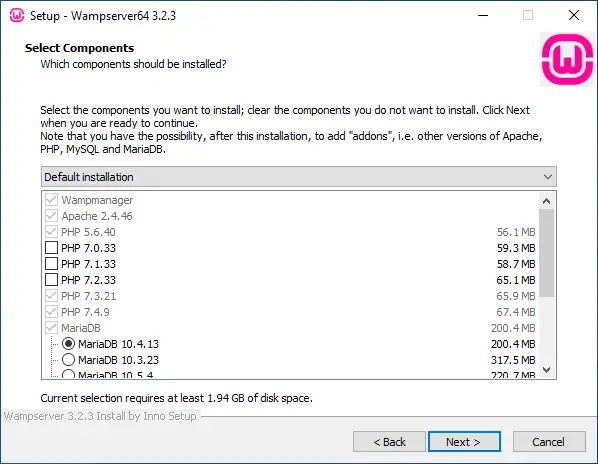
Once the WAMP server software is downloaded, run the setup; keep in mind that according to your computer’s operating system’s architecture, download the WAMP server, and then install it. If your computer is x64 bit, then download the same setup.
Step – 3. Start Server & Database
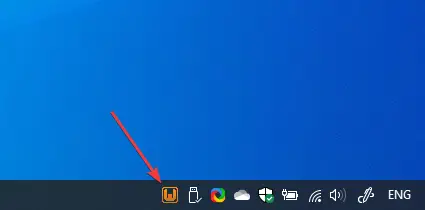
After the WAMP server installation is complete, you must start the database and the server. For this, you can see the tray icon of the wamp server in your computer’s taskbar, and you have to click it. Watch the complete tutorial video.
Create a Local WordPress Website With WAMP
Step – 1. Create Database
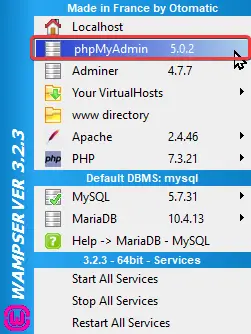
To install WordPress on a WAMP server, you must first create a database, for which you have to click on the icon of the WAMP in the taskbar, then a popup show in which you have to click on phpMyAdmin.
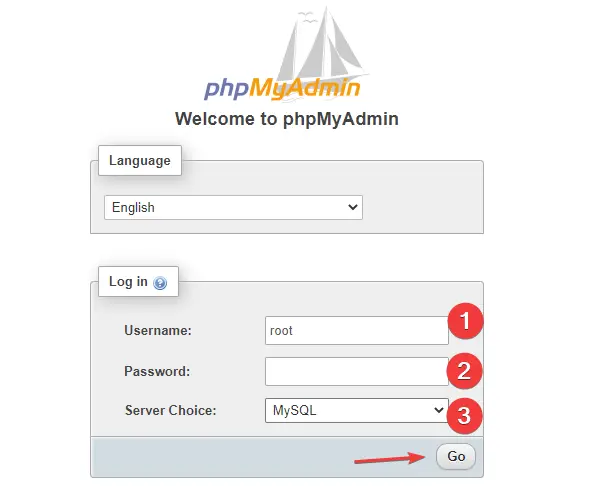
When you click on phpMyAdmin, the login page of phpMyAdmin will open on your browser, you have to type the ‘root’ and leave the password blank, and in the server choice, you have to select MySQL.
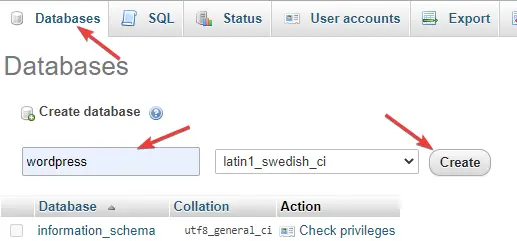
After logging into phpMyAdmin, you have to click on the database, and then you will see an input where you have to name the new database and click on the ‘Create‘ button.
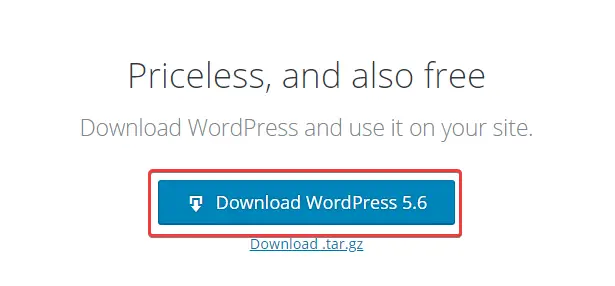
Step – 2. Download Latest WP Source Files
After creating a new database, you have to download the source file of WordPress to install WordPress locally.
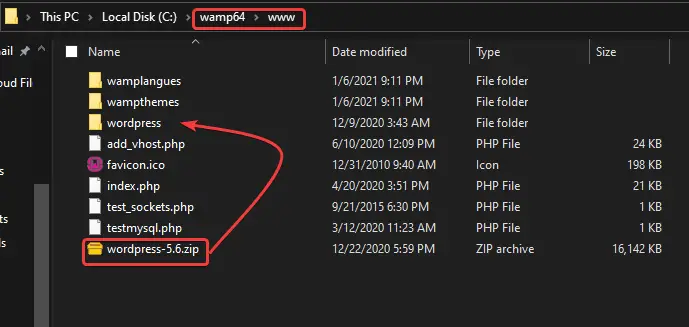
Step – 3. Move or Copy the source file into the WAMP server
Extract the WordPress source file’s zip by pasting it into the www folder of the WAMP server.
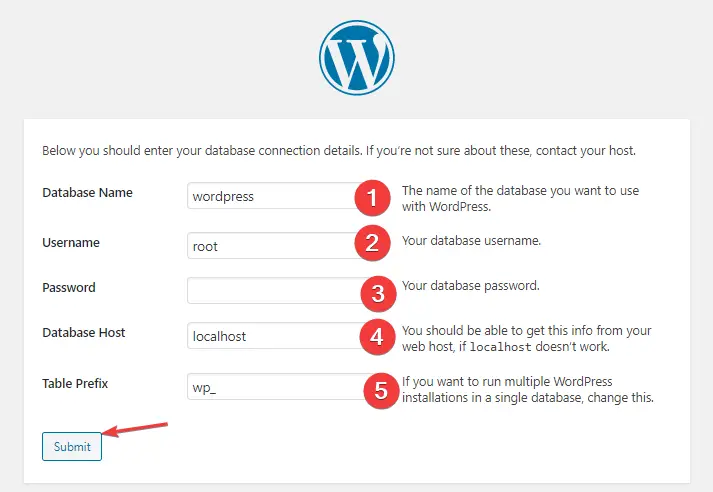
Step – 4. WP Database Configuration
When you open the URL localhost/wordpress on your browser, first, you have to select the language of WordPress. After that, you have to configure the database. As we created a new database after installing the WAMP server, you have to enter the name with which you created it and keep the password blank.
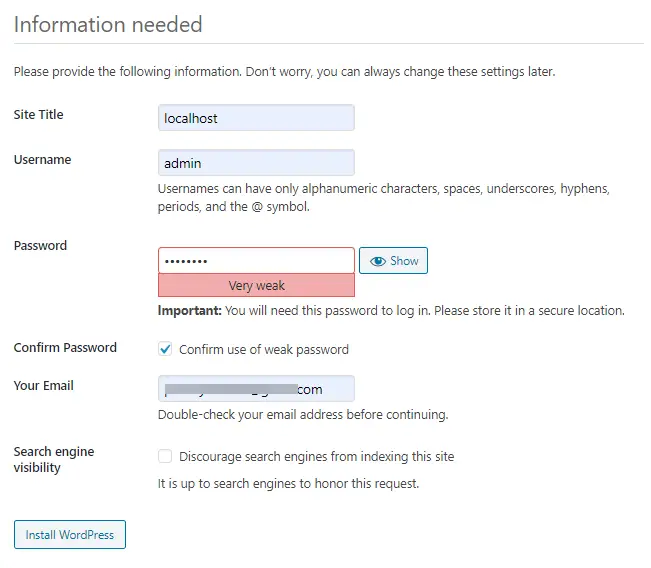
Step – 5. WP Site Information
After the database is configured, you will need to enter your site title, username and password to log in to the site, and your email. After setting this all up, you will be ready for the local offline WordPress website.
The Benefits of Using WAMP
Wamp servers are a perfect solution stack to create web application projects on your local computer. This software works only on Microsoft Windows, and it is prevalent for creating WordPress websites. Building projects on this application is straightforward and convenient.
No.3
MAMP
MAMP Server is a software through which you can easily create offline WordPress websites on your computer based on Windows and Mac. All you have to do is download the MAMP software and upload the WordPress source file. In detail, I will tell you how to build a WordPress website on localhost step by step in this article.
What is the MAMP Server?
MAMP is a solution stack consisting of programming tools and languages such as Apache, Ngnix, MySQL, MariaDB, PHP, phpMyAdmin, etc. Through this, you can develop a dynamic website or web application.
Install MAMP Server On Your Computer
Step – 1. Download MAMP Server
To install the MAMP server stack on your computer, you must visit the official site mamp.info and download the MAMP stack. MAMP server stacks are available only for Microsoft Windows and Mac operating systems.
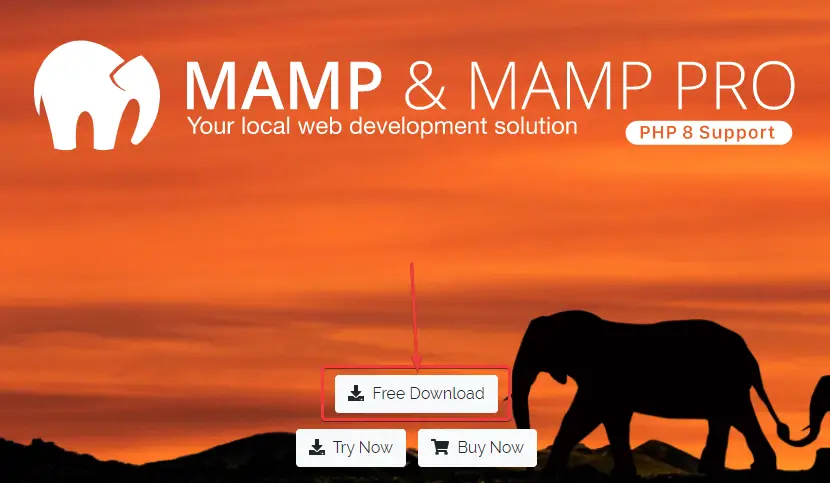
Step – 2. Install MAMP Server
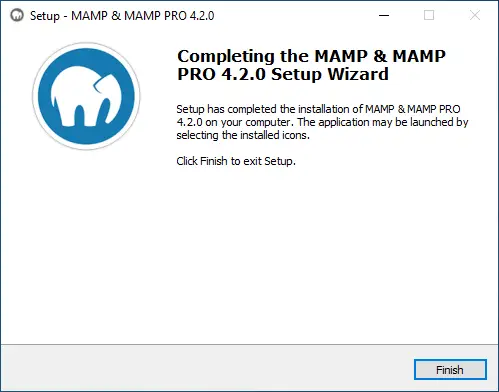
After downloading the setup file of the MAMP server, you will have to run the setup file. You will have to click on the Next button as instructed until the installation is complete. You can watch the video tutorial below. Watch the complete video tutorial.
Create a Local WordPress Website With MAMP
Step – 1. Start MAMP Services
To create a WordPress website, you have to click on the desktop icon of the MAMP server and run the application, then start the database and the server.
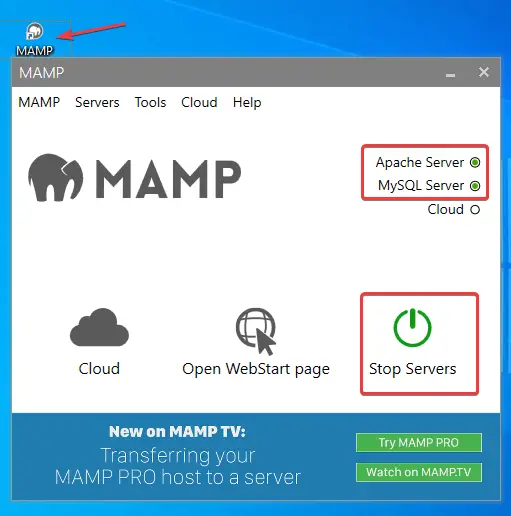
Step – 2. Open phpMyAdmin on MAMP Server
To create a database on the MAMP server, you have to visit the URL localhost/MAMP from your browser. This will open the documentation page of MAMP and give you a link to phpMyAdmin there, and you have to click there.
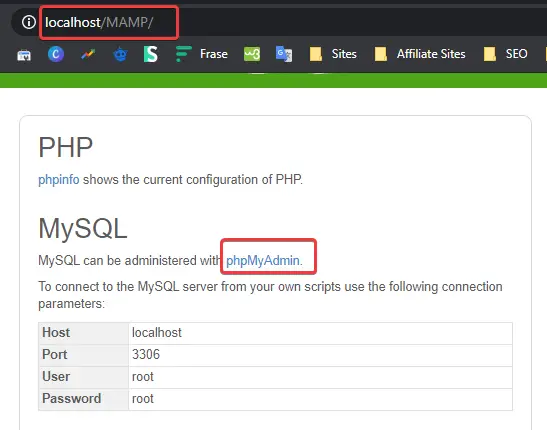
Step – 3. Create a Database on MAMP Server
After phpMyAdmin is open, you have to click on the database, and you will be given a box for the name of the new database, and you have to enter the name of the database and click on the Create button. And your new database will be ready easily.

Note:- Keep in mind that the database's username and password are on the MAMP server is 'root.'
Step – 4. Download WP Source Files
To create a WordPress website on the MAMP server, you need to download the source file, and then you can download the zip file from the official website.

Step – 5. Extract WP Source Files on MAMP Server Directory
After the WordPress zip file is downloaded, you have to find the htdocs directory of the MAMP server. In the Windows operating system, you will find it in c drive, and there you have to move and extract the zip file of WordPress.
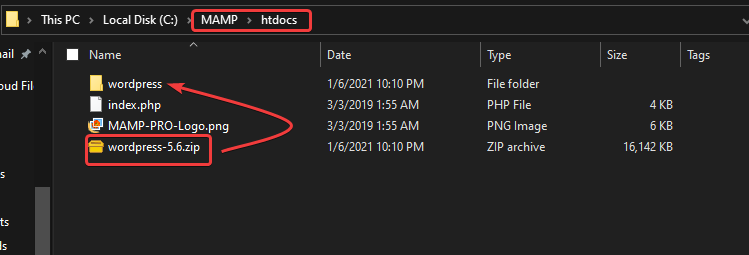
Step – 6. Configure WordPress Website Database on MAMP
After extracting the zip file of WordPress on the MAMP server, when you visit the URL localhost/wordpress on your browser, you are given the option to choose the language. After selecting the language, you must configure your database credentials, as shown in the picture below.
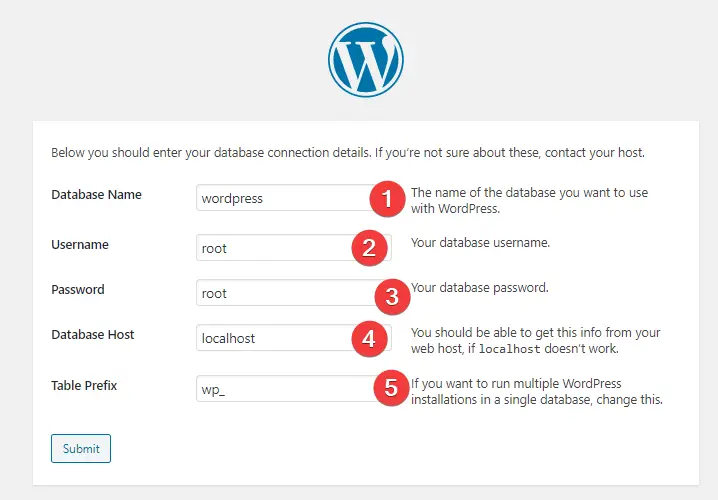
Step – 7. Finishing WordPress Setup With Site Information
After database configuration, you will need to add your local sites’ information, such as site name, admin username, password, and email address. After this setup, your WordPress website will be ready on localhost, which you can use offline.

The Benefits Of Using MAMP Server
MAMP servers are almost the same as WAMP and XAMPP servers, but this MAMP server only supports Windows and Mac operating systems. You can easily create your local project on this software as well. MAMP also gives you a cloud facility, but you have to take MAMP PRO’s license first.

Is Your Website Slow?
Migrate to Hostinger and get up to 80% off on all shared hosting plans. Hostinger is one best hosting in terms of performance and affordability. Starts at $1.99/mo.
No.4
Docker
Docker is software that performs virtualization at the OS level, and you can install the apps you want on Docker. It creates a separate isolated environment for running apps and doesn’t affect your existing operating system.
On Docker, you can create WordPress containers and easily create a website on your local machine, and with this method, you can create a website by installing Docker on live VPS and cloud hosting.
What is Docker?
Docker is a cross-platform software, and it is a platform as a service (PaaS) product that uses Operating System-level virtualization to run the software in packages called containers.
These containers are isolated from each other’s bundles or libraries, and they can communicate with each other through well-defined channels.
Install Docker For Desktop On Your Computer
Step – 1. Download Docker From the Official Site
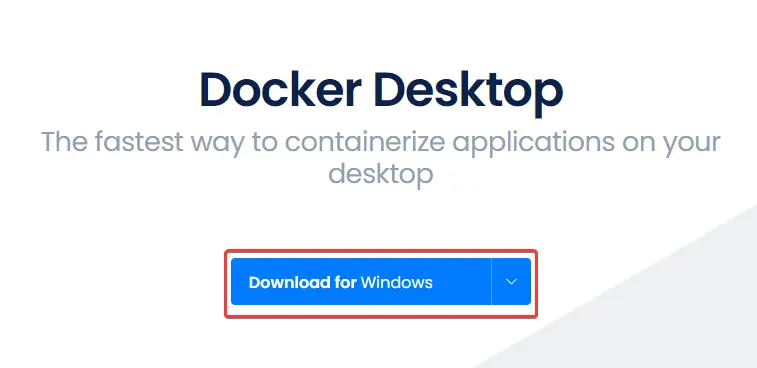
Docker is a cross-platform software, which you can download by visiting Docker’s official website. For Linux, you can also download using the terminal.
Step – 2. Enable Hyper-V (For Windows)
If you install Docker on the Windows platform, you will have to enable your computer’s virtualization. Almost all Windows laptops and desktops currently support virtualization. You can easily enable this by going to your Bios settings, and you can read ‘How To Enable Virtualization On Windows‘, a detailed article.
STEP – 3. Install Docker
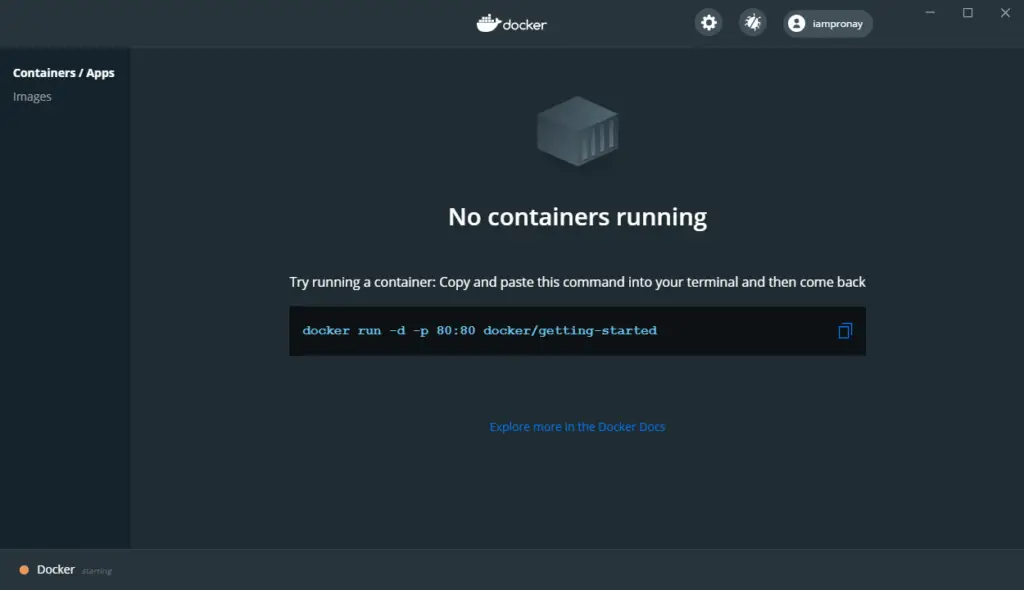
You can install Docker on any platform. For Windows and Mac, you can download and run the setup. Below you can see the complete video tutorial. Check out the complete installation video.
Create a WordPress Website With Docker
Step – 1. Pull the WordPress Container
To create a WordPress website on Docker, you will need to download the WordPress container via the command line. Use the following command to download the WordPress container.
docker pull wordpressStep – 2. Make a Directory For WordPress
To install WordPress on Docker, you need to create a directory. On Windows, you can create directly through the file manager, and if you want, you can also do it through the new terminal app. Through the following command given below.
mkdir ~/wordpress/cd ~/wordpress/Note:- You can use same command on Mac and Linux
Step – 3. Check the Version Of Docker Compose
Before creating a WordPress website, the first thing you need to check in your Docker is that you can use the below command to check whether Docker compose is installed or not. You can read this article to install Docker compose.
docker-compose --versionStep – 3. Create docker-compose.yml
In the new directory, you have to create a Docker Compose file. On the Windows platform, you can create a docker-compose.yml file directly through the file manager, and you can use the terminal if you are using Linux and Mac.
You have to add the following code lines in the Docker Compose file by opening the text editor.
version: '3.3'
services:
   db:
     image: mysql:latest
     volumes:
       - db_data:/var/lib/mysql
     restart: always
     environment:
       MYSQL_ROOT_PASSWORD: somewordpress
       MYSQL_DATABASE: wordpress
       MYSQL_USER: wordpress
       MYSQL_PASSWORD: wordpress
   wordpress:
     depends_on:
       - db
     image: wordpress:latest
     ports:
       - "8000:80"
     restart: always
     environment:
       WORDPRESS_DB_HOST: db:3306
       WORDPRESS_DB_USER: wordpress
       WORDPRESS_DB_PASSWORD: wordpress
       WORDPRESS_DB_NAME: wordpress
volumes:
    db_data: {}
Step – 4. Execute Command For Creating WordPress Website.
docker-compose.yml up -dStep – 4. Check the Site on Your Browser
Open your browser to the URL localhost:8000, which will open your WordPress website. You have to add the information about your website, in which you will have to enter the username, password, website name, etc.
For login, you can go to the login page by adding /wp-login.php to the URL slug.
The Benefits of Using Docker
Docker is software used for virtualization. Just like VirtualBox and VMWare, you can launch multiple operating systems in an isolated environment. In the same way, Docker also creates an isolated environment where you can make thousands of application containers.
Creating a WordPress website on Docker is very easy. You have to create just one file docker-compose.yml and put the command in the command line, which will make your WordPress website ready.
No.5
Local by Flywheel
Local by Flywheel is a cross-platform software that runs a WordPress application on a local computer. It consists of software, server (Ngnix), database (MariaDB and MySQL), and the programming language PHP, and includes WordPress applications.
Install Local On Your Computer
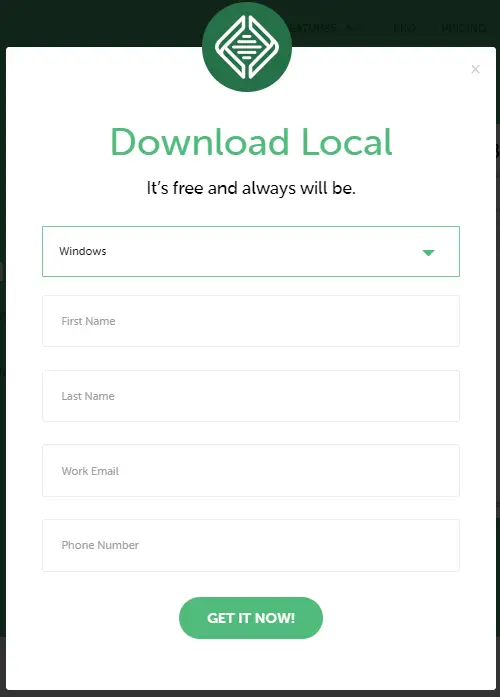
Step – 1. Download Local
Step – 2. Install Local
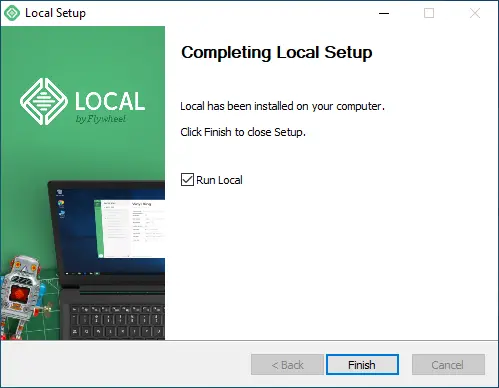
You can install local by flywheel on any platform. Below you can watch the complete video tutorial.
Create a WordPress Site With Local by Flywheel
Step – 1. Run Local & Create A New Site
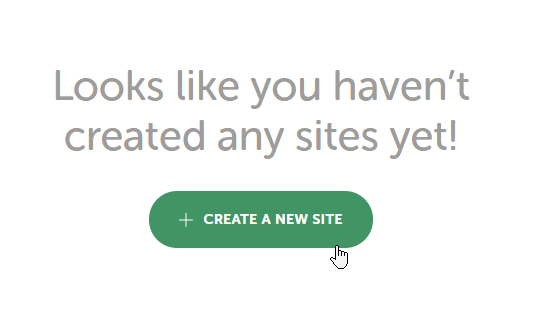
After the Local application is installed, you will have to run the application. After doing this, you will see a button to create a new site screen. You have to click on the button.
Step – 2. Give Local WordPress Website Name
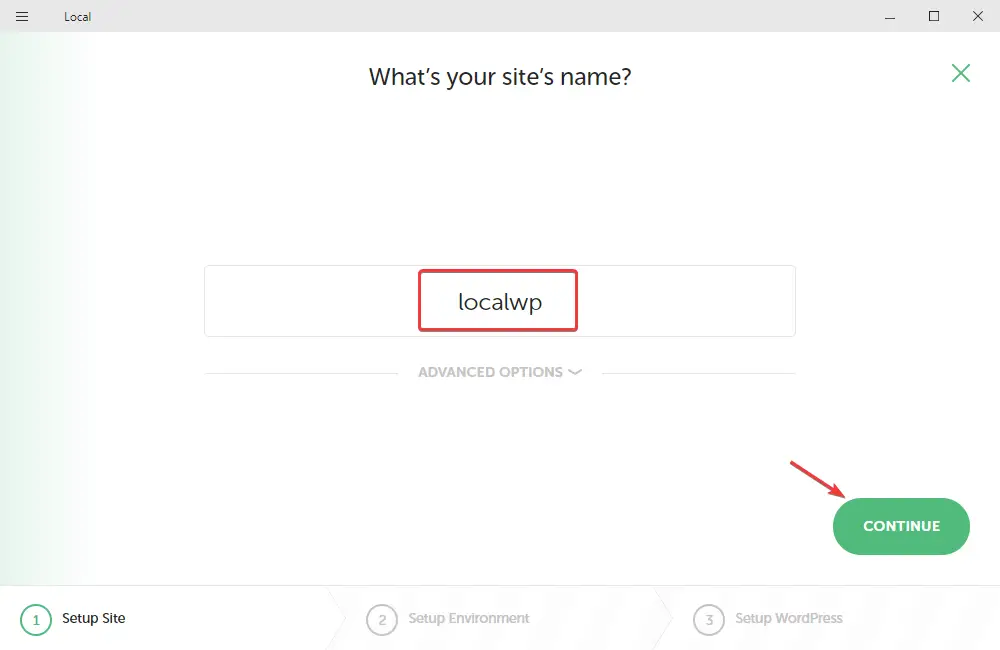
When you want to create a new WordPress website with the Local, you first need to give your website’s name.
Step – 3. Setup Local Environment
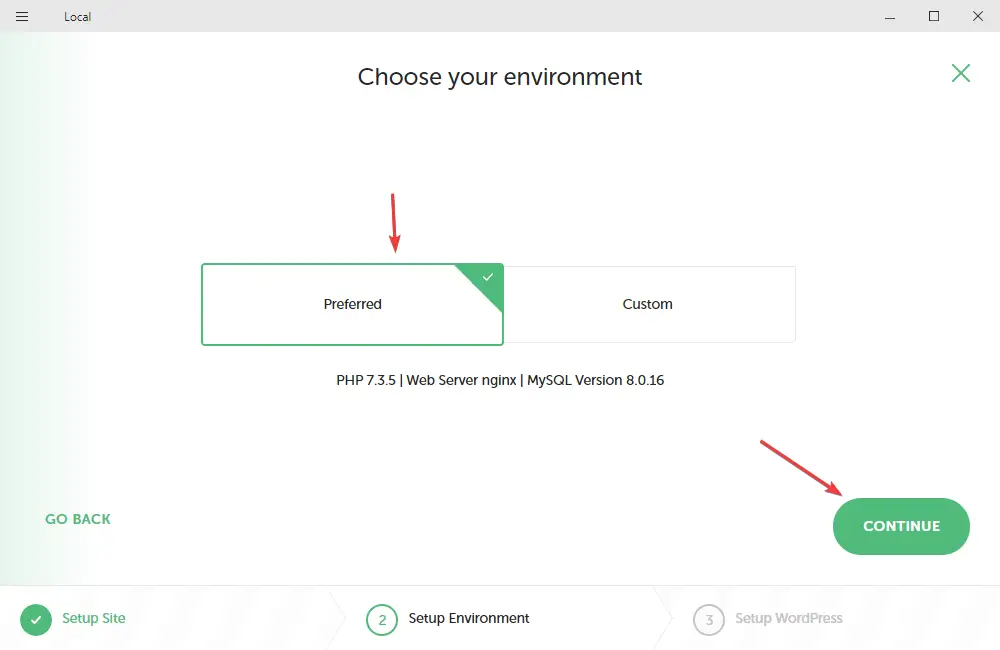
On the local by flywheel application, you will have the option to choose two environments. You can select the preferred choice as per the picture. If you need a different database, PHP version, and server, you can choose the custom option.
Step – 5. Setup Local WordPress Site Credentials
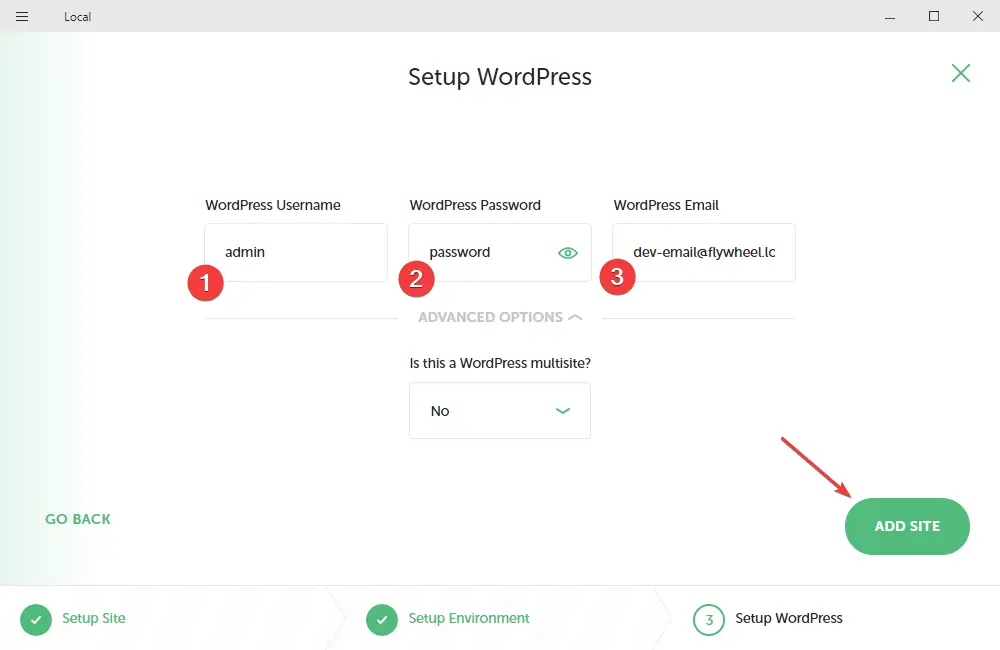
According to the picture below, you have to input the admin username and password of your local WordPress website. If you want to create a multisite, you can enable it by going to the advanced option.
Step – 6. Login to Local WordPress Dashboard
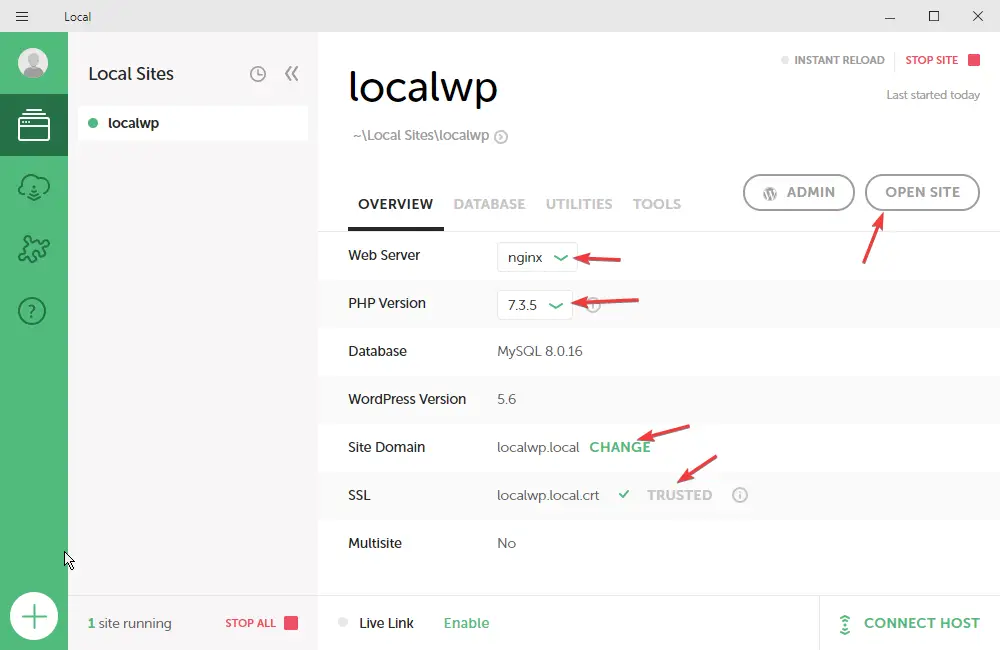
When the new WordPress website on Local by flywheel is ready, you can log in directly from the local app’s dashboard to the WordPress dashboard.
The Benefits of Using Local
Local by flywheel is the only software that I found very convenient for creating a WordPress website on localhost. Through this, you can create multiple websites, not just a WordPress website, and you can check the preview of each website on a cross-device through the Internet.
No.6
Bitnami WordPress Application
What is Bitnami WordPress?
Bitnami WordPress is an open-source application stack consisting of WordPress, MySQL or MariaDB, PHP, PHPMYADMIN, and Apache servers. This application supports cross-platform.
Create a Website With Bitnami WordPress
Step – 1. Download Software
You have to go to the official website of Bitnami, and you will have to click on the application. On the top, you will see the WordPress application; select it.
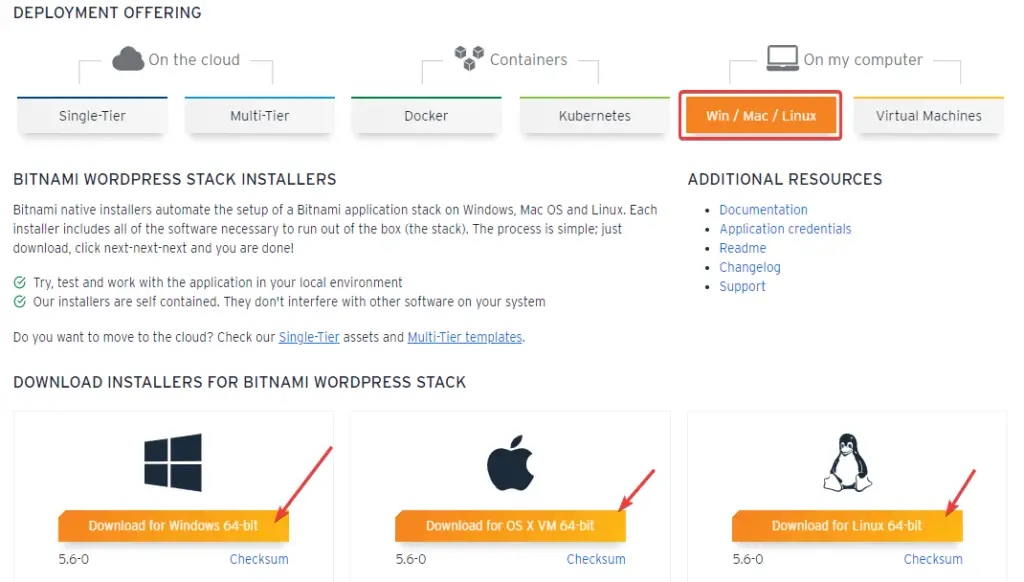
After selecting, you will be redirected to the Download and Documentation page. You have to click on WIN / MAC / Linux in the section ‘on my computer.’ On clicking, you will see the download link and click on it. Otherwise, you can download it directly from the below link
Step – 2. Run Bitnami WordPress Setup
After the Bitnami WordPress application is downloaded, run the setup, and select the WordPress website’s components.
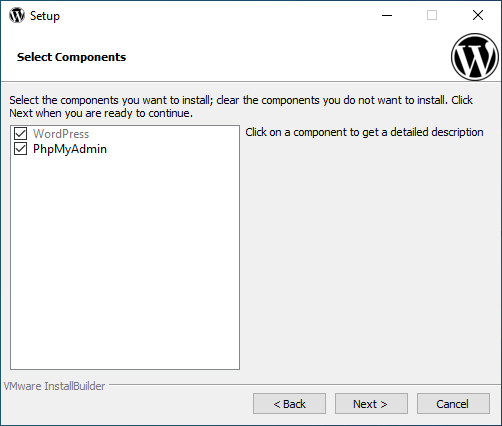
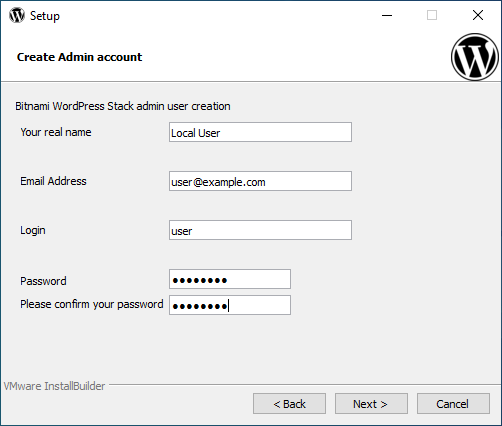
Step – 3. Add WordPress User Credentials
In the Bitnami WordPress setup, you will need to add information to your local website. You can see the picture.
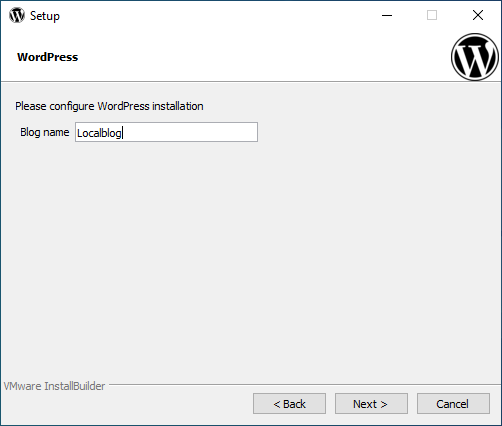
Step – 4. Give Name WordPress Website Site
Watch the complete video tutorial of Bitnami WordPress.
The Benefits of Using Bitnami WordPress
The unique thing about Bitnami WordPress is that it supports all platforms. Even in major cloud platforms are available as ready-to-install applications, you do not need to configure much.
FAQs
How do I install WordPress offline?
To install WordPress offline on your computer, you will need to download one of the solution stack software such as XAMPP, WAMP, and MAMP. When you install someone, then you can easily create a local website by copying the source file of WordPress in your local directory.
How do I manually install WordPress?
If you want to install WordPress on a live server manually, you have to take three steps: the first one: – creating a database, and the second step – downloading the source file of WordPress and uploading it to the htdocs directory. The third step – set the credentials of the database to wp-config.php. After this, when you browse your domain or IP address, you will go directly to the configuration page of WordPress, which means your site installation is completed.
Can I install WordPress on my computer?
There are many ways to install WordPress on your computer, and it is relatively easy. You can use solution stack software such as XAMPP, WAMP, MAMP, Docker, and LocalWP to create a localhost website.
How to Create a Local WordPress Site Using XAMPP?
Download the XAMPP stack and the WordPress module (Add-on) from the official website of XAMPP. Now install Xampp on your computer, followed by the WordPress module. To check, type localhost/wordpress/ on your browser. If the configuration page of WordPress opens, then your setup is complete.
How To Create WordPress Website Offline Using Local by Flywheel?
Download LocalWP’s software from LocalWP by Flywheel’s official and then install it. After the installation is complete, open the software and click on the plus sign shown on the left side, now you will have to input some credentials like username and password. After entering credentials, it will take some time to create the offline website.
How To Set Up A Local Development Environment For WordPress?
For WordPress local development, you can install any solution stack on your computer based on Windows, Mac, and Linux. After that, you have to create a database and upload the source file of WordPress.
Can we develop a website offline and then upload it to a server?
Yes, You can migrate your local website to a live server. Even you can do staging, so you do not have to migrate a whole website each time.
What’s the best way to set up a WordPress site offline on your desktop?
If you have a Windows computer, WAMP servers are great software for creating offline WordPress websites, and if you have Mac, then MAMP is useful software. Apart from all this, XAMPP is helpful for WordPress development on Windows, Mac, and Linux.
How do I move my WordPress site from offline to online?
First, you have to back up your local website through the All-in-One WP Migration plugin. After that, install a new WordPress website on your live server and upload the backed-up data to the live server using the All-in-One WP Migration plugin. After uploading, you will see the option of restore, you have to click on the restore button, and your local website will be updated on the live server.
How can I host my WordPress website for free?
Some cloud hosting providers give you free hosting for a year, like AWS, Alibaba Cloud, and Azure, but you will have to verify your credit card for this. If you want completely free hosting, you can read this article about seven such hosting providers.
Why Do You Need To Create a WordPress site Locally?
By creating a WordPress site on localhost, you get a lot of benefits. Beginners get to learn, and professionals can experiment and then implement the results on their live websites. Some people install WordPress locally for staging.
What is a WordPress staging site, and why is it important?
The staging sites are a replica of your existing live website, available on your computer or the local machine (Only you have access to the site). When you make changes on your staging site, it does not affect the live website, but if you want to make changes on the live website, then you can do it directly from the staging site.
How to Create a WordPress theme Offline?
Conclusion
For those who have never used the WordPress platform yet and want to start a new blog website then you should try installing WordPress on your computer. Beginners can learn a lot of details from a WordPress website created on their local host.
Many expert bloggers also install WordPress on their local computers and connect it to their live websites. Which is mainly called staging.
You can create a WordPress website offline on your computer from any of the above methods. If you have any problems, you can comment in the comment box.