The latest stable version of PHP 8.2 was released on December 8th, 2022, it comes with numerous improvements and new features. However, in this article, we are just going to explain how you can upgrade PHP 8.2 from the older versions. Check out the official PHP site for features & improvements.
PHP has been one of the most popular scripting languages for web development since its first release of PHP in 1998 and still is. It is open source and widely used in web projects, for example, WordPress is the most popular CMS that uses PHP scripting language in the backend, similarly, other CMSs like Drupal, Magento, and Ghost also use PHP. Facebook is one of the most popular social media sites which uses PHP language.
In this article, you will learn how to upgrade to the latest PHP 8.2 from the previous version PHP 8.1, 7.4, or PHP 7.0.
Are you thinking, we should upgrade to the latest PHP 8.2? why not stay with the current version? First, you must always use the latest stable software packages in your project, so it will have the least security concerns. If you are using WordPress or any other CMS, then use its recommended version.
So, let’s get started with the installation/upgrade processes.
Table of Contents
Manually Upgrade PHP using CLI
If you have VPS, Dedicated or Cloud Server, and have full control of it, or in simple language, you have access as a ROOT user, then using the command line you can upgrade to the latest PHP 8.2 from older PHP versions.
You must know which Linux distro you are using as a server. Nowadays most dedicated VPS server provides Ubuntu or Debian-based server. So please check your system and use the following command accordingly.
Step#1
Update System
Use the following command to update the system and after that, we will add the latest PHP repository to install the latest PHP.
Debian/Ubuntu:
sudo apt update -yStep#2
Add PHP Repository/Dependency
Ubuntu:
sudo add-apt-repository ppa:ondrej/phpsudo apt update -yDebian:
Debian 11 (Bullseye) does not come with the wget package retrieving tool, hence using the following command we need to install it.
sudo apt install wgetNow we need to add a keyring file in “trusted.gpg.d” directory which is required to add the latest PHP repository in Debian systems.
cd /etc/apt/trusted.gpg.dsudo wget https://packages.sury.org/php/apt.gpgAfter adding apt.gpg keyring file, you check it using ls -l command, and after that, we need to add the PHP source list in Debian Linux.
echo "deb https://packages.sury.org/php/ bullseye main" | sudo tee /etc/apt/sources.list.d/php.listNote:- Above in the command, the highlighted part, where mentioned bullsye, that mean Debian 11, in case if you are using older version of system, like Debain 10, 9, or 8, you have to replace it Buster, Stretch, or Jessie respectivily.

After adding the source list you can use sudo cat /etc/apt/sources.list.d/php.list to view the added source list (as shown in the image above). Now update the system using the following command.
sudo apt update -yStep#3
Install the Latest PHP 8.2 on the Debian/Ubuntu System
If you followed the steps mentioned above, then you successfully added the latest PHP repository on your Linux system. Now use the following commands to install the latest PHP on your Debian or Ubuntu system.
To add the repository, you have to execute different commands for each system, but to install PHP 8.2, just use the mentioned commands (It will work for both, Debian & Ubuntu).
sudo apt install php8.2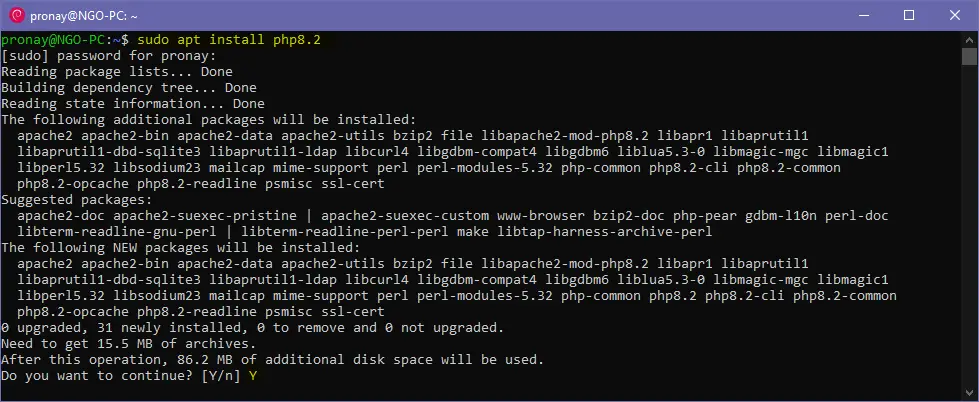
When you execute the installing command, it will show details & including PHP modules, and the system will ask you to, Do you want to continue? Type Y and press enter on the keyboard to proceed.
It will take a few seconds to complete the installations (on VPS), after completion, you can check, whether it is installed or not, using the following command.
php -v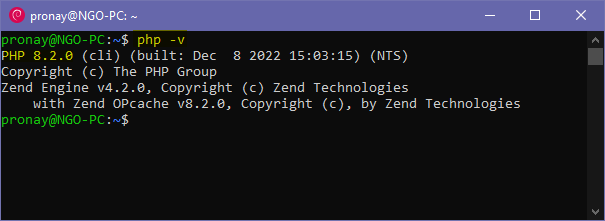
As you can see in the image above using the PHP version command you can see the installed version of PHP in Debian and Ubuntu-based Linux distro.
Install Latest PHP 8.2.x Modules/Extensions
PHP Modules are very important for doing work with PHP, and different kinds of work will be handled by different PHP modules. Some modules already come pre-packaged with PHP, & for others, you have to install them by commands.
In WordPress, you will need various PHP modules like php-mysql to work with MySQL databases, PHP-Imagick will handle image compressions & editing, etc.
Installing the latest version of PHP 8.2 modules or extensions uses the following commands:
sudo apt install php8.2-{imagick,bz2,curl,intl,mysql,readline,xml,fpm,mbstring,zip,bcmath,redis,imap,gd}Use the following command in your respective operating system, this command will work with both Debian & Ubuntu-based Linux systems. This one command is comprised of multiple extensions, so you don’t need to install every extension one by one.
Must Read: Install OpenLiteSpeed Web Server on CentOS/AlmaLinux/RHEL
Switch on Latest PHP 8.2 on the Apache Web server
If your Linux system has the Apache HTTP server and an older version of PHP, then to upgrade to Latest PHP, you have to disable the older version and need to enable the latest PHP 8.2.
So, use the following steps to switch latest PHP on the Apache Web server:
Step#1
Disable Old PHP
sudo a2dismod php8.1Suppose your server has installed PHP 8.1 or a lower version and you want to upgrade to the latest version, then to disable the currently installed PHP version, you must replace php8.1 with your currently installed version of PHP, like 8.0, 7.4, 7.3, or 7.2.
Step#2
Enable Latest PHP 8.2
sudo a2enmod php8.2The latest stable version of PHP is 8.2, & after disabling the older version, you must execute the following command, mentioned above to enable and run perfectly with the Apache web server.
Note:- If you are installing PHP in your newly deployed system (Fresh VPS), then you don't need to switch between the PHP versions. You can direcly install the latest PHP 8.2 & it will work with the Apache webs server.
Step#3
Check Web Server Syntax Error
sudo apache2ctl -t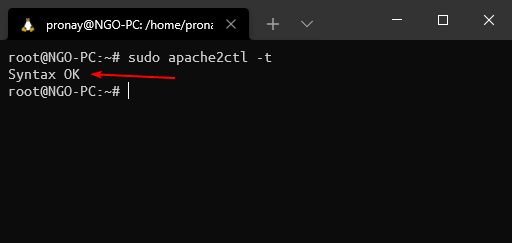
Use the following command to check, whether everything is okay or not. The syntax error check command will show any error if Apache is not correctly configured with PHP.
Step#4
Restart the Apache HTTP Server
sudo systemctl restart apache2.serviceor
sudo service apache2 restartUsing one of the commands you can restart the Apache HTTP server, & to complete the switching process, you must restart the HTTP server using the command mentioned above.
Must Read: Install phpMyAdmin for OpenLiteSpeed web server
Switch on the Latest PHP 8.2 on the Nginx Web Server
Nginx is also a very popular and open-source web server. Nowadays, most developers choose Nginx over Apache, because of the performance & other security features. However, if you have Nginx in your system & want to upgrade to the latest PHP then follow the steps mentioned below.
Step#1
Edit Server Block/Virtual Host
We need to edit the PHP-FPM socket path in the Nginx server block, which is located in /etc/nginx/sites-available/ directory.
sudo nano /etc/nginx/sites-available/defaultNote:- If the system is configured with custom "Server Block" instead of the default one, you must edit the custom one.
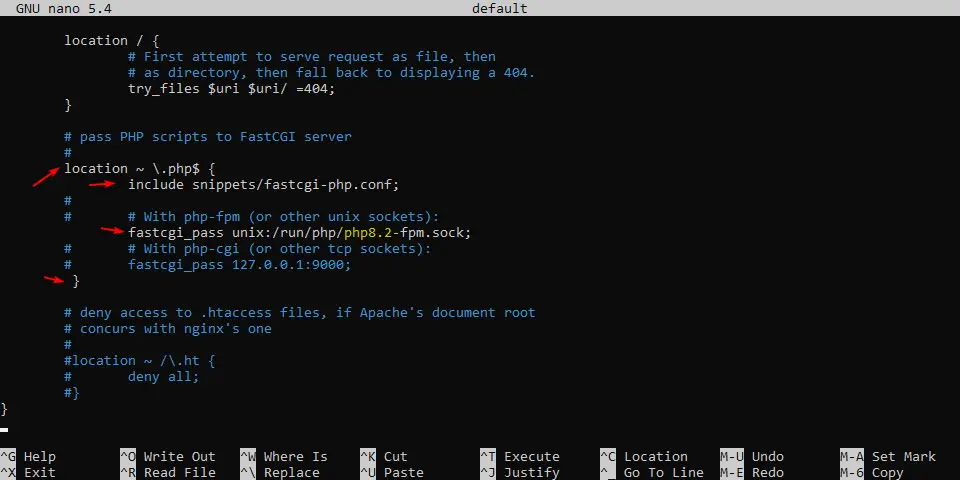
When you edit the Nginx server block, you have to scroll down & you will find the FastCGI server location, in the Nginx Server block, where you have to remove the pound (#) sign from the following lines as shown in the image above. And also don’t forget to replace PHP 8.2 with the default PHP socket.
Now to save the modification, type the following keyboard key combination, CTRL+X then type Y and hit the Enter key.
Step#2
Check Web Server Syntax Error
sudo nginx -t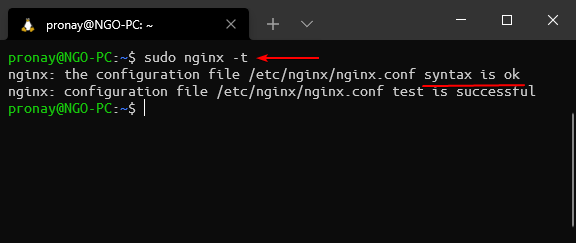
Step#3
Restart the Nginx Web Server
sudo systemctl restart nginxor
sudo service nginx restartRestart the Nginx web server to make effective the PHP 8.2 switch from the older version.
Also Read: How to Install WordPress on OpenLiteSpeed Web Server
Getting 502 Bad Gateway Error After Configuring Nginx with the Latest PHP 8.2
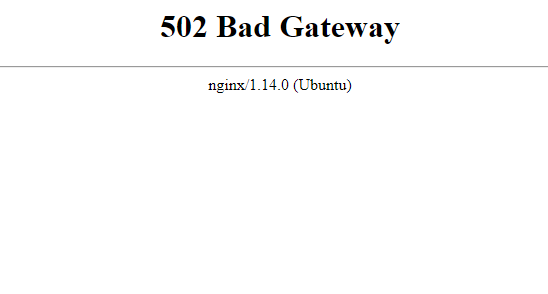
After editing the Nginx server block to switch to the latest PHP 8.2, the server gets a 502 Bad Gateway error, which means your server does not have installed the latest php8.2-fpm extension. So using the following command you can install php8.2-fpm for the Nginx web server.
Install Latest PHP-FPM
sudo apt install php8.2-fpmStart PHP-FPM Service
sudo service php8.2-fpm startProbably using this method you can switch between different PHP versions and if you get a possible error, also can fix them easily.
Summary
PHP is a very popular scripting language, and it is used in the backend of the server. In this article, you have learned how to install the latest PHP 8.2 on popular Linux systems like Ubuntu and Debian. If your system has already an installed PHP version, you can upgrade it very easily using the following methods, which we have explained in this article.
If you are having issues during upgrading or installing the latest PHP on your system or have any suggestions for it, please let us know. The comment box is always open.
After updating php 8.1 to php 8.2 i’m getting this error
Internal Server Error
The server encountered an internal error and was unable to complete your request.
Please contact the server administrator if this error reappears multiple times, please include the technical details below in your report.
More details can be found in the server log.